Linux环境下Node.js的安装配置
2021-07-12 17:07
标签:代码 body alt 系统 ext auto home 技术分享 enter
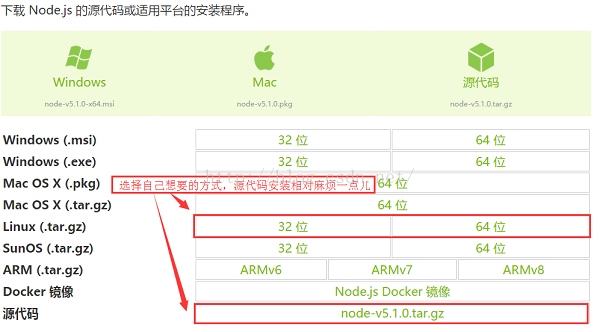
1. 官网下载Node.js

2. 安装Node.js
根据下载内容的不同,提供三种安装方法,选择自己喜欢的方式
2.1. 绿色免安装版(Linux(.tar.gz))
-
解压Node-XXX.tar.gz
tar zxvf Node-XXX.tar.gz

-
进入Node-XXX/bin目录,可以看到node 和 npm都存在
cd Node-XXX/bin
-
查看node版本,执行命令看到版本号就说明你下载的内容妥妥的了
./node –v
-
将node命令修改为全局(相当于windows的设置Path环境变量)
ln -s /home/XXX/Node-XXX/bin/node /usr/local/bin/node
ln -s /home/XXX/Node-XXX/bin/npm /usr/local/bin/npm
至此到任意目录执行node –v都是可用的了,哦了~
2.2. 源代码
-
解压Node-XXX.tar.gz
tar zxvf Node-XXX.tar.gz
-
进入解压后的根目录 执行
./configure
make
make install
-
查看node版本,执行命令看到版本号就说明你安装的内容妥妥的了
./node –v
2.3. apt-get硬安装
-
只需要两条命令
sudo apt-get install nodejs
sudo apt-get install npm
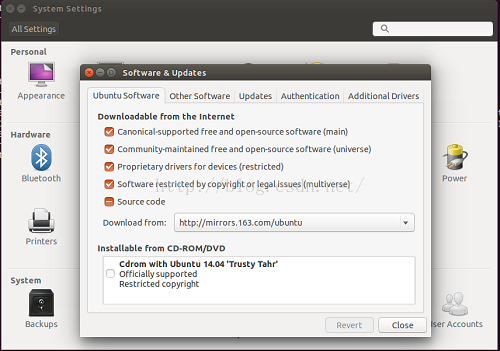
有些人不喜欢这个方式,觉得很慢,可以尝试设置下国内的软件源地址,还是很快滴~

3. 安装Electron
安装好Node.js后,最好安装Electron这种图形用户界面来辅助提高开发效率,使用如下命令:一定要sudo不然会安装失败,--registry选项提供淘宝服务器下载地址,不然可能会下载缓慢甚至失败>
-
安装
sudo npm install electron-prebuilt -g--registry=https://registry.npm.taobao.org
-
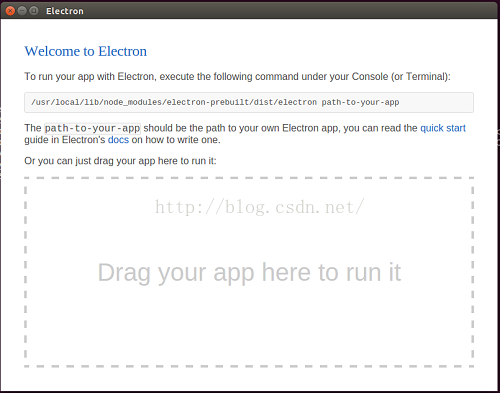
测试,输入electron看到下面的图形界面表示安装成功
electron

4. 安装asar(打包工具)
从Electron的运行界面可以看出,我们可以直接把node.js项目拖到其中运行,这里就需要一个将Node.js项目打包的工具——asar
-
安装
sudo npm install -g asar --registry=https://registry.npm.taobao.org
安装成功后会显示如下图内容

-
测试 (注意这里是大写的V)
asar -V
5. 第一个Node.js程序
-
创建一个项目目录,创建项目文件
mkdir testNodejs
cd testNodejs
-
创建项目文件
vi package.json
- {
- "name" : "TestNodejs",
- "version" : "0.1.0",
- "main" : "main.js"
- }
vi main.js
- const electron = require(‘electron‘);
- const app = electron.app; // Module to control application life.
- const BrowserWindow =electron.BrowserWindow; // Module tocreate native browser window.
- // Report crashes to our server.
- electron.crashReporter.start();
- // Keep a global reference of the windowobject, if you don‘t, the window will
- // be closed automatically when theJavaScript object is garbage collected.
- var mainWindow = null;
- // Quit when all windows are closed.
- app.on(‘window-all-closed‘, function() {
- //On OS X it is common for applications and their menu bar
- //to stay active until the user quits explicitly with Cmd + Q
- if(process.platform != ‘darwin‘) {
- app.quit();
- }
- });
- // This method will be called when Electronhas finished
- // initialization and is ready to createbrowser windows.
- app.on(‘ready‘, function() {
- //Create the browser window.
- mainWindow = new BrowserWindow({width: 800, height: 600});
- //and load the index.html of the app.
- mainWindow.loadURL(‘file://‘ + __dirname + ‘/index.html‘);
- //Open the DevTools.
- mainWindow.webContents.openDevTools();
- //Emitted when the window is closed.
- mainWindow.on(‘closed‘, function() {
- // Dereference the window object, usually you would store windows
- // in an array if your app supports multi windows, this is the time
- // when you should delete the corresponding element.
- mainWindow = null;
- });
- });
vi index.html
- html>
- html>
- head>
- meta charset="UTF-8">
- title>Hello World!title>
- head>
- body>
- h1>Hello World!h1>
- We are using nodescript>document.write(process.versions.node)script>,
- Chromescript>document.write(process.versions.chrome)script>,
- and Electronscript>document.write(process.versions.electron)script>.
- body>
- html>
-
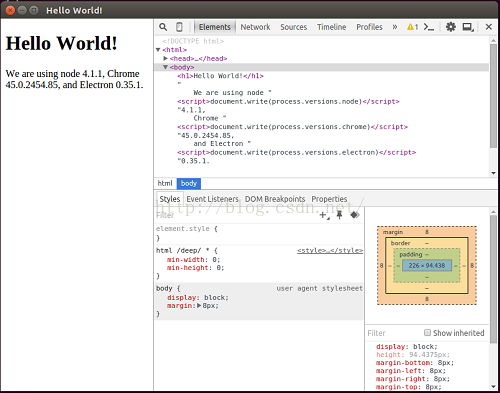
测试运行(在testNodejs根目录下执行命令)
electron .

-
打包项目
cd ..
asar pack testNodejs testNodejs.asar
-
测试运行打包内容,在文件系统界面将testNodejs.asar拖到Electron界面的”Drag your app here to run it”来运行
ENJOY Node.js !!!
Linux环境下Node.js的安装配置
标签:代码 body alt 系统 ext auto home 技术分享 enter
原文地址:http://www.cnblogs.com/chris-oil/p/7081055.html