AntD框架的upload组件上传图片时使用customRequest方法自定义上传行为
2021-02-07 09:18
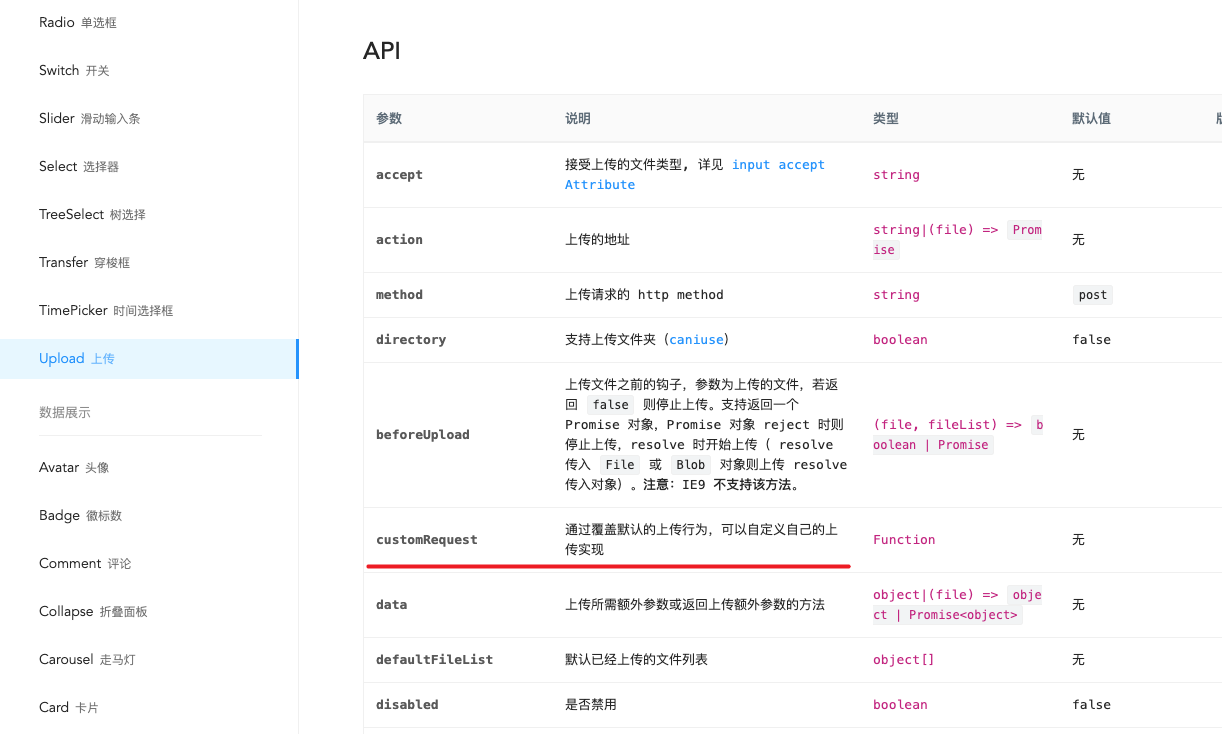
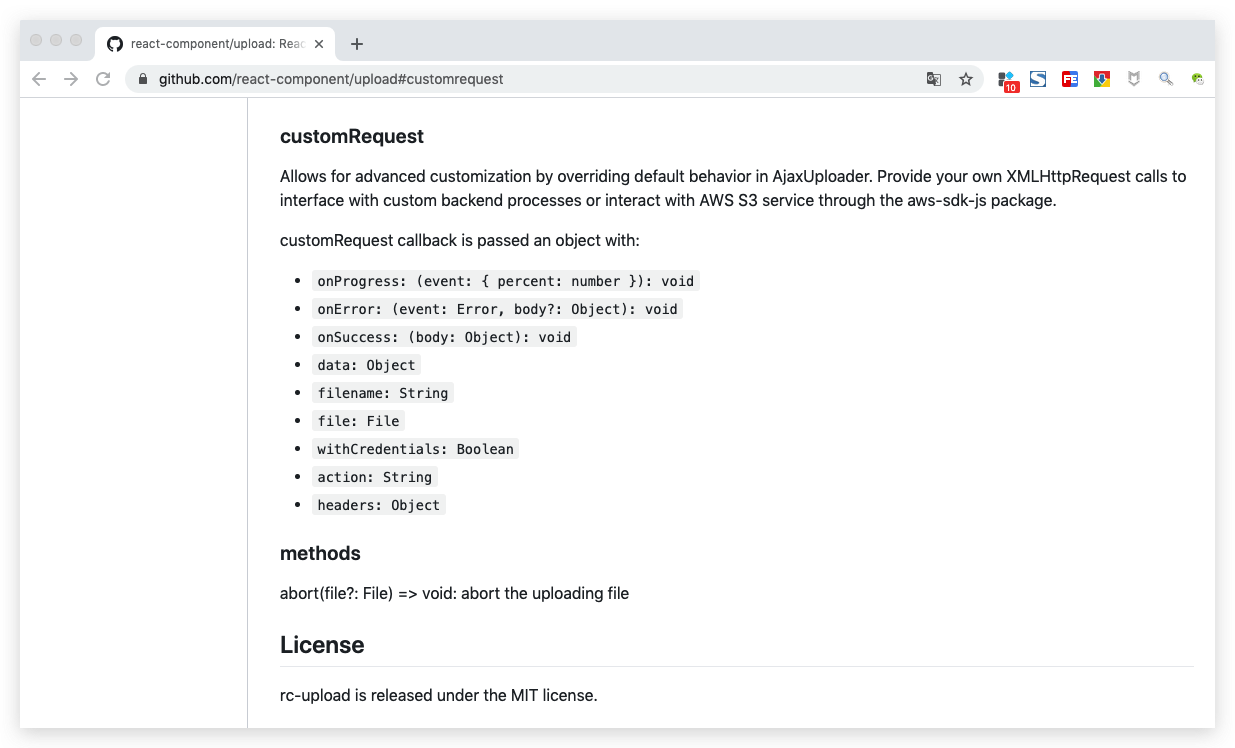
标签:decorator 字符 match before dal component tle ogre rom 本次做后台管理系统,采用的是 AntD 框架。涉及到图片的上传,用的是AntD的 upload 组件。 我在上一篇文章《前端AntD框架的upload组件上传图片时遇到的一些坑》中讲到:AntD 的 upload 组件有很多坑,引起了很多人的关注。折腾过的人,自然明白其中的苦楚。 今天这篇文章,我们继续来研究 AntD 的 upload 组件的另一个坑。 备注:本文写于2020-06-11,使用的 antd 版本是 3.13.6。 因为需要上传多张图片,所以采用的是照片墙的形式。上传成功后的界面如下: (1)上传中: (2)上传成功: (3)图片预览: 首先,你需要让后台同学提供好图片上传的接口。上一篇文章中,我们是把接口调用直接写在了 好在 AntD 的 upload 组件给我们提供了 关于customRequest 这个方法, AntD 官方并没有给出示例,他们只是在 GitHub 上给出了这样一个简短的介绍: 但这个方法怎么用呢?用的时候,会遇到什么问题呢?AntD 官方没有说。我在网上搜了半天,也没看到比较完整的、切实可行的 Demo。我天朝地大物博,网络资料浩如烟海,AntD 可是口口声声被人们号称是天朝最好用的管理后台的样式框架。可如今,却面临这样的局面。我看着你们,满怀羡慕。 既然如此,那我就自己研究吧。折腾了一天,总算是把 customRequest 的坑踩得差不多了。 啥也不说了,直接上代码。 采用 AntD框架的 upload 组件的 customRequest 方法,自定义上传行为。核心代码如下: 注意file的格式:https://www.lmonkey.com/t/oREQA5XE1 Demo在线演示: https://stackoverflow.com/questions/58128062/using-customrequest-in-ant-design-file-upload https://stackblitz.com/edit/so-58128062-upload-progress fileList 格式在线演示: https://stackoverflow.com/questions/51514757/action-function-is-required-with-antd-upload-control-but-i-dont-need-it https://codesandbox.io/s/rl7ooo544q ant design Upload组件的使用总结:https://www.jianshu.com/p/0aa4612af987 antd上传功能的CustomRequest:https://mlog.club/article/3832743 AntD框架的upload组件上传图片时使用customRequest方法自定义上传行为 标签:decorator 字符 match before dal component tle ogre rom 原文地址:https://www.cnblogs.com/qianguyihao/p/13093592.html使用 AntD 的 upload 组件做图片的上传,效果演示


代码实现
customRequest这个方法:

import React, { PureComponent } from ‘react‘;
import { Button, Card, Form, message, Upload, Icon, Modal, Row, Col } from ‘antd‘;
import { connect } from ‘dva‘;
import { queryMyData, submitData } from ‘../api‘;
import { uploadImage } from ‘../../utils/wq.img.upload‘;
import styles from ‘../../utils/form.less‘;
const FormItem = Form.Item;
@Form.create()
export default class PicturesWall extends PureComponent {
constructor(props) {
super(props);
const { id } = this.props.match.params;
this.state = {
id,
img: undefined, // 从接口拿到的图片字段
imgList: [], // 展示在 antd图片组件上的数据
previewVisible: false,
previewImage: ‘‘,
};
}
componentDidMount() {
const { id } = this.state;
id && this.queryData();
}
// 调接口,查询已有的数据
queryData() {
const { id } = this.state;
queryMyData({
id,
})
.then(({ ret, data }) => {
if (ret == 0 && data && data.list && data.list.length) {
const item = data.list[0];
const img = data.img;
const imgList = item.img
? [
{
uid: ‘1‘, // 注意,这个uid一定不能少,否则展示失败
name: ‘hehe.png‘,
status: ‘done‘,
url: img,
},
]
: [];
this.setState({
img,
imgList,
});
} else {
return Promise.reject();
}
})
.catch(() => {
message.error(‘查询出错,请重试‘);
});
}
handleCancel = () => this.setState({ previewVisible: false });
// 方法:图片预览
handlePreview = (file) => {
console.log(‘smyhvae handlePreview:‘ + JSON.stringify(file));
this.setState({
previewImage: file.url || file.thumbUrl,
previewVisible: true,
});
};
// 参考链接:https://www.jianshu.com/p/f356f050b3c9
handleBeforeUpload = (file) => {
console.log(‘smyhvae handleBeforeUpload file:‘ + JSON.stringify(file));
console.log(‘smyhvae handleBeforeUpload file.file:‘ + JSON.stringify(file.file));
console.log(‘smyhvae handleBeforeUpload file type:‘ + JSON.stringify(file.type));
//限制图片 格式、size、分辨率
const isJPG = file.type === ‘image/jpeg‘;
const isJPEG = file.type === ‘image/jpeg‘;
const isGIF = file.type === ‘image/gif‘;
const isPNG = file.type === ‘image/png‘;
const isLt2M = file.size / 1024 / 1024 {
let src = e.target.result;
const image = new Image();
image.onload = function () {
// 获取图片的宽高
file.width = this.width;
file.height = this.height;
resolve();
};
image.onerror = reject;
image.src = src;
};
filereader.readAsDataURL(file);
});
}
// 图片上传
doImgUpload = (options) => {
const { onSuccess, onError, file, onProgress } = options;
// start:进度条相关
// 伪装成 handleChange里面的图片上传状态
const imgItem = {
uid: ‘1‘, // 注意,这个uid一定不能少,否则上传失败
name: ‘hehe.png‘,
status: ‘uploading‘,
url: ‘‘,
percent: 99, // 注意不要写100。100表示上传完成
};
this.setState({
imgList: [imgItem],
}); // 更新 imgList
// end:进度条相关
const reader = new FileReader();
reader.readAsDataURL(file); // 读取图片文件
reader.onload = (file) => {
const params = {
myBase64: file.target.result, // 把 本地图片的base64编码传给后台,调接口,生成图片的url
};
// 上传图片的base64编码,调接口后,返回 imageId
uploadImage(params)
.then((res) => {
console.log(‘smyhvae doImgUpload:‘ + JSON.stringify(res));
console.log(‘smyhvae 图片上传成功:‘ + res.imageUrl);
const imgItem = {
uid: ‘1‘, // 注意,这个uid一定不能少,否则上传失败
name: ‘hehe.png‘,
status: ‘done‘,
url: res.imageUrl, // url 是展示在页面上的绝对链接
imgUrl: res.imageUrl, // imgUrl 是存到 db 里的相对链接
// response: ‘{"status": "success"}‘,
};
this.setState({
imgList: [imgItem],
}); // 更新 imgList
})
.catch((e) => {
console.log(‘smyhvae 图片上传失败:‘ + JSON.stringify(e || ‘‘));
message.error(‘图片上传失败,请重试‘);
});
};
};
handleChange = ({ file, fileList }) => {
console.log(‘smyhvae handleChange file:‘ + JSON.stringify(file));
console.log(‘smyhvae handleChange fileList:‘ + JSON.stringify(fileList));
if (file.status == ‘removed‘) {
this.setState({
imgList: [],
});
}
};
submit = (e) => {
e.preventDefault();
this.props.form.validateFields((err, fieldsValue) => {
if (err) {
return;
}
const { id, imgList } = this.state;
const tempImgList = imgList.filter((item) => item.status == ‘done‘); // 筛选出 status = done 的图片
const imgArr = [];
tempImgList.forEach((item) => {
imgArr.push(item.imgUrl);
// imgArr.push(item.url);
});
submitData({
id,
img: imgArr[0] || ‘‘, // 1、暂时只传一张图片给后台。如果传多张图片,那么,upload组件需要进一步完善,比较麻烦,以后有需求再优化。2、如果图片字段是选填,那就用空字符串兜底
})
.then((res) => {
if (res.ret == 0) {
message.success(`${id ? ‘修改‘ : ‘新增‘}成功,自动跳转中...`);
} else if (res.ret == 201 || res.ret == 202 || res.ret == 203 || res.ret == 6) {
return Promise.reject(res.msg);
} else {
return Promise.reject();
}
})
.catch((e) => {
message.error(e || ‘提交失败,请重试‘);
});
});
};
render() {
const { id, imgList } = this.state;
console.log(‘smyhvae render imgList:‘ + JSON.stringify(imgList));
const { getFieldDecorator } = this.props.form;
const formItemLayout = {
labelCol: { span: 3 },
wrapperCol: { span: 10 },
};
const buttonItemLayout = {
wrapperCol: { span: 10, offset: 3 },
};
const uploadButton = (
参考链接
上一篇:基于 Go 的 Web 框架调研
下一篇:纯CSS实现放烟花效果
文章标题:AntD框架的upload组件上传图片时使用customRequest方法自定义上传行为
文章链接:http://soscw.com/essay/52123.html