php调试环境之Windows
2021-03-20 17:25
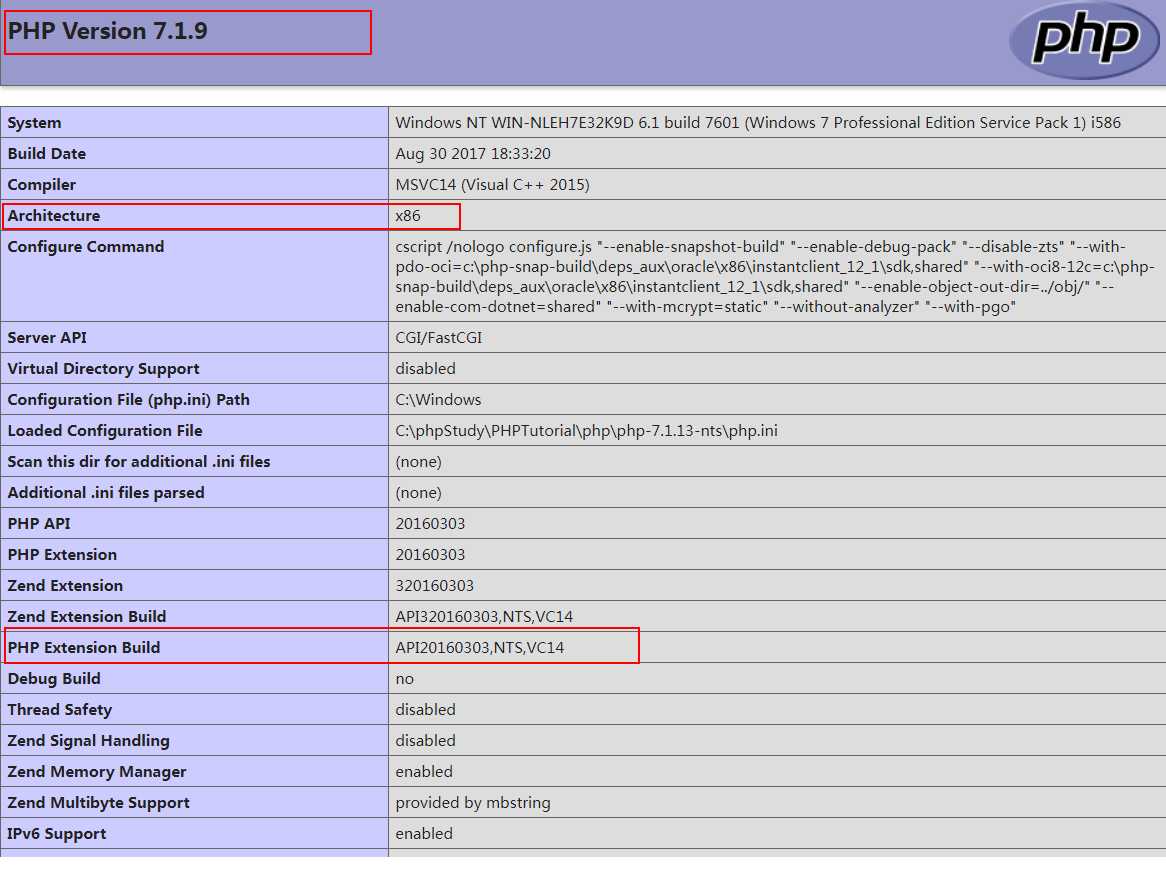
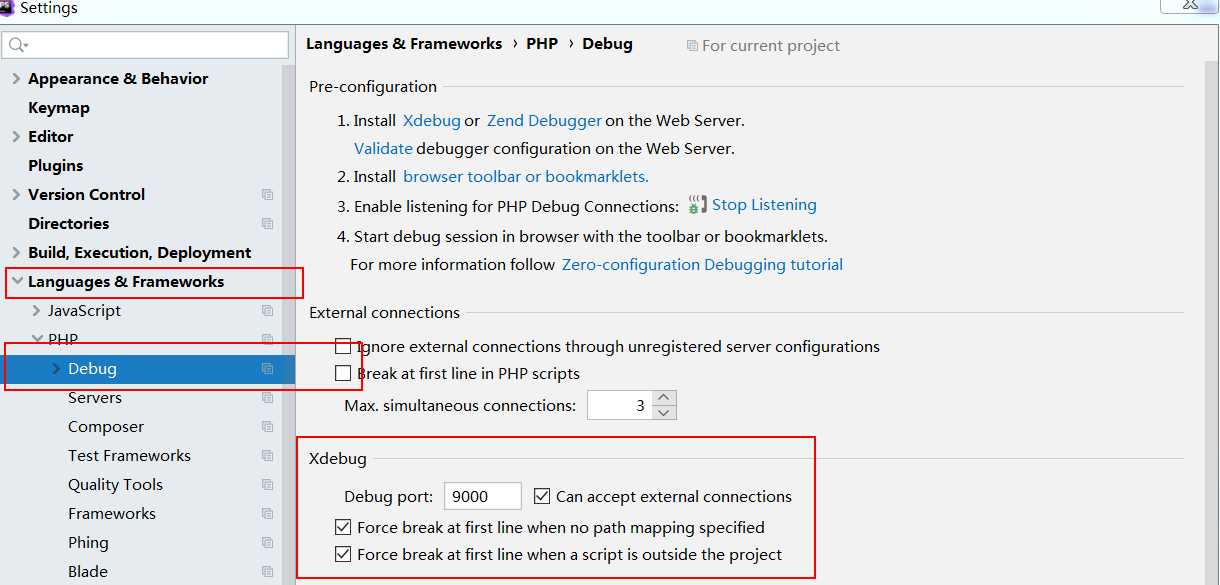
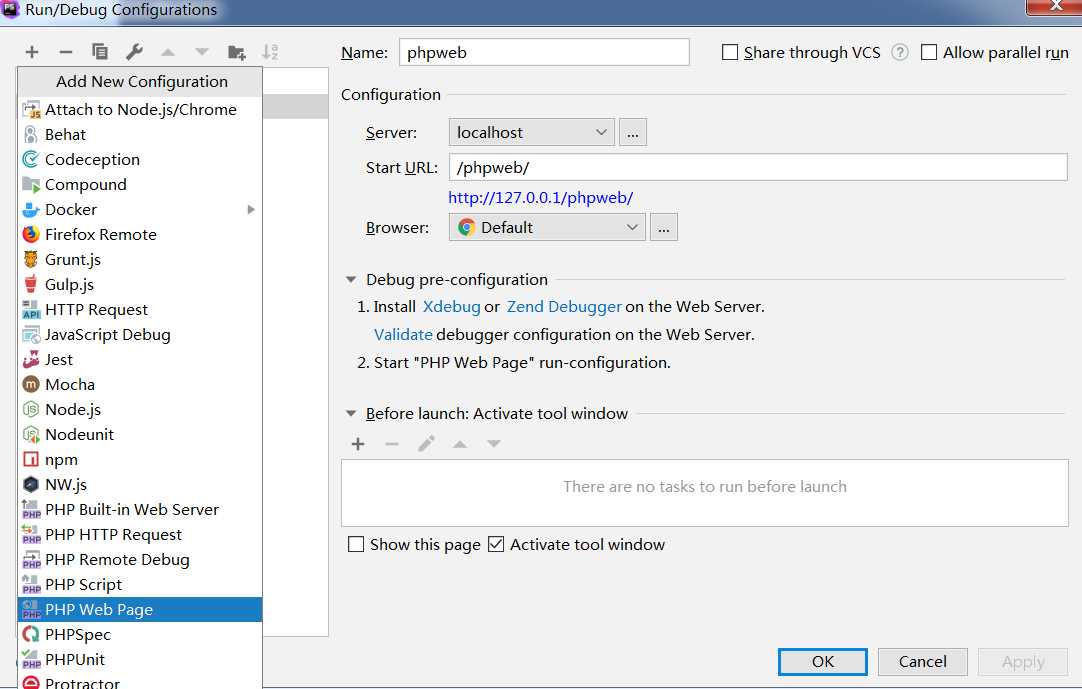
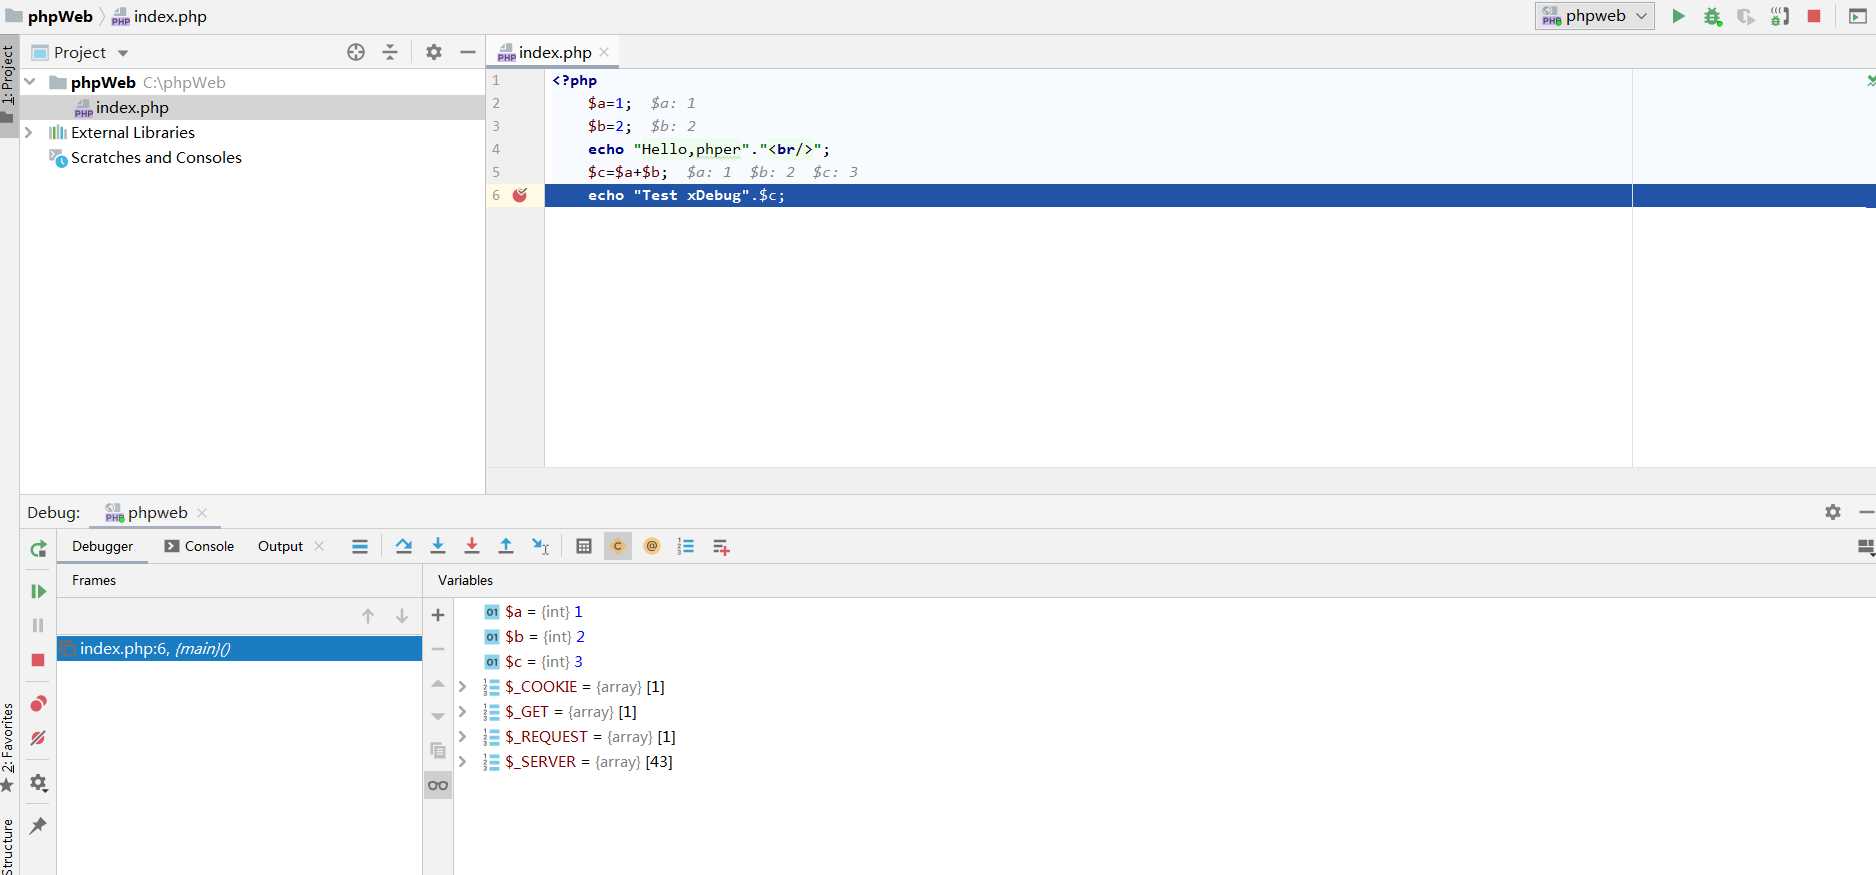
标签:rect 图片 module php str debug orm tor com 环境:Windows7+phpstudy(Apache+php7.1) phpinfo看一下php版本,架构(32还是64位),扩展是vc几和线程安全(ts)版本还是非线程安全版本(nts)。 我这里: 之后到官网下载xdebug的dll: https://xdebug.org/download ,下载好之后放入对应php版本目录的ext,这里文件名为: 打开对应php版本的php.ini,在 最后看phpinfo看xdebug信息。 phpstudy把php_xdebug.dll放入对应目录,只需要改一下php.ini即可。 这里为了方便首先在apache配置一个虚拟目录/phpweb,创建目录 在添加虚拟目录处添加: 重启apache之后,打开phpstorm的setting,找到debug按照以下修改: 调试例子: phpstorm打开c:/phpWeb目录,新建index.php文件,文件内容为: 在运行按钮旁边点击新建配置,php web page,新建服务器,这里也就是127.0.0.1:80,之后填入访问路径(+虚拟路径),配置完成。 之后下断点,点击debug即可(不行的话记得点击开始监听debug): php调试环境之Windows 标签:rect 图片 module php str debug orm tor com 原文地址:https://www.cnblogs.com/nobgr/p/12291641.htmlWindows下php调试环境
1、xdebug的安装配置

php_xdebug-2.9.2-7.1-vc14-nts.dll; Modele出粘贴一下内容(注意dll文件名)[xdebug]
zend_extension=php_xdebug-2.9.2-7.1-vc14-nts.dll
;dll文件名
xdebug.remote_enable = On
;启用性能检测分析
;xdebug.remote_handler = dbgp ;支持远程调试
xdebug.remote_host= localhost
xdebug.remote_port = 9000
;监听地址和端口
xdebug.idekey = PHPSTORM
;idekey2、phpstorm配置
c:/phpWeb/,之后修改 httpd.conf# Create Virtual catalogue

";
    $c=$a+$b;
    echo "Test xDebug".$c;
