.NET Core + Ocelot + IdentityServer4 + Consul 基础架构实现
2021-04-12 22:26
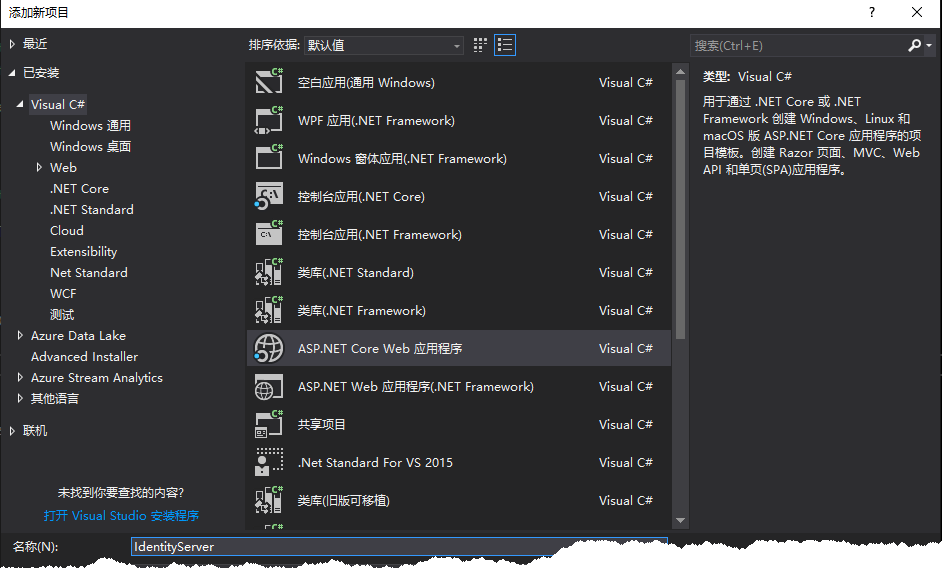
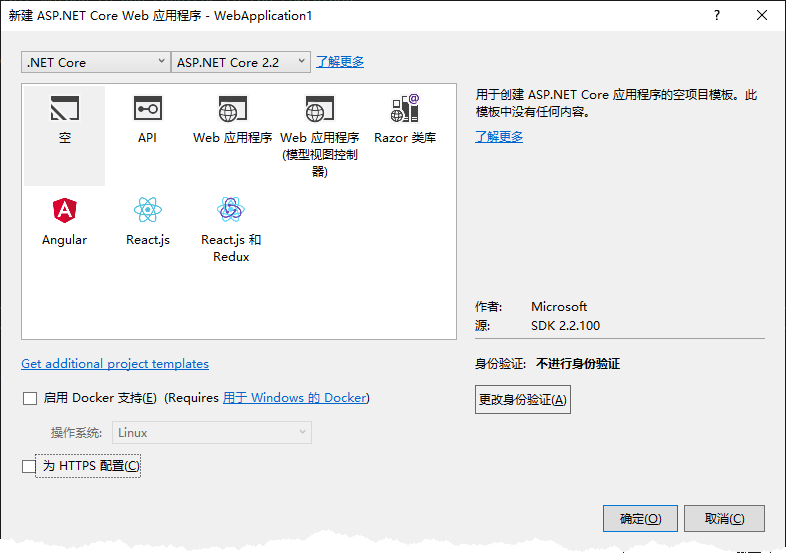
- 添加 ASP.Net Core Web 项目

- 添加空项目

- 在程序包管理控制台中输入:Install-Package IdentityServer4.AspNetIdentity
-
添加 Config.cs 文件,并添加内容如下:
using System.Collections.Generic; using IdentityServer4.Models; using IdentityServer4.Test; namespace IdentityServer { public sealed class Config { public static IEnumerable GetApiResources() { return new List { new ApiResource("ServiceA", "ServiceA API"), new ApiResource("ServiceB", "ServiceB API") }; } public static IEnumerableGetClients() { return new List { new Client { ClientId = "ServiceAClient", AllowedGrantTypes = GrantTypes.ResourceOwnerPassword, ClientSecrets = { new Secret("ServiceAClient".Sha256()) }, AllowedScopes = new Liststring> {"ServiceA"}, AccessTokenLifetime = 60 * 60 * 1 }, new Client { ClientId = "ServiceBClient", AllowedGrantTypes = GrantTypes.ResourceOwnerPassword, ClientSecrets = { new Secret("ServiceBClient".Sha256()) }, AllowedScopes = new Liststring> {"ServiceB"}, AccessTokenLifetime = 60 * 60 * 1 } }; } public static List GetUsers() { return new List { new TestUser { Username = "test", Password = "123456", SubjectId = "1" } }; } public static IEnumerable GetIdentityResources() { return new List (); } } } 注意:这里添加了两个 Client ,分别为 ServiceA、ServiceB ,因此接下来将构建这两个服务。
-
删掉StartUp.cs文件,在Program.cs中添加内容如下:
using Microsoft.AspNetCore; using Microsoft.AspNetCore.Builder; using Microsoft.AspNetCore.Hosting; using Microsoft.AspNetCore.Mvc; using Microsoft.Extensions.DependencyInjection; namespace IdentityServer { public class Program { public static void Main(string[] args) { CreateWebHostBuilder(args).Build().Run(); } public static IWebHostBuilder CreateWebHostBuilder(string[] args) { return WebHost.CreateDefaultBuilder(args).ConfigureServices(services => { services.AddMvc().SetCompatibilityVersion(CompatibilityVersion.Version_2_2); services.AddIdentityServer() .AddDeveloperSigningCredential() .AddInMemoryIdentityResources(Config.GetIdentityResources()) .AddInMemoryApiResources(Config.GetApiResources()) .AddInMemoryClients(Config.GetClients()) .AddTestUsers(Config.GetUsers()); }).Configure(app => { app.UseIdentityServer(); }); } } }注意:AddDeveloperSigningCredential() 方法用于添加开发时使用的 Key material ,生产环境中不要使用该方法。在 .NET Core 2.2 中新建的 Web 项目文件 csproj 中包含了如下内容:
csharpnetcoreapp2.2 InProcess
这里更改csharp InProcess
为或直接删除该行,这么做的原因是当值为 InProcess 时,读写 tempkey.rsa 将产生权限问题。关于 AspNetCoreHostingModel 可参考 ASP.NET Core Module 。csharp OutOfProcess -
F5 启动该服务,显示如下:

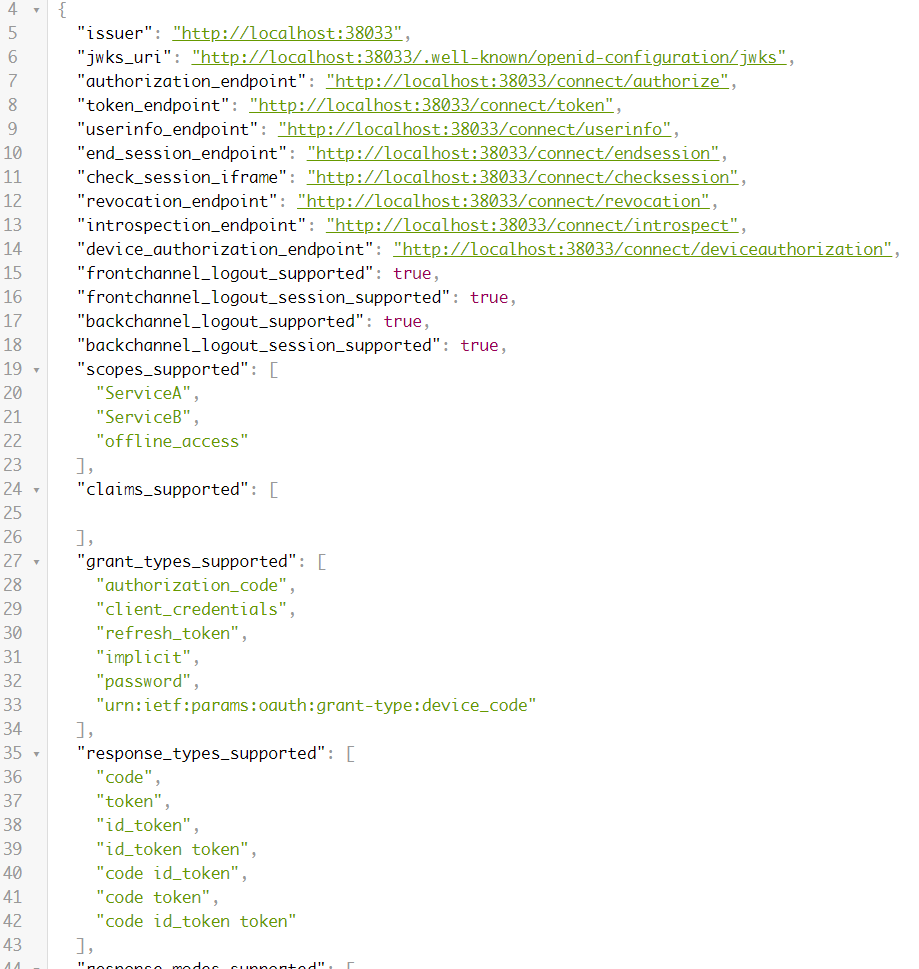
在浏览器中输入 http://localhost:38033/.well-known/openid-configuration ,得到以下内容

上一篇:js 百度地图
文章标题:.NET Core + Ocelot + IdentityServer4 + Consul 基础架构实现
文章链接:http://soscw.com/essay/74906.html