使用angular4和asp.net core 2 web api做个练习项目(一)
2021-05-02 21:27
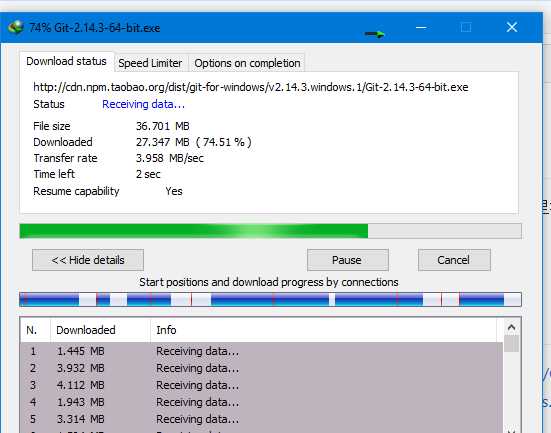
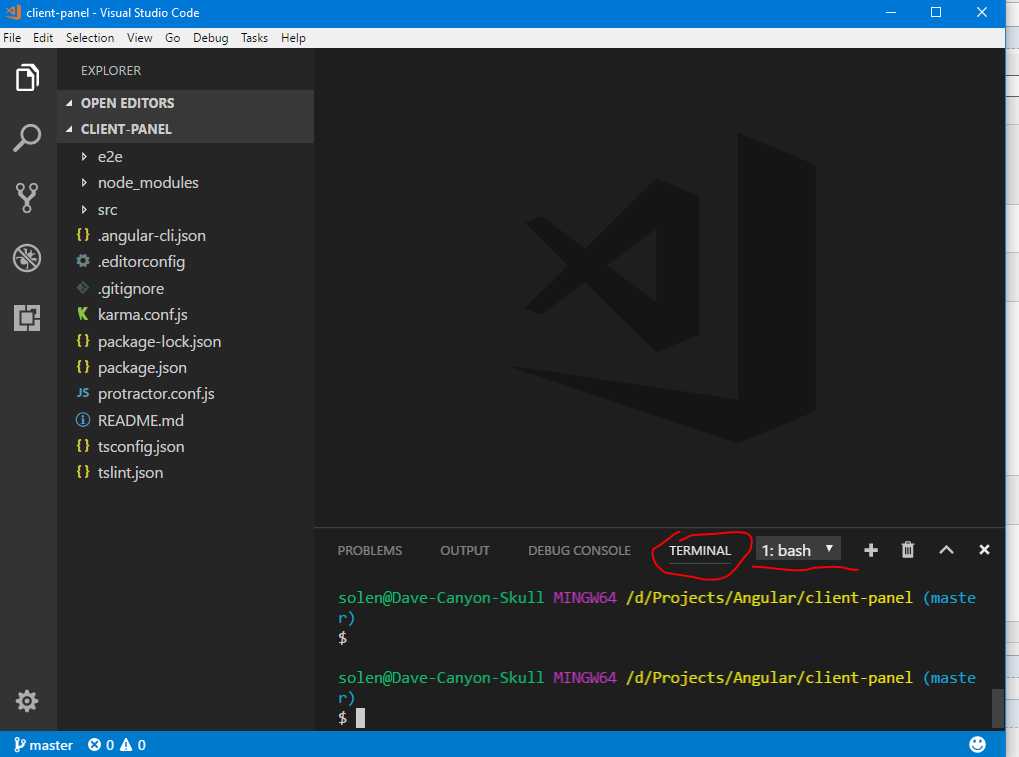
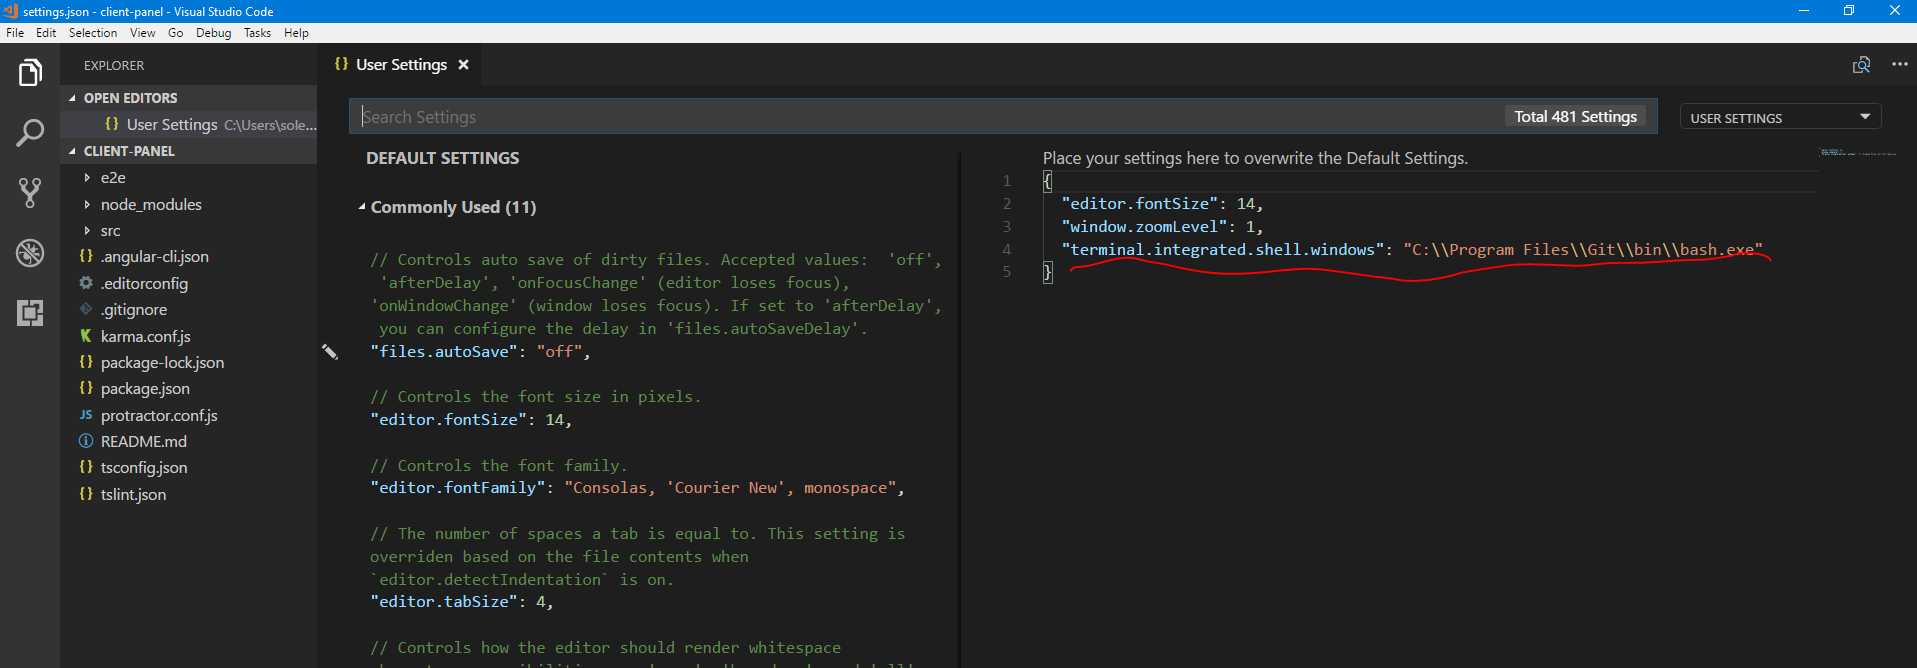
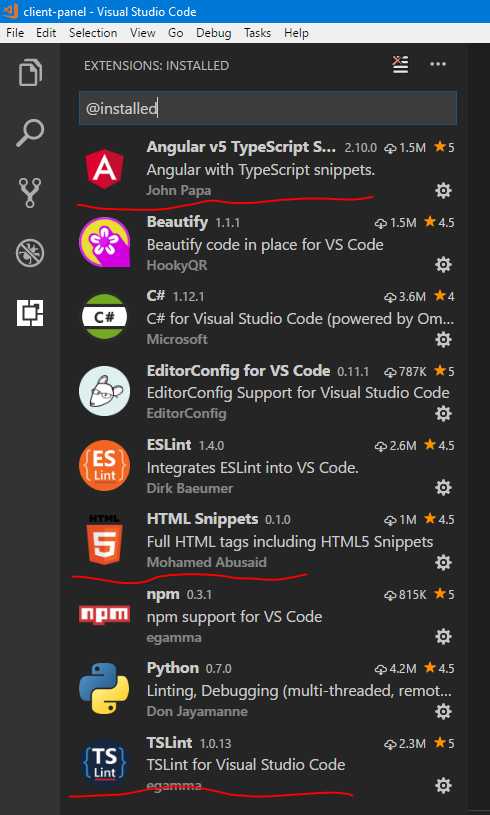
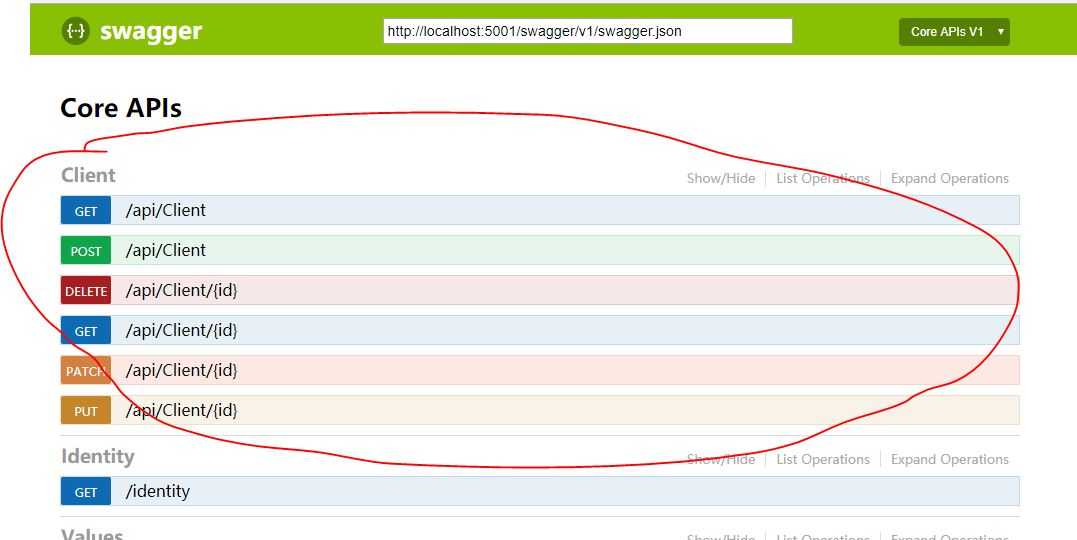
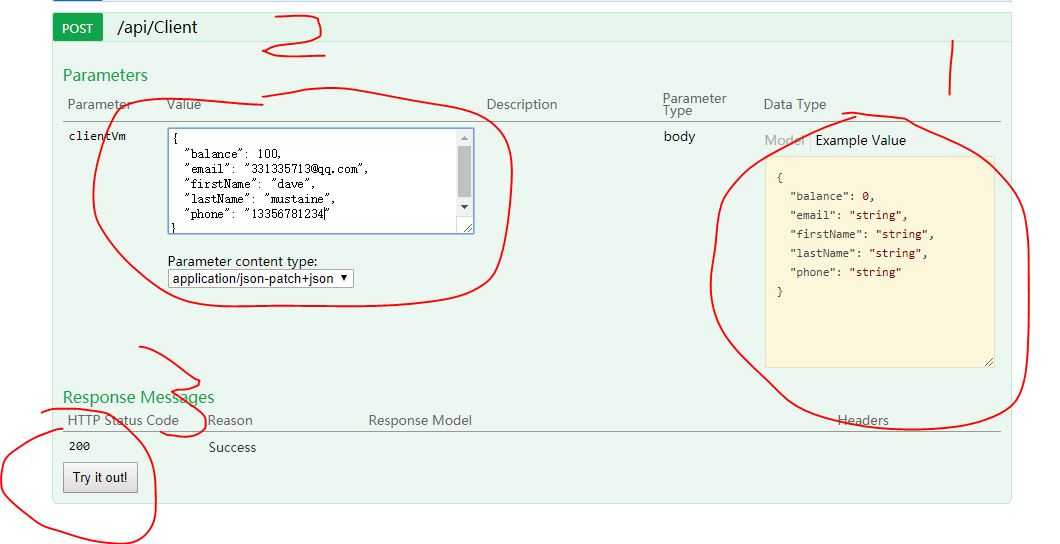
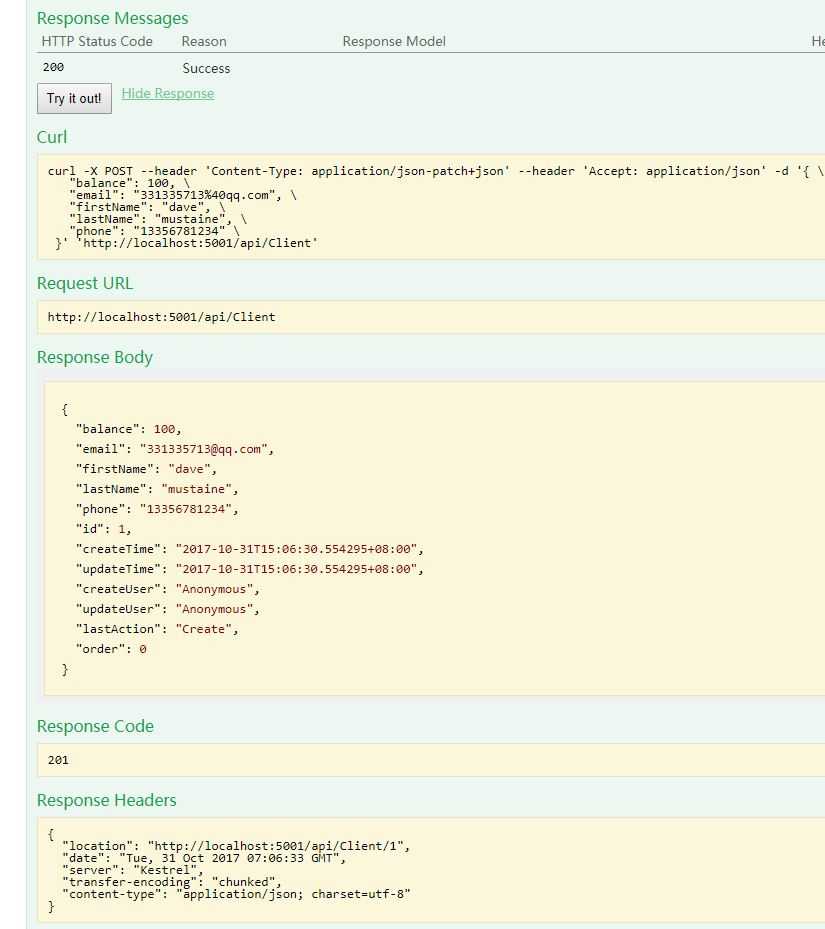
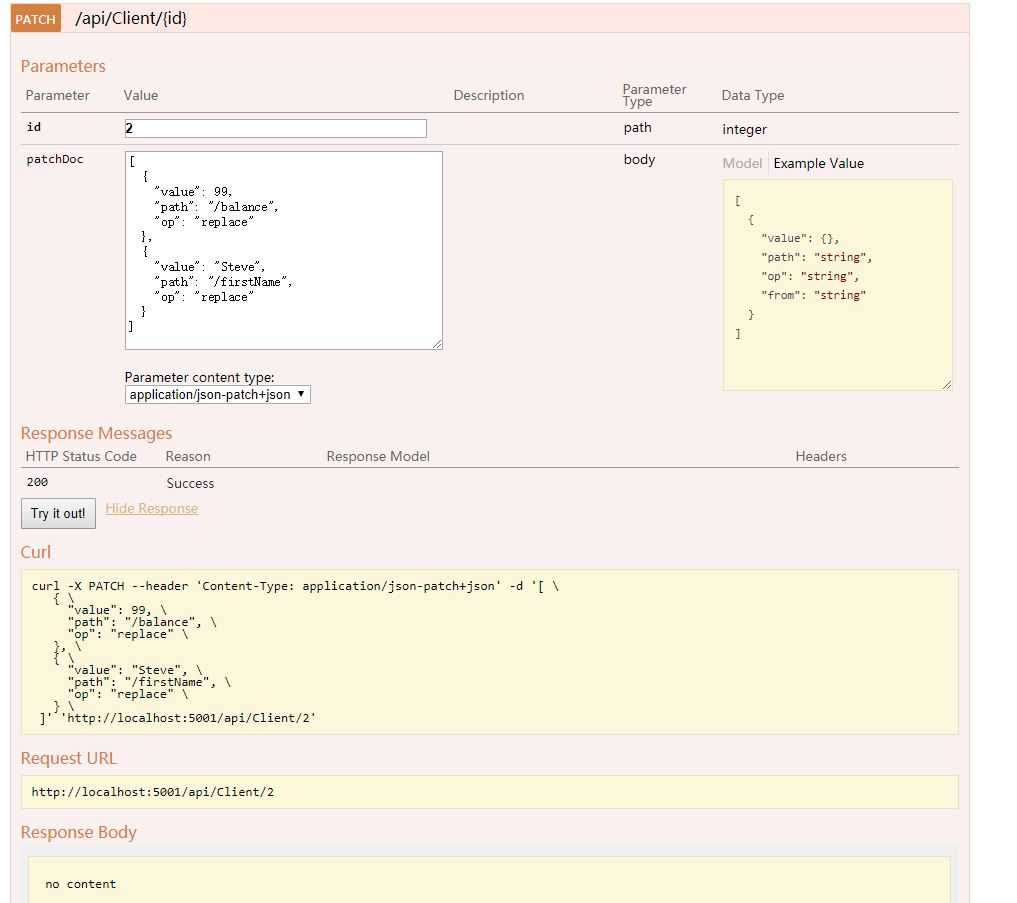
标签:jpg 函数 工具类 row adr ken icon cti asm 这是一篇学习笔记. angular 5 正式版都快出了, 不过主要是性能升级. 我认为angular 4还是很适合企业的, 就像.net一样. 我用的是windows 10 git for windows: 官网很慢, 所以找一个镜像站下载: https://github.com/waylau/git-for-win, 淘宝镜像的速度还是蛮快的: 安装的时候, 建议选择这个, 会添加很多命令行工具: nodejs: 去官网下载就行: https://nodejs.org/en/ 正常安装即可. npm的版本不要低于5.0吧: angular-cli, 官网: https://github.com/angular/angular-cli visual studio code: https://code.visualstudio.com/ and visual studio 2017 of course. 进入命令行在某个地方执行命令: 这就会建立一个client-panel文件夹, 里面是该项目的文件, 然后它会立即执行npm install命令(这里不要使用淘宝的cnpm进行安装, 有bug), 稍等一会就会结束. 使用vscode打开该目录, 然后在vscode里面打开terminal: terminal默认的可能是powershell, 如果你感觉powershell有点慢的话, 可以换成bash(安装git时候带的)或者windows command line等. 第一次打开terminal的时候, vscode上方会提示你配置terminal, 这时就可以更换默认的terminal. 否则的话, 你可以点击菜单file-reference-settings, 自己选择一个terminal应用: 同样可以安装几个vscode的插件: 然后试运行一下项目, 在terminal执行 ng serve, 如果没问题的话, 大概是这样: 浏览器运行: http://localhost:4200 安装bootstrap4, tether, jquery等: 安装成功后, 打开 .angular-cli.json, 把相关的css和js添加进去: 然后在运行试试 ng serve, 刷新: 字体已经改变, bootstrap起作用了. terminal执行 执行成功后会生成4个文件: 并且会自动在app.module.ts里面声明: 打开app.component.html, 清空内容, 添加一个div(可以输入div.container然后按tab健): 现在刷新浏览器, 大约这样: 修改navbar.component.html: 修改app.component.html: 运行: 建立一个client.service: 然后在app.module.ts添加引用: 并添加在providers里: 前端先暂时到这, 现在开始搞后端 web api. web api项目源码: https://github.com/solenovex/asp.net-core-2.0-web-api-boilerplate 项目列表如图: AspNetIdentityAuthorizationServer是一个单独的authorization server, 这里暂时还没用到, 它的端口是5000, 默认不启动. CoreApi.Infrastructure 里面有一些基类和接口, 还放了一个公共的工具类等. CoreApi.Models就是 models/entities CoreApi.DataContext 里面就是DbContext相关的 CoreApi.Repositories 里面是Repositories CoreApi.Services 里面就是各种services CoreApi.ViewModels 里面就是各种ViewModels或者叫Dtos CoreApi.Web是web启动项目. SharedSettings是横跨authorization server和 web api的一些公共设置. 上面说的这些都没什么用, 下面开始建立Client的api. 在CoreApi.Models建立文件夹Angular, 然后建立Client.cs: 其中父类EntityBase里面含有一些通用属性,Id, CreateUser, UpdateUser, CreateTime, UpdateTime, LastAction, 这些是我公司做项目必须的, 你们随意. 下面ClientConfiguration是针对Client的fluent api配置类. 他的父类EntityBaseConfiguration实现了EF的IEntityTypeConfiguration接口, 并在父类里面针对EntityBase那些属性使用fluent api做了限制: 弄完Model和它的配置之后, 就添加到DbContext里面. 打开CoreApi.DataContext的CoreContext, 添加Model和配置: 在CoreApi.Repositories里面建立Angular目录, 建立ClientRepository.cs: 图省事, 我把repository和它的interface放在一个文件了. IEntityBaseRepository EntityBaseRepository 在CoreApi.ViewModels建立Angular文件夹, 分别针对查询, 新增, 修改建立3个ViewModel(Dto): ClientViewModel: ClientCreationViewModel: ClientModificationViewModel: 针对Client和它的Viewmodels, 分别从两个方向进行配置: DomainToViewModelMappingProfile: ViewModelToDomainMappingProfile: 在web项目的StartUp.cs的ConfigureServices里面为ClientRepository注册DI: 在controllers目录建立Angular/ClientController.cs: 首先, Controller继承了ControllerBase这个类, ControllerBase是自己写的类, 里面可以放置一些公用的方法或属性, 目前里面的东西都没用: 由于父类构造函数依赖的类太多了, 所以我建立了一个CoreService, 里面包含着这些依赖, 然后用一个变量就注入进去了, 这种写法不一定正确: Controller里面的方法应该都能看明白吧. 需要提一下的是UnitOfWork. 我才用的是UnitOfWork和Repository模式, 多个Repository挂起的数据库操作, 可以使用一个UnitOfWork一次性提交. 由于DBContext已经实现了UnitOfWork模式, 所以可以直接在Controller里面使用DbContext, 但是我还是做了一个接口 IUnitOfWork: 里面前4个方法就是DbContext内置的方法, 后面4个方法可有可无, 就是上面4个方法的简单变形. 看一下CoreContext: 差不多了, 开始 在Package Manager Console分别执行 Add-Migration XXX和 Update-database命令. 注意这个时候 解决方案的启动项目必须是Web项目, 如果设置了多个启动项目, 迁移命令会不太好用. 然后运行一下: 选择CoreApi.Web而不是IISExpress, 这样的话端口应该是 http://localhost:5001/api/values 然后进入swagger简单测试一下ClientController: http://localhost:5001/swagger/ 先点击右侧, 然后会把数据的json模板复制到左边的框里, 然后修改值, 然后点击try It out, 结果如下: 然后两个Get, Delete, Put您都应该会测试. 这里试一下 Patch: 再查询一下, 应该没有什么问题. 先写到这, 明天就能差不多写完了吧. 使用angular4和asp.net core 2 web api做个练习项目(一) 标签:jpg 函数 工具类 row adr ken icon cti asm 原文地址:http://www.cnblogs.com/cgzl/p/7755801.html安装工具:


npm install -g @angular/cli
建立angular项目
ng new client-panel

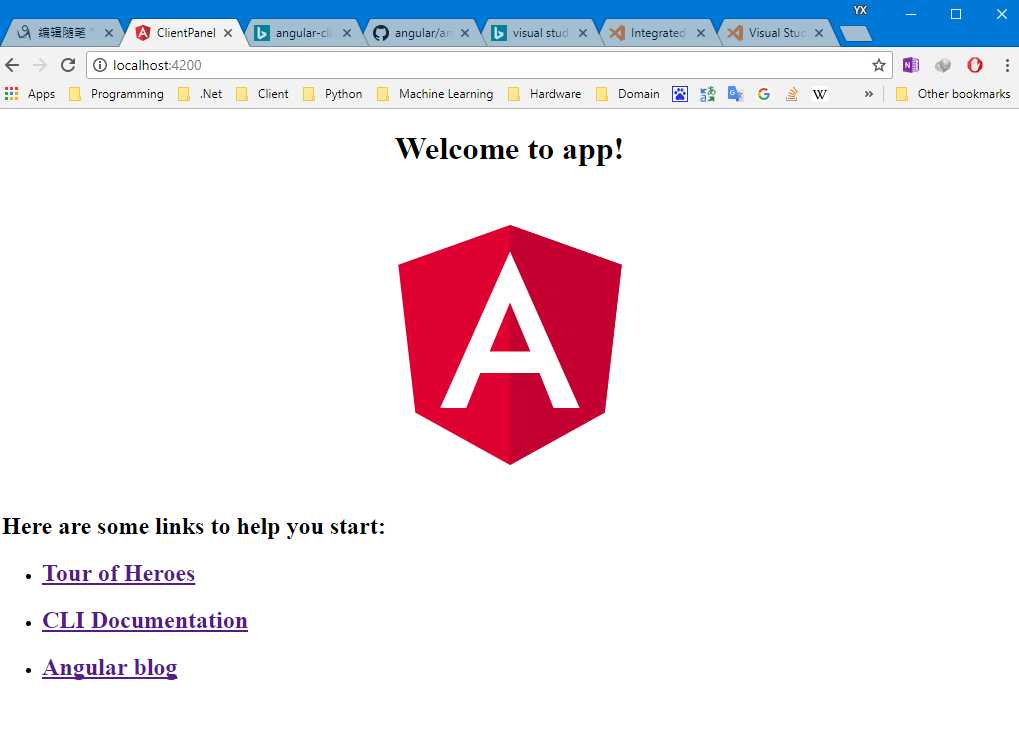
安装bootstrap4等:
npm install bootstrap@4.0.0-beta.2 tether jquery --save
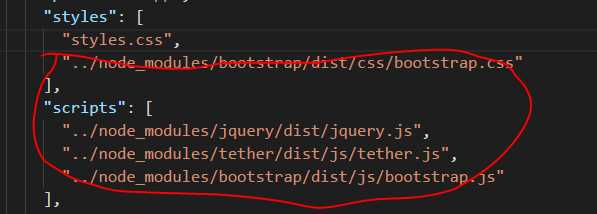
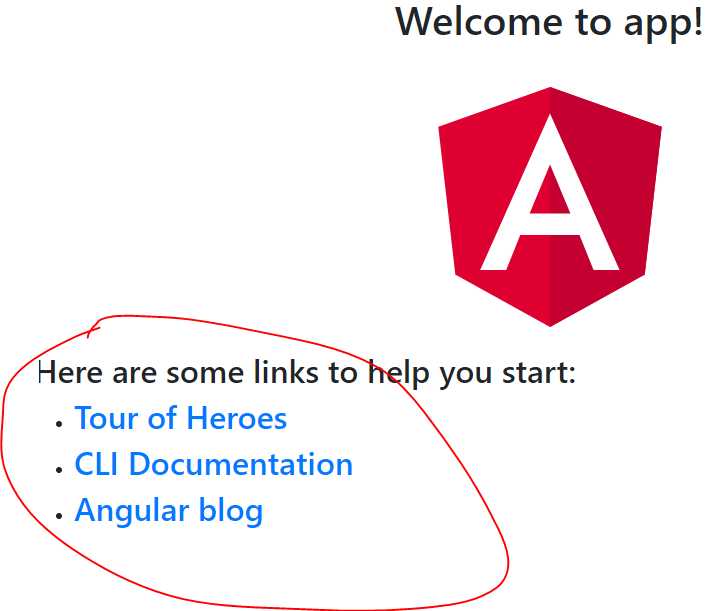
建立Components
建立dashboard:
ng g component components/dashboard
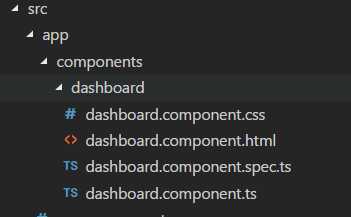
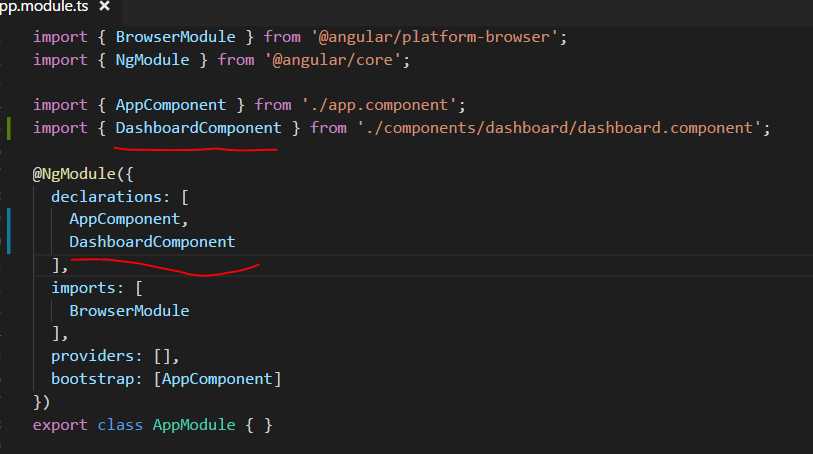
建立其他 components:
ng g component components/clients
ng g component components/clientDetails
ng g component components/addClient
ng g component components/editClient
ng g component components/navbar
ng g component components/sidebar
ng g component components/login
ng g component components/register
ng g component components/settings
ng g component components/pageNotFound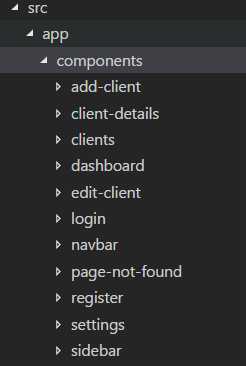
建立Route路由
import { BrowserModule } from ‘@angular/platform-browser‘;
import { NgModule } from ‘@angular/core‘;
import { RouterModule, Routes } from ‘@angular/router‘;

import { AppComponent } from ‘./app.component‘;
import { DashboardComponent } from ‘./components/dashboard/dashboard.component‘;
import { ClientsComponent } from ‘./components/clients/clients.component‘;
import { ClientDetailsComponent } from ‘./components/client-details/client-details.component‘;
import { AddClientComponent } from ‘./components/add-client/add-client.component‘;
import { EditClientComponent } from ‘./components/edit-client/edit-client.component‘;
import { NavbarComponent } from ‘./components/navbar/navbar.component‘;
import { SidebarComponent } from ‘./components/sidebar/sidebar.component‘;
import { LoginComponent } from ‘./components/login/login.component‘;
import { RegisterComponent } from ‘./components/register/register.component‘;
import { SettingsComponent } from ‘./components/settings/settings.component‘;
import { PageNotFoundComponent } from ‘./components/page-not-found/page-not-found.component‘;

const appRoutes: Routes = [
  { path: ‘‘, component: DashboardComponent },
  { path: ‘register‘, component: RegisterComponent },
  { path: ‘login‘, component: LoginComponent }
];

@NgModule({
  declarations: [
    AppComponent,
    DashboardComponent,
    ClientsComponent,
    ClientDetailsComponent,
    AddClientComponent,
    EditClientComponent,
    NavbarComponent,
    SidebarComponent,
    LoginComponent,
    RegisterComponent,
    SettingsComponent,
    PageNotFoundComponent
  ],
  imports: [
    BrowserModule,
    RouterModule.forRoot(appRoutes)
  ],
  providers: [],
  bootstrap: [AppComponent]
})
export class AppModule { }
添加router-outlet:
div class="container">
  router-outlet>router-outlet>
div>
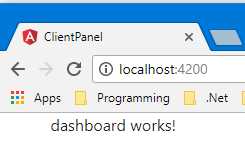
添加navbar:
nav class="navbar navbar-expand-md navbar-light bg-light">
  div class="container">
    a class="navbar-brand" href="#">Client Panela>
    button class="navbar-toggler" type="button" data-toggle="collapse" data-target="#navbarsExampleDefault" aria-controls="navbarsExampleDefault"
      aria-expanded="false" aria-label="Toggle navigation">
      span class="navbar-toggler-icon">span>
    button>

    div class="collapse navbar-collapse" id="navbarsExampleDefault">
      ul class="navbar-nav mr-auto">
        li class="nav-item">
          a class="nav-link" href="#" routerLink="/">Dashboard a>
        li>
      ul>
      ul class="navbar-nav ml-auto">
        li class="nav-item">
          a class="nav-link" href="#" routerLink="/register">Register a>
        li>
        li class="nav-item">
          a class="nav-link" href="#" routerLink="/login">Login a>
        li>
      ul>
    div>
  div>
nav>
div class="container">
  router-outlet>router-outlet>
div>

建立Service
ng g service services/client
// Services Imports
import { ClientService } from "./services/client.service";
  providers: [
    ClientService
  ],
建立asp.net core 2.0 的 Web api项目
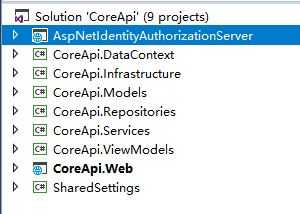
建立Client Model(或者叫Entity)
using CoreApi.Infrastructure.Features.Common;
using Microsoft.EntityFrameworkCore;
using Microsoft.EntityFrameworkCore.Metadata.Builders;
namespace CoreApi.Models.Angular
{
public class Client : EntityBase
{
public decimal Balance { get; set; }
public string Email { get; set; }
public string FirstName { get; set; }
public string LastName { get; set; }
public string Phone { get; set; }
}
public class ClientConfiguration : EntityBaseConfiguration
namespace CoreApi.Infrastructure.Features.Common
{
public abstract class EntityBaseConfiguration
        protected override void OnModelCreating(ModelBuilder modelBuilder)
        {
            base.OnModelCreating(modelBuilder);
            modelBuilder.HasDefaultSchema(AppSettings.DefaultSchema);

            modelBuilder.ApplyConfiguration(new UploadedFileConfiguration());
            modelBuilder.ApplyConfiguration(new ClientConfiguration());
        }
public DbSet
然后建立ClientRepository
namespace CoreApi.Repositories.Angular
{
public interface IClientRepository : IEntityBaseRepository
namespace CoreApi.DataContext.Infrastructure
{
public interface IEntityBaseRepository
namespace CoreApi.DataContext.Infrastructure
{
public class EntityBaseRepository
建立Client的ViewModels
namespace CoreApi.ViewModels.Angular
{
    public class ClientViewModel : EntityBase
    {
        public decimal Balance { get; set; }
        public string Email { get; set; }
        public string FirstName { get; set; }
        public string LastName { get; set; }
        public string Phone { get; set; }
    }
}
namespace CoreApi.ViewModels.Angular
{
    public class ClientCreationViewModel
    {
        public decimal Balance { get; set; }

        [Required]
        [MaxLength(100)]
        public string Email { get; set; }

        [Required]
        [MaxLength(50)]
        public string FirstName { get; set; }

        [Required]
        [MaxLength(50)]
        public string LastName { get; set; }

        [Required]
        [MaxLength(50)]
        public string Phone { get; set; }
    }
}
namespace CoreApi.ViewModels.Angular
{
    public class ClientModificationViewModel
    {
        public decimal Balance { get; set; }

        [Required]
        [MaxLength(100)]
        public string Email { get; set; }

        [Required]
        [MaxLength(50)]
        public string FirstName { get; set; }

        [Required]
        [MaxLength(50)]
        public string LastName { get; set; }

        [Required]
        [MaxLength(50)]
        public string Phone { get; set; }
    }
}
配置AutoMapper
namespace CoreApi.Web.MyConfigurations
{
public class DomainToViewModelMappingProfile : Profile
{
public override string ProfileName => "DomainToViewModelMappings";
public DomainToViewModelMappingProfile()
{
CreateMap
namespace CoreApi.Web.MyConfigurations
{
public class ViewModelToDomainMappingProfile : Profile
{
public override string ProfileName => "ViewModelToDomainMappings";
public ViewModelToDomainMappingProfile()
{
CreateMap
注册Repository的DI:
services.AddScoped
建立Controller
namespace CoreApi.Web.Controllers.Angular
{
[Route("api/[controller]")]
public class ClientController : BaseController
namespace CoreApi.Web.Controllers.Bases
{
public abstract class BaseController
public interface ICoreServiceout T> : IDisposable
{
IUnitOfWork UnitOfWork { get; }
ILogger
Unit Of Work
namespace CoreApi.DataContext.Infrastructure
{
    public interface IUnitOfWork: IDisposable
    {
        int SaveChanges();
        int SaveChanges(bool acceptAllChangesOnSuccess);
        Taskint> SaveChangesAsync(bool acceptAllChangesOnSuccess, CancellationToken cancellationToken = default(CancellationToken));
        Taskint> SaveChangesAsync(CancellationToken cancellationToken = default(CancellationToken));

        bool Save();
        bool Save(bool acceptAllChangesOnSuccess);
        Taskbool> SaveAsync(bool acceptAllChangesOnSuccess, CancellationToken cancellationToken = default(CancellationToken));
        Taskbool> SaveAsync(CancellationToken cancellationToken = default(CancellationToken));
    }
}
namespace CoreApi.DataContext.Core
{
public class CoreContext : DbContext, IUnitOfWork
{
public CoreContext(DbContextOptions
迁移数据库
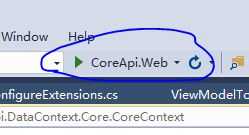
到Swagger里简单测试下
先添加数据 POST:
上一篇:43、我的C#学习笔记9
下一篇:关于WPF的验证
文章标题:使用angular4和asp.net core 2 web api做个练习项目(一)
文章链接:http://soscw.com/essay/81503.html