Python_使用smtplib+email完成邮件发送
2021-06-07 18:05
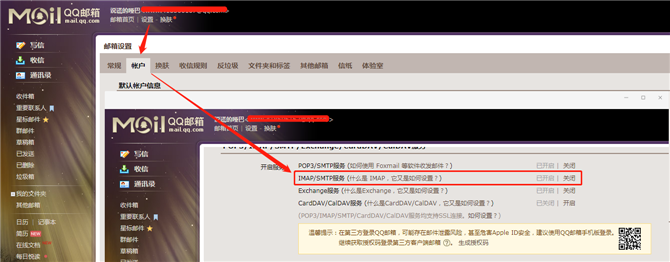
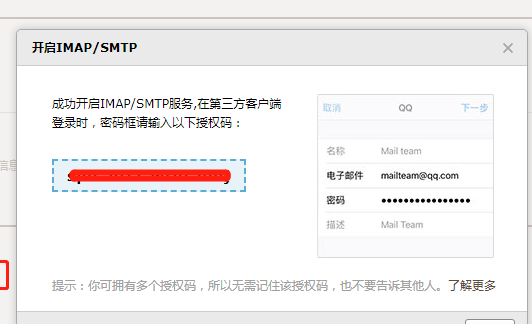
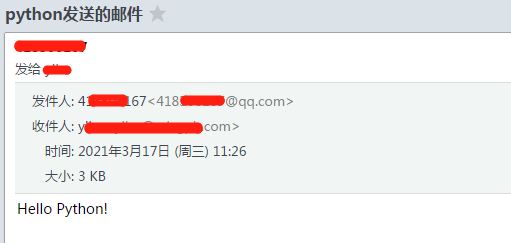
标签:author 帮助文档 email 账户 type 查看 选择 邮件发送 服务器 本文以第三方QQ邮箱服务器演示如何使用python的smtplib+email完成邮箱发送功能 开启QQ邮箱SMTP服务 开启的最后一步是发送短信验证,获取 authorization。 QQ官方获取授权码的帮助文档。 使用SMTP服务有POP和IMAP(Internet Message Access Protocol)两种协议,我们选择使用IMAP,具体差异查看QQ邮箱帮助文档。 发送结果如下: Python_使用smtplib+email完成邮件发送 标签:author 帮助文档 email 账户 type 查看 选择 邮件发送 服务器 原文地址:https://www.cnblogs.com/testlearn/p/14548396.html一、设置开启SMTP服务并获取授权码


二、发送简单的邮箱
import smtplib
from email.mime.text import MIMEText


# 1.连接邮件服务器
smtpHost = "smtp.qq.com"    # 邮件服务器地址
port = 465      # 邮件服务器端口
server = smtplib.SMTP_SSL(smtpHost, port)

# 2.登录服务
sender = ‘418***167@qq.com‘    # 发件人邮箱账号
authorization = ‘spi********idj‘      # QQ邮箱授权码
server.login(sender, authorization)  # 括号中对应的是发件人邮箱账号、邮箱密码

# 3.构造邮件内容
# 3.1 创建邮箱容器
mailboxContainer = MIMEText(‘Hello Python!‘, "plain", "utf-8")   # 创建文本类型容器

# 3.2 定义容器内容
mailboxContainer[‘Subject‘] = "python发送的邮件"     # 邮箱主题
mailboxContainer[‘From‘] = sender           # 邮箱发送人
receiver_to = [‘y****@****.com‘]
mailboxContainer["To"] = ",".join(receiver_to)  # 邮箱接收人
receiver_cc = []
mailboxContainer[‘Cc‘] = ",".join(receiver_cc)   # 邮箱抄送人

# 4.发送邮件
receiver = receiver_to + receiver_cc    # 接收邮箱的人(包含接收和抄送)
server.sendmail(sender, receiver, mailboxContainer.as_string())

# 5.关闭连接
server.quit()

文章标题:Python_使用smtplib+email完成邮件发送
文章链接:http://soscw.com/essay/91860.html