Springboot中对Swagger2的基本管理
2021-06-09 18:06
标签:pac ref class contact res 判断 图片 list() 信息 只希望我的Swagger在生产测试环境中使用,在发布环境不使用,应该如何实现 思路: 1、判断是否是生产环境 flag=false 2、注入 enable(flag) 配置API文档的分组 如需配置多个组,创建多个Docket实例即可 1.我们可以通过Swagger给一些比较难理解的属性或者接口,增加注释信息 2.接口文档实时更新 3.可以在线测试 【注意】:正式发布项目的时候,一定要关闭Swagger!!!! Springboot中对Swagger2的基本管理 标签:pac ref class contact res 判断 图片 list() 信息 原文地址:https://www.cnblogs.com/HHY123/p/14486047.htmlSpringBoot集成Swagger2
1、新建springboot+web项目
2、导入相关的依赖
3、新建一个helloController进行测试
@RestController
public class HelloController {
    @RequestMapping("hello")
    public String hello(){
        return "hello";
    }
}
4、创建SweggerConfig
@Configuration
@EnableSwagger2		//开启Swagger
public class SwaggerConfig {

}
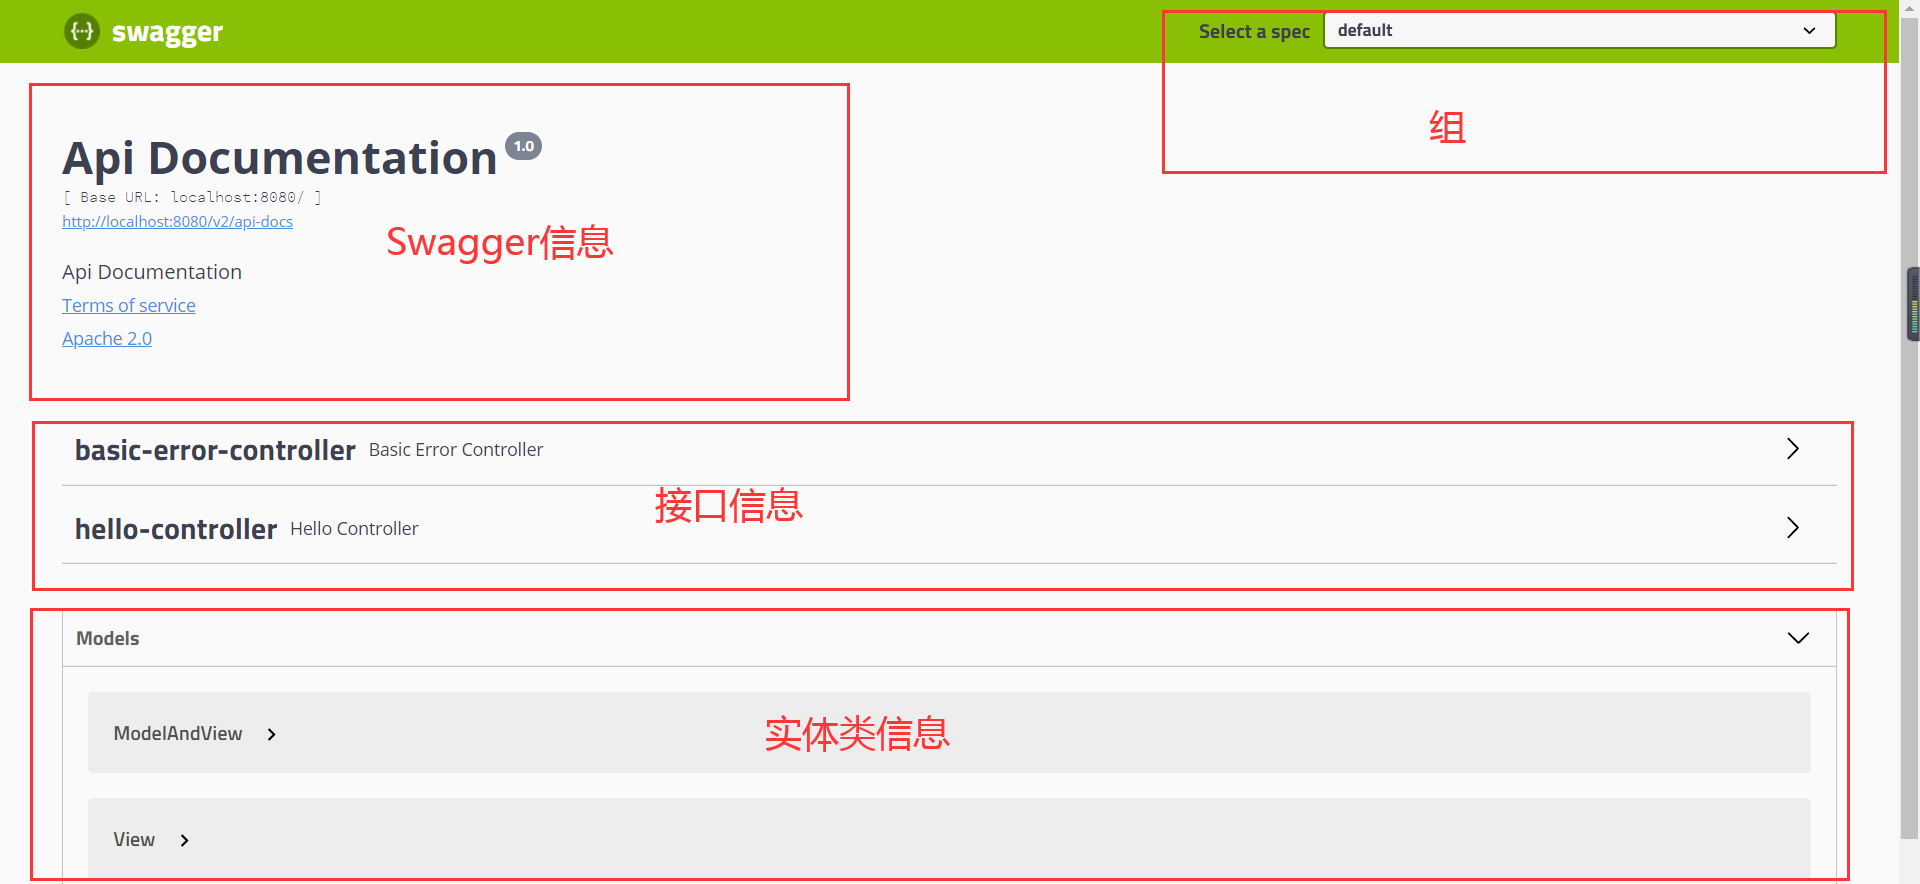
5、测试访问Swagger-ui——http://localhost:8080/swagger-ui.html

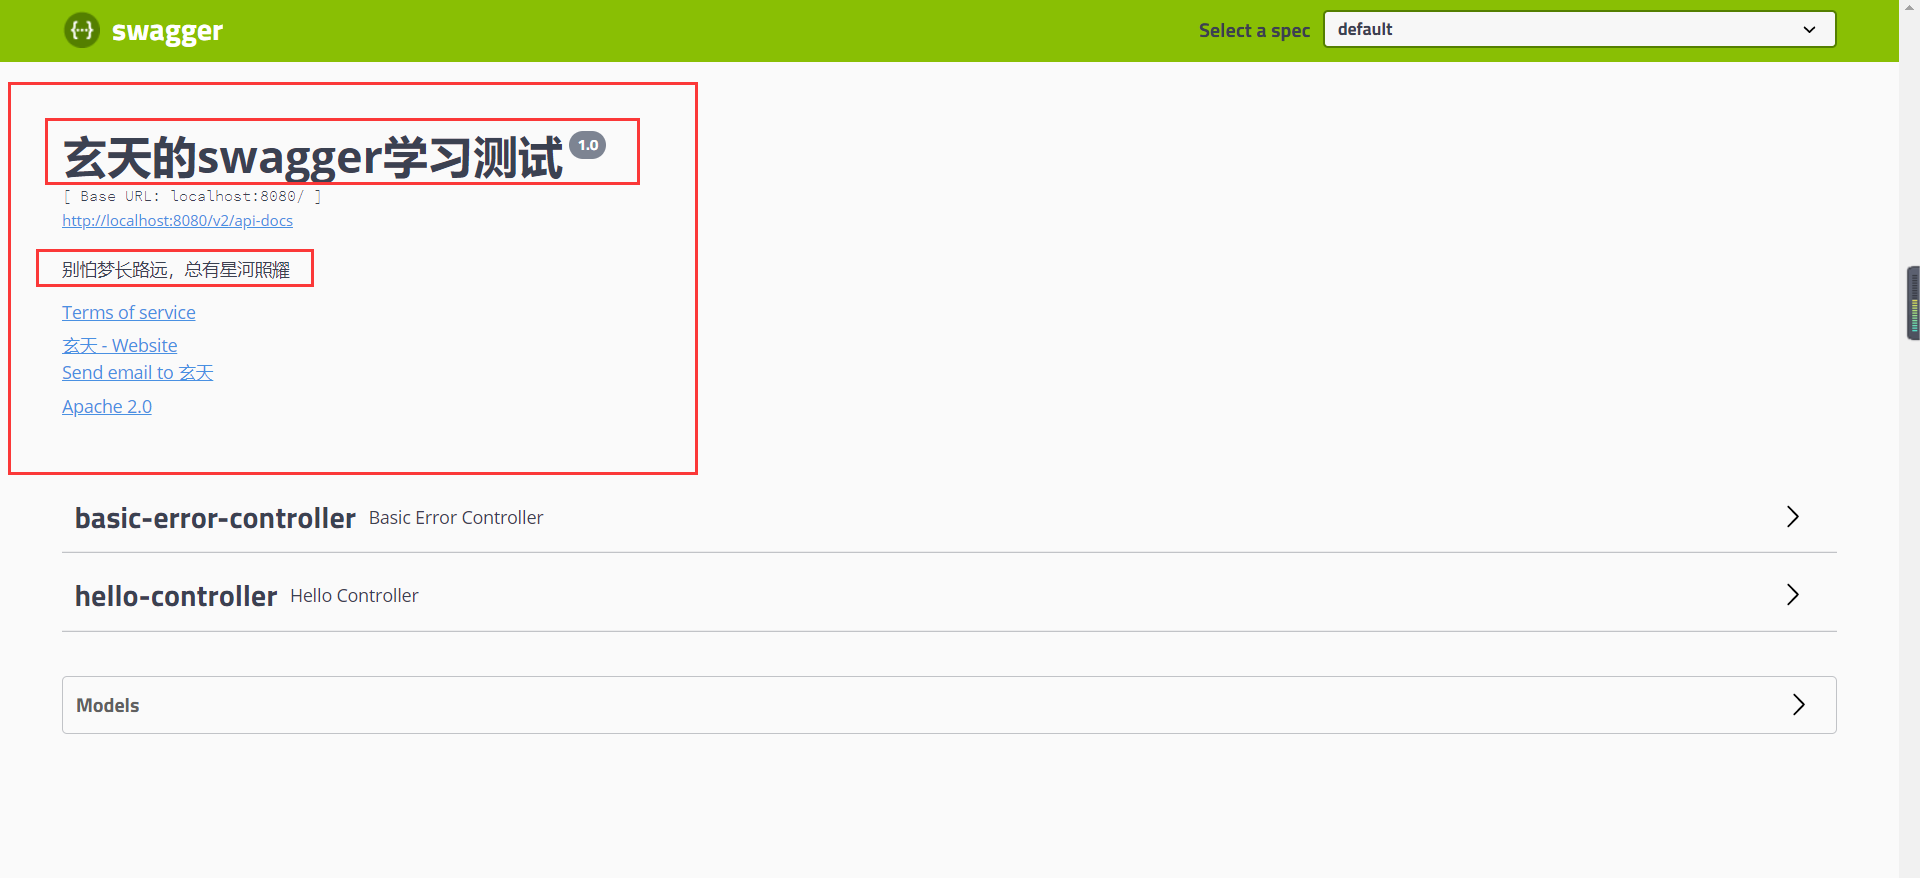
配置SwaggerConfig信息
@Configuration
//开启Swagger
@EnableSwagger2
public class SwaggerConfig {

    //配置了 Swagger 的 Docket 的 Bean 实例
    @Bean
    public Docket docket(){
        return new Docket(DocumentationType.SWAGGER_2).apiInfo(apiInfo());
    }

    //配置 Swagger 的信息 apiInfo
    private ApiInfo apiInfo(){

        //Contact("姓名","官网链接","邮箱")
        Contact DEFAULT_CONTACT = new Contact("玄天", "。。。。。", "*****@qq.com");

        return new ApiInfo(
                "玄天的swagger学习测试",	//title
                "别怕梦长路远,总有星河照耀",	//描述
                "1.0",	//版本
                "urn:tos",	//官网链接
                DEFAULT_CONTACT, "Apache 2.0",
                "http://www.apache.org/licenses/LICENSE-2.0",
                new ArrayList());
    }
}

Swager配置扫描接口
Docket.select()
	//配置了 Swagger 的 Docket 的 Bean 实例
	@Bean
    public Docket docket(){
        return new Docket(DocumentationType.SWAGGER_2)
                .apiInfo(apiInfo())
                .select()
                //RequestHandlerSelectors:配置要扫描的接口方式
                //basePackage:指定要扫描的包
                //any():扫描全部
                //none():不扫描
                //withClassAnnotation():扫描类上的注解,参数是一个注解的反射对象
                //withMethodAnnotation():扫描方法上的注解
                .apis(RequestHandlerSelectors.basePackage("com.qf.springboot.controller"))
                //过滤的路径
                .paths(PathSelectors.ant("/qf/**"))
                .build();
    }
配置Swagge的自动启动
	//配置了 Swagger 的 Docket 的 Bean 实例
    @Bean
    public Docket docket(){
        return new Docket(DocumentationType.SWAGGER_2)
                .apiInfo(apiInfo())
                .enable(false)    //enable是否启动Swagger,如果为false,则不启动
                .select()
                .apis(RequestHandlerSelectors.basePackage("com.qf.springboot.controller"))
                .build();
    }
思考题
	//配置了 Swagger 的 Docket 的 Bean 实例
    @Bean
    public Docket docket(Environment environment){

        //设置要显示的Swagger环境
        Profiles profiles = Profiles.of("dev","test");

        //通过 environment.acceptsProfiles 判断是否处于自己所指定的环境中
        boolean flag = environment.acceptsProfiles(profiles);

        return new Docket(DocumentationType.SWAGGER_2)
                .apiInfo(apiInfo())
                .enable(flag)    //enable是否启动Swagger,如果为false,则不启动
                .select()
                .apis(RequestHandlerSelectors.basePackage("com.qf.springboot.controller"))
                .build();
    }
.groupName("玄天")
	@Bean
    public Docket docket1(){
        return new Docket(DocumentationType.SWAGGER_2).groupName("A");
    }

    @Bean
    public Docket docket2(){
        return new Docket(DocumentationType.SWAGGER_2).groupName("B");
    }

    @Bean
    public Docket docket3(){
        return new Docket(DocumentationType.SWAGGER_2).groupName("C");
    }
总结:
下一篇:检测是否引入jQuery