cordova 拍照上传!
2021-06-16 01:05
阅读:631
YPE html>
标签:func ext hang false add tor indexof ror nbsp
1,安装需要的插件
2,选择设备照片并上传 

3,拍照并上传
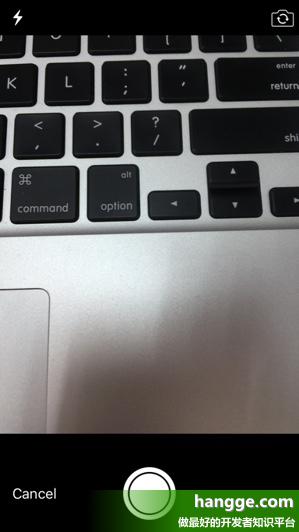
下面代码样例,当点击按钮后会掉用摄像头拍照,并在页面上显示出来。同时拍摄照片会上传到服务器上。


原文出自:www.hangge.com
不管是从相册中选择图片上传,还是拍照上传。我们都需要如下先安装如下三个插件:Camera(相机)、file(文件访问操作)、fileTransfer(文件传输)。
如果没有安装的话,先安装下:
|
1
2
3
|
cordova plugin add cordova-plugin-cameracordova plugin add cordova-plugin-filecordova plugin add cordova-plugin-file-transfer |
2,选择设备照片并上传
下面代码样例,点击按钮后会打开系统相册来选择照片,选中的照片会显示在页面上。同时会把选择的照片上传到服务器。


|
1
2
3
4
5
6
7
8
9
10
11
12
13
14
15
16
17
18
19
20
21
22
23
24
25
26
27
28
29
30
31
32
33
34
35
36
37
38
39
40
41
42
43
44
45
46
47
48
49
50
51
52
53
54
55
56
57
58
59
60
61
62
63
64
65
66
67
68
69
70
71
72
73
74
75
76
77
|
charset="utf-8" src="cordova.js">
charset="utf-8">
var pictureSource;
var destinationType;
document.addEventListener("deviceready",onDeviceReady,false);
//Cordova加载完成会触发
function onDeviceReady() {
pictureSource=navigator.camera.PictureSourceType;
destinationType=navigator.camera.DestinationType;
}
//获取照片
function getPhoto(source) {
//quality : 图像的质量,范围是[0,100]
navigator.camera.getPicture(onPhotoURISuccess,
function(error){console.log("照片获取失败!")},
{ quality: 50, destinationType: destinationType.FILE_URI, sourceType: source });
}
//获取照片成功
function onPhotoURISuccess(imageURI) {
//打印出照片路径
console.log(imageURI);
//显示照片
var largeImage = document.getElementById(‘largeImage‘);
largeImage.style.display = ‘block‘;
largeImage.src = imageURI;
upload(imageURI);
}
//上传文件
function upload(fileURL) {
//上传成功
var success = function (r) {
console.log("上传成功! Code = " + r.responseCode);
}
//上传失败
var fail = function (error) {
alert("上传失败! Code = " + error.code);
}
var options = new FileUploadOptions();
options.fileKey = "file1";
options.fileName = fileURL.substr(fileURL.lastIndexOf(‘/‘) + 1);
//options.mimeType = "text/plain";
//上传参数
var params = {};
params.value1 = "test";
params.value2 = "param";
options.params = params;
var ft = new FileTransfer();
//上传地址
var SERVER = "http://www.hangge.com/upload.php"
ft.upload(fileURL, encodeURI(SERVER), success, fail, options);
};
从相册选择照片并上传
|
下面代码样例,当点击按钮后会掉用摄像头拍照,并在页面上显示出来。同时拍摄照片会上传到服务器上。


|
1
2
3
4
5
6
7
8
9
10
11
12
13
14
15
16
17
18
19
20
21
22
23
24
25
26
27
28
29
30
31
32
33
34
35
36
37
38
39
40
41
42
43
44
45
46
47
48
49
50
51
52
53
54
55
56
57
58
59
60
61
62
63
64
65
66
67
68
69
70
71
72
73
74
75
|
charset="utf-8" src="cordova.js">
charset="utf-8">
var destinationType;
document.addEventListener("deviceready",onDeviceReady,false);
//Cordova加载完成会触发
function onDeviceReady() {
destinationType=navigator.camera.DestinationType;
}
//拍照
function capturePhoto() {
//拍照并获取Base64编码的图像(quality : 存储图像的质量,范围是[0,100])
navigator.camera.getPicture(onPhotoDataSuccess, onFail, { quality: 50,
destinationType: destinationType.FILE_URI }
);
}
//拍照成功
function onPhotoDataSuccess(imageURL) {
var smallImage = document.getElementById(‘smallImage‘);
smallImage.style.display = ‘block‘;
smallImage.src = imageURL;
//开始上传
upload(imageURL);
}
//拍照失败
function onFail(message) {
alert(‘拍照失败: ‘ + message);
}
//上传文件
function upload(fileURL) {
//上传成功
var success = function (r) {
console.log("上传成功! Code = " + r.responseCode);
}
//上传失败
var fail = function (error) {
alert("上传失败! Code = " + error.code);
}
var options = new FileUploadOptions();
options.fileKey = "file1";
options.fileName = fileURL.substr(fileURL.lastIndexOf(‘/‘) + 1);
options.mimeType = "image/jpeg";
//上传参数
var params = {};
params.value1 = "test";
params.value2 = "param";
options.params = params;
var ft = new FileTransfer();
//上传地址
var SERVER = "http://www.hangge.com/upload.php"
ft.upload(fileURL, encodeURI(SERVER), success, fail, options);
};
|
原文出自:www.hangge.com
cordova 拍照上传!
标签:func ext hang false add tor indexof ror nbsp
原文地址:http://www.cnblogs.com/rainMicro/p/7272953.html
评论
亲,登录后才可以留言!