NET Core 3.0中的WPF
2021-05-29 03:02
标签:efi EAP str template turn ack inject ted src 我们都知道.NET Core 3.0已经发布了第六个预览版,我们也知道.NET Core 3.0现在已经支持创建WPF项目了,刚好今天在写一个代码生成器的客户端的时候用到了WPF,所以就把WPF创建以及使用IOC的过程记录一下,希望能对大家有所帮助。当然文章实例我就以我曾阅读过的一篇文章的示例代码来进行演示了。 作者:依乐祝 原文链接:https://www.cnblogs.com/yilezhu/p/11099358.html 通过命令行创建wpf项目,当然你也可以通过vs2019来进行创建。具体的步骤就不演示了,当然,如果你还不会用vs2019创建项目,那么请你右上角关闭网页,省的烦心。 我们想要实现的是引导应用程序并在MainWindow的构造函数中注入一个服务,该服务将被调用以便在应用程序的主窗口上显示一些文本。 我们首选要安装下
步骤
? mkdir WpfIoc
? cd WpfIoc
? dotnet.exe --version
3.0.100-preview6-012264

? dotnet new wpf
The template "WPF Application" was created successfully.

Processing post-creation actions...
Running ‘dotnet restore‘ on C:\Users\laure\projects\WpfIoc\WpfIoc.csproj...
  Restore completed in 90.03 ms for C:\Users\laure\projects\WpfIoc\WpfIoc.csproj.

Restore succeeded.

? dotnet build
Microsoft (R) Build Engine version 16.1.54-preview+gd004974104 for .NET Core
Copyright (C) Microsoft Corporation. All rights reserved.

  Restore completed in 19.92 ms for C:\Users\laure\projects\WpfIoc\WpfIoc.csproj.
C:\Program Files\dotnet\sdk\3.0.100-preview6-012264\Sdks\Microsoft.NET.Sdk\targets\Microsoft.NET.RuntimeIdentifierInference.targets(151,5): message NETSDK1057: You are using a preview version of .NET Core. See: https://aka.ms/dotnet-core-preview [C:\Users\laure\projects\WpfIoc\WpfIoc.csproj]
  WpfIoc -> C:\Users\laure\projects\WpfIoc\bin\Debug\netcoreapp3.0\WpfIoc.dll

Build succeeded.
    0 Warning(s)
    0 Error(s)

Time Elapsed 00:00:01.63Microsoft Extensions DependencyInjectionnuget包,当然你也可以通过下面的方式进行添加,不过最好还是通过nuget的方式引入最新的预览版即可。Project Sdk="Microsoft.NET.Sdk.WindowsDesktop">
PropertyGroup>
OutputType>WinExeOutputType>
TargetFramework>netcoreapp3.0TargetFramework>
UseWPF>trueUseWPF>
PropertyGroup>
ItemGroup>
PackageReference Include="Microsoft.Extensions.DependencyInjection" Version="3.0.0-preview6.19304.6" />
ItemGroup>
ItemGroup>
ProjectReference Include="..\StoneGenerate.Core\StoneGenerate.Core.csproj" />
ItemGroup>
Project>
创建一个ITextService接口服务,这个接口将由依赖注入容器注入到MainWindow类中进行使用。
public interface ITextService
{
    string GetText();
}当然你还得创建一个TextService类来实现上面的接口。
class TextService : ITextService
{
    private string _text;

    public TextService(string text)
    {
        _text = text;
    }

    public string GetText()
    {
        return _text;
    }
}接下来在我们的入口App.xaml.cs文件中配置我们的IOC容器,并入住我们的服务,相信做过.NET Core项目的你,对下面的代码应该都非常的熟悉,这里就不过多的解释了,省的浪费大家的宝贵时间。
public App()
{
    var serviceCollection = new ServiceCollection();
    ConfigureServices(serviceCollection);

    _serviceProvider = serviceCollection.BuildServiceProvider();
}

private void ConfigureServices(IServiceCollection services)
{
    services.AddSingleton(provider => new TextService("Hi WPF .NET Core 3.0"));
    services.AddSingleton();
} 接下来我们重写一下App.xaml.cs的OnStartup方法,解析出MainWindow 并show出来
protected override void OnStartup(StartupEventArgs e)
        {
            base.OnStartup(e);
            var main = serviceProvider.GetRequiredService();
            main.Show();
} 当然,这也就意味着你得移除App.xmal中的启动选项,代码如下:
Application x:Class="wpfioc.App"
             xmlns="http://schemas.microsoft.com/winfx/2006/xaml/presentation"
             xmlns:x="http://schemas.microsoft.com/winfx/2006/xaml"
             xmlns:local="clr-namespace:wpfioc"
             Startup="App_OnStartup">
    Application.Resources>
    Application.Resources>
Application>-
接下来我们修改一下
MainWindow的xaml代码以便来显示我们的文本信息:Window x:Class="WpfIoc.MainWindow" xmlns="http://schemas.microsoft.com/winfx/2006/xaml/presentation" xmlns:x="http://schemas.microsoft.com/winfx/2006/xaml" xmlns:d="http://schemas.microsoft.com/expression/blend/2008" xmlns:mc="http://schemas.openxmlformats.org/markup-compatibility/2006" xmlns:local="clr-namespace:WpfIoc" mc:Ignorable="d" Title="MainWindow" Height="450" Width="800"> Grid> Grid.RowDefinitions> RowDefinition Height="9*" /> RowDefinition Height="1*" /> Grid.RowDefinitions> Label Name="Label" Content="Hello .NET Core!" HorizontalAlignment="Center" VerticalAlignment="Center" FontSize="40" /> Grid> Window> -
当然,
MainWindow的cs代码也要进行下调整,以便能够接受IOC注入进来的方法。public partial class MainWindow : Window { public MainWindow(ITextService textService) { InitializeComponent(); Label.Content = textService.GetText(); } }
结果
相信上面的繁琐的步骤你也都看完了,那么接下来就是见证奇迹的时刻了,睁开你的双眼,奉上精美图片一张:
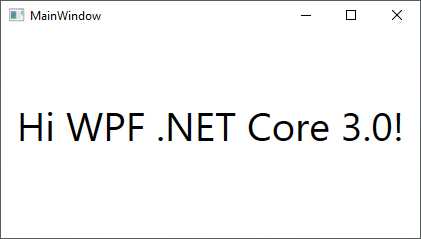
如上图所示:MainWindow调用了IOC注入进来的TextService服务并正确的显示了文字。
谢天谢地,没出bug,其实我想说,这张图为了偷懒,我都是盗的,文末上原文链接。
https://laurentkempe.com/2019/04/18/WPF-and-IOC-on-NET-Core-3-0/
最后
最近事情比较多,都没时间好好的分享文章了。当然,每当我闲下来的时候我就会对所学所用进行相应的总结后进行分享的。只是工作忙的原因,频次越来越低而已。
NET Core 3.0中的WPF
标签:efi EAP str template turn ack inject ted src
原文地址:https://www.cnblogs.com/Leo_wl/p/11106023.html
上一篇:C#中多态的实现