基于Windows 配置 nginx 集群
2020-12-12 21:23
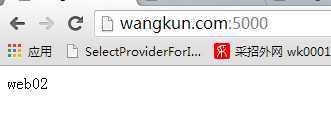
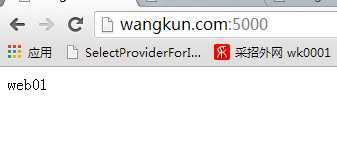
标签:style blog class c code java 1、下载 nginx 下载页面 : http://nginx.org/en/download.html 具体文件: http://nginx.org/download/nginx-1.7.0.zip 2、运行 nginx 解压第一步下载的 nginx-1.7.0.zip 压缩包 解压到 c:/nginx路径 2.1、修改监听端口 由于 80 端口已经配置IIS ,现修改nginx 监听端口 server { listen 80; 修改为 listen 5000; 2.2 、修改 host 修改系统 host (路径:C:\Windows\System32\drivers\etc\HOSTS): 添加配置: 127.0.0.1 wangkun.com 2.3 、启动 cmd 命令窗口 在浏览器中 浏览 http://wangkun.com:5000 即可查看 nginx 欢迎界面 2.4 配置nginx 集群 2.4.1 配置 IIS 站点: web1: 127.0.0.1:5069 web2: 127.0.0.1:5070 2.4.2 调整nginx配置 2.4.3 验证: 通过浏览器浏览: http://wangkun:5000 现在停止 IIS web01
,则浏览的页面就一直显示 web02 备注: 在生产环境中 ,可以将nginx
部署在linux上 ,有独立的linux nginx 主机转化请求 映射到 windows IIS上 基于Windows 配置 nginx 集群,搜素材,soscw.com 基于Windows 配置 nginx 集群 标签:style blog class c code java 原文地址:http://www.cnblogs.com/rhythmK/p/3731567.html
cd C:\nginx// 启动 nginxstart nginx/* 常用命令
nginx -s stop // 停止nginx
nginx -s reload // 重新加载配置文件
nginx -s quit // 退出nginx
*/
events { worker_connections 1024;
}http { include mime.types;
default_type application/octet-stream;
upstream wangkun.com
{
server 127.0.0.1:5069;
server 127.0.0.1:5070;
}
server
{
listen 5000;
server_name localhost;
location / {
proxy_pass http://wangkun.com;
proxy_redirect default;
}
error_page 500 502 503 504 /50x.html;
location = /50x.html {
root html;
}
}
}

文章标题:基于Windows 配置 nginx 集群
文章链接:http://soscw.com/index.php/essay/23687.html