python自动化管理Ansible(Ansible,Fabric,hosts)
2021-01-16 07:14
标签:ice fabri 内存 描述 setup discover rpm包 l命令 讲解 Ansible是一个简单的自动化运维工具,可完成配置管理、应用部署、服务编排以及其他各种IT需求。Ansible也是一款基于Python语言实现的开源软件,其依赖Jinja2、paramiko和PYYAML这几个Python库。 在这一小节,我们将首先介绍Ansible的优点,然后比较Ansible与Fabric之间的差异。 Ansible作为配置工具,通常与Puppet、Chef、Saltstack进行比较,如下所示: 从发布时间来看,Ansible完全没有优势,那么,是什么特性让Ansible进入了工程师的视野,并且逐步获得青睐呢?我们需要了解一下Ansible有哪些优点。 Ansible作为自动化系统运维的一大利器,在构建整个体系过程中有着举足轻重的地位。其简单易用、易于安装、功能强大、便于分享、内含大量模板等都是它的魅力所在,再加上易封装、接口调用方便,Ansible正在被越来越多的大公司采用。 简单来说,Fabric像是一个工具箱,提供了很多好用的工具,用于在远程服务器执行命令。而Ansible则提供了一套简单的流程,只需要按照它的流程来做就能轻松完成任务。这就像是库和框架的关系一样,其中,Fabric是库,Ansible是框架。 在这一小节我们介绍Ansible的安装与基本使用,然后在接下来的章节中介绍Ansible的高级用法。 Ansible不需要安装客户端,因此,相对于其他配置管理工具,Ansible的安装简单得多,只需要在控制端安装Ansible即可。Ansible使用Python语言开发,我们可以直接使用pip进行安装,也可以使用Linux下的包管理工具(如yumI、apt-get)进行安装。如下所示: 检查Ansible是否安装成功,如下所示: Ansible依赖Python与SSH,因此服务器需要安装SSH和Python 2.5或2.5以上版本的Python。SSH和Python是大多数操作系统中默认安装的软件,这进一步降低了Ansible安装部署的难度。除了SSH和Python以外,服务器端不需要再预装任何软件。在控制端(Ansible命令运行的那台机器)需要安装Python 2.6或更高版本的Python程序,且Ansible的控制端只能运行在Linux下。 这些可执行程序将在之后使用时进行详细介绍。 为了更好的理解Ansible,在介绍Ansible的使用之前,我们先看一下Ansible的架构图,如下所示: 在Ansible中,用户通过编排引擎操作主机。其中,主机可以通过配置文件配置,调用云计算的接口获取,或者访问CMDB中的数据库。Ansible的编排引擎有Inventory、API、Modules(模块)和Plugins组成。Ansible的典型用法是:工程师将需要远程服务器执行的操作写在Ansible Playbook中,然后使用Ansible执行Playbook中的操作。 使用Ansible操作远程服务器时,首先需要确定的是操作哪些服务器,然后再确定对这些服务器执行哪些操作。 Ansible会默认读取/etc/ansible/hosts文件中配置的远程服务器列表。在我们这一小节,/etc/ansible/hosts文件内容如下: Ansible中存在一个名为ping的模块,该模块并不是测试服务器的网络是否连接,而是尝试建立SSH连接,以便验证用户的SSH是否已经正确配置。如下所示: 执行成功后,将会在~/.ssh目录下生成2个文件:id_rsa和id_rsa.pub Ansible默认使用当前用户和默认的22端口号与远程服务器建立SSH连接。如果需要使用其他用户,或者使用非默认的SSH端口号,可以在host之后增加用户名和端口号的配置。如下所示: 一般情况下,工作环境的服务器ssh用户名和ssh端口号都是相同的。如果我们有很多的远程服务器,每一台服务器都需要配置ansible_user或ansible_port参数,如果依然使用前面的配置方式进行配置,会显得非常冗余。对于这种情况,可以在Ansible配置文件中修改相应的配置。 Ansible默认使用/etc/ansible/ansible.cfg文件,我们可以在ansible.cfg中设定一些默认值,这样就需要对同样的内容输入多次。如下所示: ping模块是Ansible中最简单的模块,而command模块则是工程师最熟悉的模块。command模块的作用非常简单,就是在服务器中执行shell命令。在Ansible中,通过-m参数指定模块名称,通过-a参数指定模块的参数。因此,使用command模块在远程服务器执行shell命令的语句如下: command是Ansible中的默认模块,当我们省略-m参数时,默认使用command模块。如下所示: 大部分情况下,Ansible的模块包含多个参数,参数使用“key=value”的形式表示,各个参数之间使用空格分隔。如下所示: 前面通过Ansible命令执行操作的方式,称为ad-hoc。我们可以使用ad-hoc来执行非常简单的操作,也可以使用ad-hoc的方式来学习模块的使用方式。但是,在实际的生产环境中,我们一般将远程服务器需要做的事情写在一个YAML配置文件中。 例如,将本地文件拷贝到远程服务器并修改文件所有者,然后安装软件的功能,写在YAML的配置文件中以后,其内容如下: 这个YAML文件称为Ansible Playbook。Playbook中首先包含了一些声明信息,如hosts关键字声明该Playbook应用的服务器列表,become和become_method表示在远程服务器通过sudo执行操作。Playbook最后包含了若干个task,每一个task对应于前面的一条ad-hoc命令。具体执行时,多个task按序执行。如果你不能完全理解YAML文件,现在只需要对Ansible的执行方式有一个认识即可。后续小节将会详细讲解如何编写Ansible Playbook。 有了Playbook以后,通过ansible-playbook命令执行,如下所示: 上面这条命令的效果与上一小节中多条ad-hoc命令的效果是一样的。关于YAML的语法,如何编写playbook以及模块的使用方式等,将在本章的后续小节中进行详细讲解。在这一小节中,我们只需要知道Ansible有两种操作远程服务器的方式,分别是:ad-hoc与Playbook。 在Ansible中,将可管理的服务器的集合称为Inventory。因此,Inventory管理便是服务器管理。这一节中,我们将会详细讨论Inventory管理。 我们已经演示了Ansible如何对远程服务器执行操作,可以看到,Ansible在执行操作是,首先需要确定对哪些服务器执行操作。默认情况下,Ansible读取/etc/ansible/hosts文件中的服务器配置,获取需要操作的服务器列表。Ansible定义与获取服务器列表的方式比这个要灵活得多。 在Ansible中,有3种方式制定hosts文件,分别是: 例如:当前系统中除了/etc/ansible/hosts文件以外,在test用户的home目录下也存在一个名为hosts的文件,该hosts文件的内容如下所示: 使用/etc/ansible/hosts文件 -i选项指定hosts文件 修改ansible.cfg文件,添加inventory选项,指定hosts文件的路径 Ansible还支持通配符和正则表达式等更灵活的方式来匹配服务器。 Ansible官方给出了ansible命令的语法格式: 例如:重启所有web服务器中的Apache进程: 远程服务器匹配规则: 在hosts文件中,除了定义行为参数以外,还可以定义普通的变量,以便在不同的服务器中使用不同的配置。比如:可以在2台服务器中分别启动MySQL,1台服务器的MySQL的端口是3306,另一台服务器MySQL的端口是3307。定义普通参数和定义行为参数的方法是一样的,只是行为参数的名字有Ansible预先定义,普通参数的名称有我们自己定义。在Ansible中,参数名必须为字母、数字和下划线的组合,并且首字符必须为字母。 假定,我们在/etc/ansible/hosts文件中为不同的服务器定义一个相同的变量名,但是取值不同。如下所示: 在测试环境中,我们可以通过echo方式显示变量的值。如下所示: 如果test组下的两个服务器mysql_port变量取值相同,我们也可以通过组的名称加上“:vars”后缀来定义变量,如下所示: 随着业务的发展,管理的hosts文件越来越大,使用的变量越来越多了,依然使用一个hosts文件管理服务器和变量的话,就会逐渐变得难以管理。 Ansible提供了更好的方法来管理服务器和群组的变量,即:为每个服务器和群组创建独立的变量文件。其定义方式是,将组的变量存放在一个名为group_vars命令下,目录下的文件名与组的名称相同,文件的扩展名可以是.yml或.yaml,也可以没有任何扩展名。服务器的变量存放在一个名为host_vars目录下,该目录下的文件名为服务器的名称。 Ansible将依次在Playbook所在的目录、hosts文件所在的目录和/etc/ansible目录下寻找group_vars目录和host_vars目录。目前,假设group_vars目录和host_var目录都位于/etc/ansible目录下。 对于我们前面定义mysql_port变量的例子,将变量存放在独立的文件以后,/etc/ansible目录的结构如下: 其中,test.yaml文件定义了hosts文件中test组的变量,127.0.0.1.yaml文件定义了hosts文件中127.0.0.1这台服务器使用的变量。如:test.yaml文件的内容如下: 注意:我们在hosts文件中定义变量时,使用的是“var = value”格式定义。将变量保存在一个独立的文件时,使用的是“var:value”格式定义。这是因为Ansible解析这两个文件时,认为hosts是一个ini格式的文件,而保存变量的文件是一个YAML格式的文件。 Python标准库没有包含解析YAML格式的库,需要安装第三方的PyYAML库。 使用YAML表示数组非常容易,只需要用“-”将元素按序列出即可。假设我们有下面这样一个YAML文件,文件的内容保存在一个名为data.yaml的文件中,如下所示: 在YAML中,对象以“key:value”的形式进行定义,如下所示: YAML中可以使用多种方式制定布尔值,如以上YAML文件中的“True”、“TRUE”、“false”,转换为Python代码后,对变量的取值进行了格式化。 YAML中的对象和数组是可以任意嵌套的,如下所示: 在YAML中定义字符串的时候,不需要使用单引号或者双引号,直接将字符串写在文件中即可。如下所示: 如果字符串中包含了特殊字符,需要使用双引号包含起来。比如:字符串中包含冒号。冒号是YAML中的特殊字符,因此需要使用双引号包含起来。 如果字符串内容比较长,可以使用“>”来折叠换行。 将以上YAML文件转换为Python的内部对象后,“Foo”和“Bar”都是字符串的一部分。 Ansible中的模块是幂等的,也就是说,多次执行相同的操作,只有第一次会起作用。这也是在编写自定义的Ansible模块的时候需要注意的。 Ansible模块非常多,如果以模块的功能进行分类的话,可以分为以下模块: 查看Ansible模块帮助信息,如下所示: 查看指定模块的帮助信息,如下所示: Ansible提供的功能越丰富,所需要的模块也就越多。默认情况下,模块存储在/usr/share/ansible目录中。 command模块在执行Linux命令时,不能使用管道。如下所示: 执行后报错如下: 如果执行的命令需要使用管道,可以使用raw模块,如下所示: raw模块相当于使用ssh直接执行Linux命令,不会进入到Ansible的模块的子系统中。 除了使用raw模块以外,也可以使用shell模块,如下所示: shell模块还可以执行远程服务器上的shell脚本,其中,脚本文件的路径需要使用绝对路径,如下所示: 引用文件的方式 file模块主要用于对远程服务器上的文件(包括链接和目录)进行操作,包括修改文件的权限、修改文件的所有者、创建文件、删除文件等。 copy模块用来将主控节点的文件或者目录拷贝到远程服务器上,类似于Linux下的scp命令。但是,copy模块比scp命令更强大,在拷贝文件到远程服务器上的同时,也可以设置文件在远程服务器上的权限和所有者。 copy模块的使用示例: copy模块中重要选项: user模块请求的是useradd、userdel、usermod这三个指令,group模块请求的是groupadd、groupdel、groupmod这三个指令。 user/group模块的使用示例: user/group模块重要选项: yum模块可以帮助我们在远程主机上通过yum源管理软件包。 yum模块使用示例: yum模块重要选项: 从互联网上下载数据到本地,作用类似于Linux下的curl命令。get_url模块比curl命令更加灵活,可以控制下载以后的数据所有者、权限以及检查下载数据的checksum等。 get_url模块使用示例: 为了进行get_url测试,使用命令“python -m http.server”启动一个下载服务器,将下载服务器中的文件地址传给url选项。 get_url模块重要选项: unarchive模块用于解压文件,其作用类似于Linux下的tar命令。默认情况下,unarchive的作用是将控制节点的压缩包拷贝到远程服务器,然后进行解压。 unarchive模块使用示例: unarchive模块重要选项: git模块非常好理解,就是在远程服务器执行git相关的操作。该模块一般应用于需要源码安装软件时,从github这样的源码托管网站将软件下载到本地,然后执行命令进行源码安装。需要注意的是,该模块依赖于git软件,因此在使用该模块前应该使用yum模块先安装git软件。 git模块的使用示例: git模块常用选项: stat模块用于获取远程服务器上的文件信息,其作用类似于Linux下的stat命令。stat模块可以获取atime、ctime、mtime、checksum、size、uid、gid等信息。 stat只有path这一个必选选项,用来指定文件或目录的路径。stat模块的使用方法如下: 顾名思义,cron是管理Linux下计划任务的模块。 cron模块的使用示例: 该模块包含以下重要选项:Ansible的作者是Michael Dehaan,Michael Dehaan同时也是知名软件Cobber的作者和Func的共同作者。Michael Dehaan与2012年创建了AnsibleWorks公司,之后改名为Ansible公司。Ansible公司与2015年10月被红帽公司(Red Hat)收购。1、Ansible的优点
工具
发布时间
语言
架构
协议
Puppet
2005年
Ruby
C/S
http
Chef
2008年
Ruby
C/S
http
Saltstack
2012年
Python
C/S(可无Client)
ssh/zmq/raet
Ansible
2013年
Python
无Client
ssh
Ansible具有以下几个优点:
(1)部署简单
只需要在主控端部署Ansible环境,被控端无须做任何操作。换句话说,在安装Ansible时,远程服务器无烦安装任何依赖。因此,相对于其他配置管理器,Ansible安装部署非常简单,省去了客户端的安装。在数千台规模的大型数据中心意味着少了一些路由和安全策略的配置,省去了很多不必要的麻烦。(2)基于ssh进行配置管理,充分利用现成的机制
Ansible不依赖与客户端,直接使用ssh进行配置管理,在Ansible早期版本中,默认使用paramiko进行配置管理,从Ansible1.3版本开始,Ansible默认使用OpenSSH实现个服务器间通信。(3)Ansible不需要守护进程
因为Ansible依赖OpenSSH进行通信,不需要安装客户端,因此服务端也不需要像其他配置管理一样使用一个守护进程。Ansible的安装和维护都变得更加简单,系统更加安全可靠。(4)日志集中存储
所有操作日志都存储在Ansible发起服务器,可以采用自定义的格式,这样可以很方便地知晓哪些服务器操作有问题,哪些已经成功,也便于日后追溯。(5)Ansible简单易用
Ansible和其他配置管理工具一样,运行一个部署命令就可以完成应用部署,使用非常简单。此外,Ansible使用YAML语法管理配置,YAML本身是一种可读性非常强的标记语言,工程师几乎像阅读英文一样阅读YAML的配置文件。因为Ansible使用YAML管理配置,所以使用Ansible不需要使用者具有任何编程背景。运维自动化工具本身是用来简化运维工作的,如果本身比较复杂(如Puppet),甚至需要一定的程序开发能力,那么就会增加使用者的使用难度和犯错的概率。(6)Ansible功能强大
Ansible通过模块来实现各种功能,目前,Ansible已经有了950多个模块,工程师也可以使用任何语言编写自定义的Ansible模块。(7)Ansible设计优秀,便于分享
Ansible使用role组织Playbook,并提供了分享role的平台(galaxy.ansible.com),便于大家分享和复用。充分使用role,可以编写可读性更强的配置文件。使用开源的role,能够有效节省编写Playbook的时间。(8)Ansible对云计算和大数据平台都有很好的支持
从Ansible的模块列表可以看到,Ansible包含了大量与云服务、AWS、OpenStack、Docker等相关的模块。并且,Ansible便于扩展,当出现新事务时可以根据需要编写自定义的模块。2、Ansible与Fabric之间的比较
(1)Fabric与Ansible之间的共同点
1.都是基于paramiko开发;
2.都使用ssh和远程服务器通讯,不需要在远程服务器上安装客户端。
(2)Fabric与Ansible之间的主要区别
1. Fabric简单,Ansible复杂。因此,Fabric学习成本低,Ansible的学习成本高;
2. Fabric通过ssh执行简单的命令,Ansible将模块拷贝到远程服务器后执行,执行完成以后删除模块;
3. 使用Fabric需要具有Python编程背景,使用Ansible则不需要;
4. Fabric对常用的管理操作和ssh连接操作进行了封装,工程师通过编写简单的代码就能完成要做的事情。Ansible不需要工程师编写任何代码,直接编写YAML格式的配置文件来描述要做的事情;
5. Fabric提供了基本的接口,业务逻辑需要用户自己实现;Ansible提供了大量的模块,用户只需要学习模块的用法即可完成复杂的任务。
二、Ansible使用入门
ansible使用原则:
关于hosts文件:
1、安装Ansible
[root@python ~]# pip3 install ansible[root@python ~]# ansible --version
ansible 2.9.9
config file = /etc/ansible/ansible.cfg
configured module search path = [u‘/root/.ansible/plugins/modules‘, u‘/usr/share/ansible/plugins/modules‘]
ansible python module location = /usr/lib/python2.7/site-packages/ansible
executable location = /usr/bin/ansible
python version = 2.7.5 (default, Aug 7 2019, 00:51:29) [GCC 4.8.5 20150623 (Red Hat 4.8.5-39)]
与其他库和工具不同的是,Ansible包含了多个工具。安装完Ansible以后,控制端会增加以下几个可执行程序:ansible
ansible-doc
ansible-playbook
ansible-vault
ansible-console
ansible-galaxy
ansible-pull2、Ansible的架构

3、Ansible的运行环境
[root@python ~]# mkdir /etc/ansible
[root@python ~]# vim /etc/ansible/hosts

[test]
127.0.0.1
192.168.1.80[root@python ~]# ansible test -m ping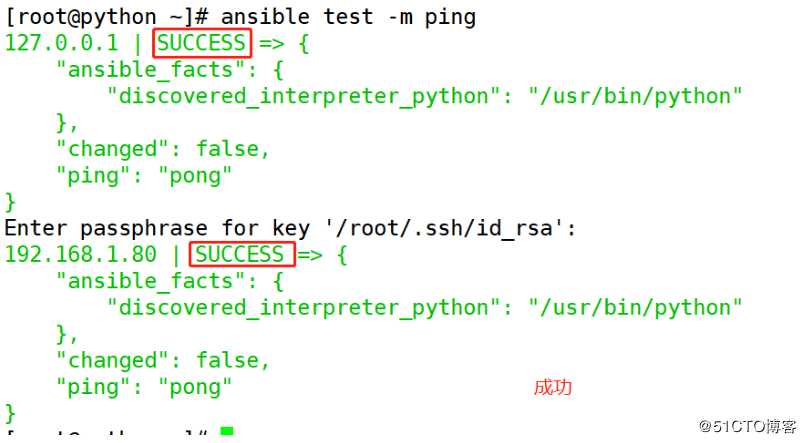
修改test的权限
[root@python ~]# chmod  755 /etc/sudoers
[root@python ~]# vim /etc/sudoers
test    ALL=(ALL)       ALL                   #92行左右添加
[root@python ~]# vim /etc/ansible/hosts

[test]
127.0.0.1 ansible_user=root ansible_port=22
192.168.1.80
再次测试一下
root@python ~]# ansible test -m ping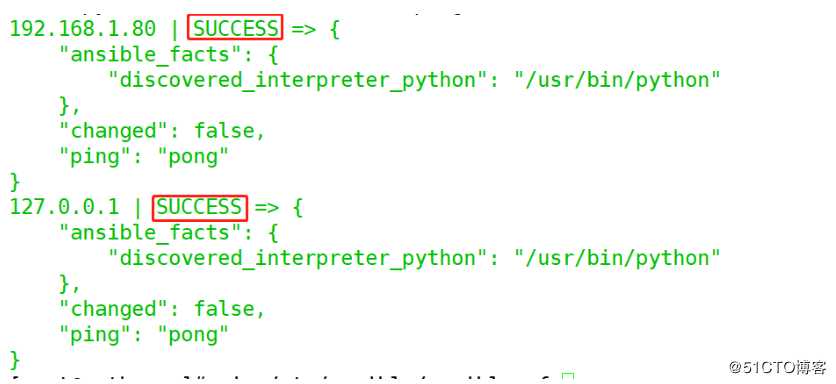
常见错误解决方案如下:
(1)ansible管理节点生成ssh-key
[root@192 ~]# ssh-keygen (2)添加目标节点的ssh认证信息
[root@192 ~]# ssh-copy-id root@47.100.98.242
[root@192 ~]# ssh-copy-id root@192.168.79.133
(3)测试
[root@192 ~]# ansible test -m ping
192.168.79.133 | SUCCESS => {
    "ansible_facts": {
        "discovered_interpreter_python": "/usr/bin/python"
    },
    "changed": false,
    "ping": "pong"
}
47.100.98.242 | SUCCESS => {
    "ansible_facts": {
        "discovered_interpreter_python": "/usr/bin/python"
    },
    "changed": false,
    "ping": "pong"
}[root@192 ~]# cat /etc/ansible/hosts
[test]
192.168.79.133 ansible_user=test ansible_port=22
47.100.98.242 ansible_user=laoyu ansible_port=80[root@192 ~]# cat /etc/ansible/ansible.cfg
[defaults]
remote_port = 2090
remote_user = test4、Ansible的ad-hoc模式
[root@python ~]# ansible test -m command -a "hostname"
127.0.0.1 | CHANGED | rc=0 >>
python
192.168.1.80 | CHANGED | rc=0 >>
python
[root@python ~]# ansible test -m command -a "whoami"
192.168.1.80 | CHANGED | rc=0 >>
root
127.0.0.1 | CHANGED | rc=0 >>
root[root@python ~]# ansible test -m command -a "whoami"
192.168.1.80 | CHANGED | rc=0 >>
root
127.0.0.1 | CHANGED | rc=0 >>
root(1)创建ansible.cfg文件
[root@python ~]# vim /etc/ansible/ansible.cfg
[defaults]
remote_port = 22
remote_user = root
再次测试一下
[root@python ~]# ansible test -m ping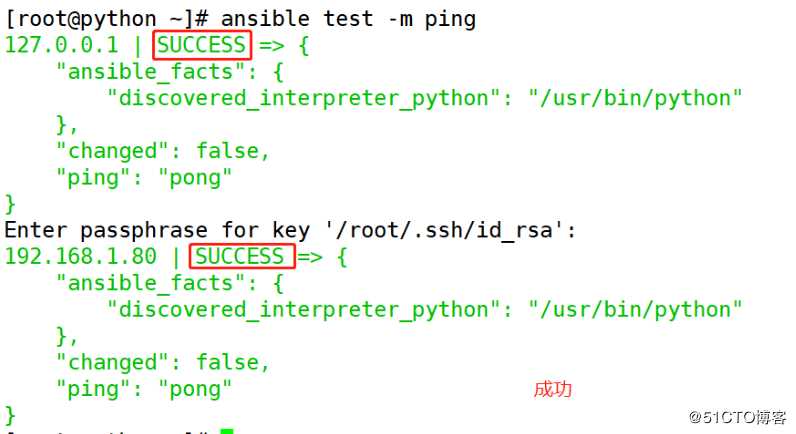
[root@python ~]# ansible test -m command -a "hostname"
(2)将本地文件拷贝到服务器
[root@python ~]# cd /tmp/
[root@python tmp]# mkdir abc
[root@python tmp]# cd abc/
[root@python abc]# ls
nginx.conf  restart.sh     #要拷贝的文件
进行拷贝
[root@python abc]# ansible test -m copy -a "src=/tmp/abc/nginx.conf dest=/opt/nginx.conf"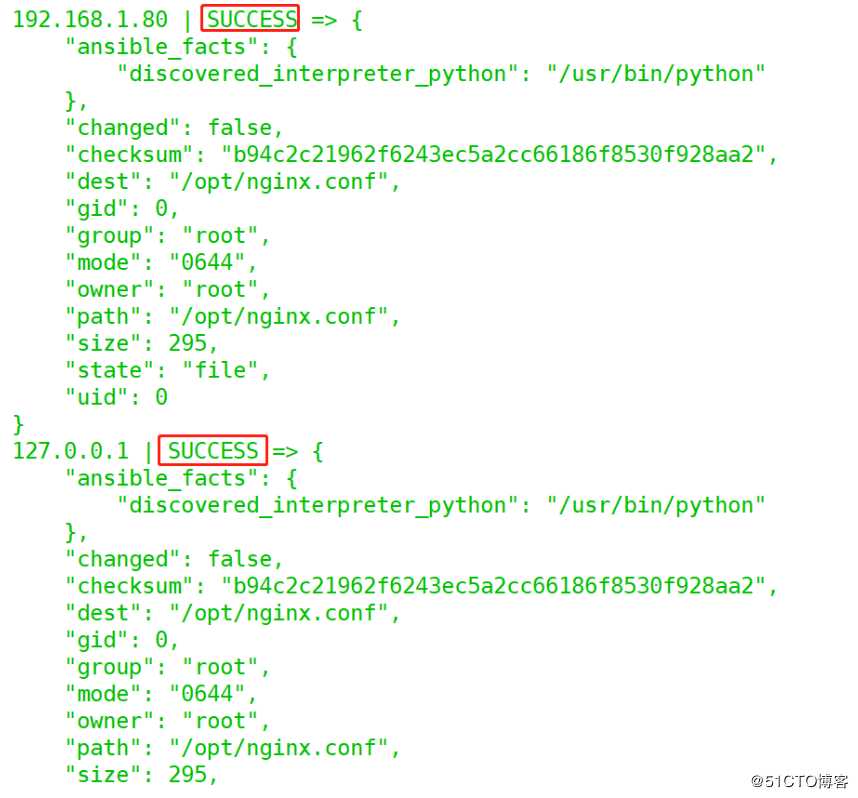
查看一下是否有拷贝的文件
[root@python abc]# ls /opt/ | grep nginx.conf
nginx.conf
创建剧本(拷贝)
[root@python abc]# vim test_playbook.yml

---
- hosts: test
  become: yes               #是否支持root权限
  become_method: sudo
  tasks:                    #任务
  - name: copy file         #描叙
    copy: src=/opt/nginx.conf dest=/tmp/abc/nginx.conf #拷贝的

  - name: package install   #描叙
    yum: name={{item}} state=present        #安装的
    with_items:
      - tmux
执行一下
[root@python abc]# ansible-playbook test_playbook.yml 
查看是否有拷贝的文件
[root@python abc]# ls | grep nginx.conf
nginx.conf
(3)在远程服务器中安装软件
[root@python abc]# ansible test -m yum -a "name=tmux state=present" -become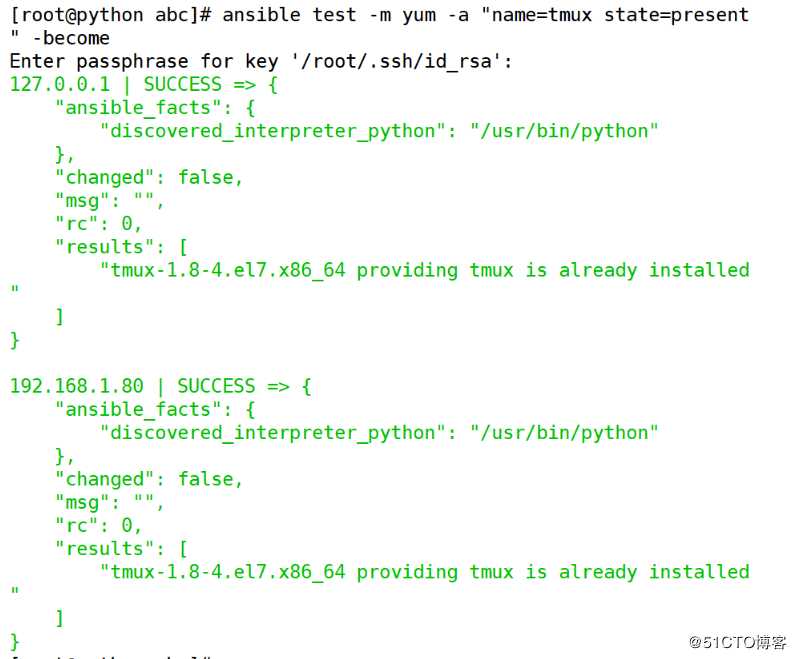
5、使用playbook控制服务器
[root@192 ~]# cat test_playbook.yml
---
- hosts: test
  become: yes
  become_method: sudo
  tasks:
    - name: copy file
      copy: src=~/s.txt dest=/opt/s.txt

    - name: change mode
      file: dest=/opt/s.txt mode=500 owner=root group=root

    - name: ensure packages installed
      yum: name={{item}} state=present
      with_items:
        - git
- tmux[root@192 ~]# ansible-playbook test_palybook.yml
PLAY [test] ****************************************************************************************************************
TASK [Gathering Facts] *****************************************************************************************************
ok: [47.100.98.242]
ok: [127.0.0.1]
TASK [copy file] ***********************************************************************************************************
ok: [127.0.0.1]
ok: [47.100.98.242]
TASK [change mode] *********************************************************************************************************
ok: [127.0.0.1]
ok: [47.100.98.242]
TASK [ensure packages installed] *******************************************************************************************
[DEPRECATION WARNING]: Invoking "yum" only once while using a loop via squash_actions is deprecated. Instead of using a
loop to supply multiple items and specifying `name: "{{item}}"`, please use `name: [‘git‘, ‘tmux‘]` and remove the loop.
This feature will be removed in version 2.11. Deprecation warnings can be disabled by setting deprecation_warnings=False in
ansible.cfg.
changed: [47.100.98.242] => (item=[‘git‘, ‘tmux‘])
changed: [127.0.0.1] => (item=[‘git‘, ‘tmux‘])
PLAY RECAP *****************************************************************************************************************
127.0.0.1 : ok=4 changed=1 unreachable=0 failed=0 skipped=0 rescued=0 ignored=0
47.100.98.242 : ok=4 changed=1 unreachable=0 failed=0 skipped=0 rescued=0 ignored=0
[root@desktop-kh5f5dc ~]# 三、Inventory管理
1、hosts文件位置
[test]
127.0.0.1
192.168.1.80[root@python ~]# ansible test --list-hosts
hosts (2):
127.0.0.1
192.168.1.80[root@python ~]# ansible test -i hosts --list-hosts
hosts (2):
127.0.0.1
192.168.1.80[root@python ~]# vim /etc/ansible/ansible.cfg
[defaults]
remote_user = root
remote_port = 22
inventory = /etc/ansible/hosts2、灵活定义hosts文件内容
(1)分组定义服务器
[root@python ~]# vim /etc/ansible/hosts

[demo]
127.0.0.1
[xgp]
192.168.1.80
[wsd]
192.168.1.60
1)查看单个分组的服务器列表
[root@python ~]# ansible demo --list-hosts
  hosts (1):
    127.0.0.1
[root@python ~]# ansible xgp --list-hosts
  hosts (1):
    192.168.1.80
[root@python ~]# ansible wsd --list-hosts
  hosts (1):
    192.168.1.60
[root@python ~]# ansible all --list-hosts
  hosts (3):
    127.0.0.1
    192.168.1.80
    192.168.1.60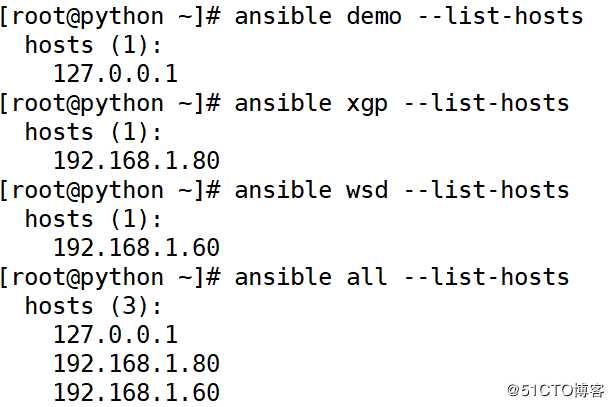
2)查看多个分组的服务器列表(冒号分隔组名)
[root@python ~]# ansible xgp:wsd -i hosts --list-hosts
  hosts (2):
    192.168.1.80
    192.168.1.60
3)使用all和星号匹配服务器
[root@python ~]# ansible ‘*‘ -i hosts --list-hosts
[root@python ~]# ansible ‘all‘ -i hosts --list-hosts
  hosts (3):
    127.0.0.1
    192.168.1.60
    192.168.1.80
(2)Ansible定义组匹配服务器
[root@python ~]# vim hosts
[demo]
127.0.0.1
[xgp]
192.168.1.80
[wsd]
192.168.1.60
[common:children]
xgp
wsd
查看服务器列表
[root@python ~]# ansible common -i hosts --list-hosts
  hosts (2):
    192.168.1.80
    192.168.1.60
(3)批量定义服务器
[root@python ~]# vim hosts

[demo]
127.0.0.1
[xgp]
192.168.1.80
[1:3].xgp.top
[wsd]
192.168.1.60
[a:d].xgp.top
[common:children]
xgp
wsd
查看服务列表
[root@python ~]# ansible xgp:wsd -i hosts --list-hosts
  hosts (9):
    192.168.1.80
    1.xgp.top
    2.xgp.top
    3.xgp.top
    192.168.1.60
    a.xgp.top
    b.xgp.top
    c.xgp.top
    d.xgp.top
3、灵活匹配hosts文件内容
ansible ansible webservers -m service -a "name=httpd state=restarted"
ansible web*.duxuejun.com =-m service -a "name=httpd state=restarted"
匹配规则
含义
192.168.1.10 或者 web.duxuejun.com
匹配目标IP地址或服务器名称,如果含有多个IP或服务器,使用“:”分隔
webservers
匹配目标为webservers,多个分组使用“:”分隔
all或者"*"
匹配所有的服务器
webservers:!dbservers
匹配在webservers中,不在dbservers组中的服务器
webservers:&dbservers
匹配同时在webservers组以及dbservers组中的服务器
*.duxujun.com或192.168.*
使用通配符进行匹配
webservers[0],webservers[1:],webservers[-1]
使用索引或切片操作的方式匹配组中的服务器
~(web|db).*.duxuejun.com
以~开头的匹配,表示使用正则表达式匹配
4、Inventory行为参数
参数                             默认值                说明
ansible_ssh_host                主机的名字            ssh的目的主机或ip
ansible_ssh_port                22                  ssh目的端口
ansible_ssh_user                root                ssh登陆使用的用户名
ansible_ssh_pass                none                ssh认证所使用的密码
ansible_connection              smart               Ansible使用何种连接模式连接到主机
ansible_ssh_private_key_file    none                ssh认证所使用的私钥
ansible_shell_type              sh                  命令所使用的shell
ansible_python_interpreter      /usr/bin/python     主机上的python解释器
ansible_*_interpreter           none                类似python解释器的其他语言版
5、改变行为参数的默认值
可以在ansible.cfg文件的[defaults]部分更改一些行为参数的默认值
ansible.cfg文件                 inventory文件
ansible_ssh_user                remote_user
ansible_ssh_port                remote_port
ansible_ssh_private_key_file    private_key_file
ansible_shell_type              executable
6、定义服务器变量
(1)变量的取值不同
[root@python ~]# vim hosts

[test]
192.168.1.60 ansible_port=22
192.168.1.80 ansible_port=22[root@python ~]# ansible test -i ./hosts -a ‘echo {{ansible_port}}‘
192.168.1.60 | CHANGED | rc=0 >>
22
192.168.1.80 | CHANGED | rc=0 >>
22(2)变量的取值相同
[root@python ~]# vim hosts

[test]
192.168.1.40
192.168.1.80

[test:vars]
ansible_port = 22[root@192 ansible]# tree
.
├── ansible.cfg
├── group_vars
│?? └── test.yaml
├── hosts
└── host_vars
└── 127.0.0.1.yaml[root@192 ansible]# cat group_vars/test.yaml
ansible_port: 22[root@python ~]# ansible test -i ./hosts -a ‘echo {{ansible_port}}‘
192.168.1.40 | CHANGED | rc=0 >>
22
192.168.1.80 | CHANGED | rc=0 >>
22四、YAML语法
1、YAML语法规则
1. YAML文件第一行为“---”,表示这是一个YAML文件;
2. YAML中字段大小写敏感;
3. YAML与Python一样,通过缩进来表示层级关系;
4. YAML的缩进不允许使用Tab键,只允许使用空格,且空格的数目不重要,只要相同层级的元素左侧对齐即可;
5. “#”表示注释,从这个字符一直到行尾都会被解析器忽略
2、YAML支持的3中格式数据
1. 对象:键值对的集合,有称为映射,类似于Python中的字典;
2. 数组:一组按次序排列的值,有称为序列(sequence),类似于Python的列表;
3. 纯量(scalars):单个的、不可再分的值,比如:字符串、布尔值与数字。
3、安装PyYAML库
pip3 install -i https://pypi.douban.com/simple/ PyYAML4、定义与解析YAML文件
(1)数组格式
---
# 一个美味的水果列表
- Apple
- Orange
- Strawberry
- Mango
解析结果:
In [1]: import yaml

In [2]: with open(‘data.yaml‘) as f:
   ...:     print(yaml.load(f))
   ...:
[‘Apple‘, ‘Orange‘, ‘Strawberry‘, ‘Mango‘]
(2)对象
---
# 一个职工的记录
name: 爱运维
job: devops
skill: Elite
age: 23
knowoop: True
likes_emacs: TRUE
users_cvs: false
解析结果:
In [3]: with open(‘dev.yaml‘) as f:
   ...:     print(yaml.load(f))
   ...:
{‘name‘: ‘爱运维‘, ‘job‘: ‘devops‘, ‘skill‘: ‘Elite‘, ‘age‘: 23, ‘knowoop‘: True, ‘likes_emacs‘: True, ‘users_cvs‘: False}(3)对象和数组嵌套
---
# 一个职工的记录
name: 爱运维
job: devops
skill: Elite
age: 23
knowoop: True
likes_emacs: TRUE
users_cvs: false
foods:
    - Apple
    - Orange
    - Strawberry
    - Mango
languages:
    ruby: Elite
    python: Elite
    shell: Lame
(4)注意事项
str: this is a stringfoo: "somebody said I should put a colon here: so I did"that: >
Foo
Bar
{‘that‘: ‘Foo Bar\n‘}五、Ansible模块
1、Ansible的模块工作原理
1. 将模块拷贝到远程服务器
2. 执行模块定义的操作,完成对服务器的修改
3. 在远程服务器删除模块2、模块列表与帮助信息
云模块
命令模块
数据库模块
文件模块
资产模块
消息模块
监控模块
网络模块
通知模块
包管理模块
源码控制模块
系统模块
单元模块
web设施模块
Windows模块
……[root@python ~]# ansible-doc -l[root@python ~]# ansible file
[WARNING]: Could not match supplied host pattern, ignoring: file
[WARNING]: No hosts matched, nothing to do
usage: ansible [-h] [--version] [-v] [-b] [--become-method BECOME_METHOD] [--become-user BECOME_USER] [-K] [-i INVENTORY]
[--list-hosts] [-l SUBSET] [-P POLL_INTERVAL] [-B SECONDS] [-o] [-t TREE] [-k]
[--private-key PRIVATE_KEY_FILE] [-u REMOTE_USER] [-c CONNECTION] [-T TIMEOUT]
[--ssh-common-args SSH_COMMON_ARGS] [--sftp-extra-args SFTP_EXTRA_ARGS] [--scp-extra-args SCP_EXTRA_ARGS]
[--ssh-extra-args SSH_EXTRA_ARGS] [-C] [--syntax-check] [-D] [-e EXTRA_VARS] [--vault-id VAULT_IDS]
[--ask-vault-pass | --vault-password-file VAULT_PASSWORD_FILES] [-f 3、常用的Ansible模块
(1)ping
[root@python ~]# ansible test -m ping
192.168.1.40 | SUCCESS => {
    "ansible_facts": {
        "discovered_interpreter_python": "/usr/bin/python"
    },
    "changed": false,
    "ping": "pong"
}
Enter passphrase for key ‘/root/.ssh/id_rsa‘:
192.168.1.80 | SUCCESS => {
    "ansible_facts": {
        "discovered_interpreter_python": "/usr/bin/python"
    },
    "changed": false,
    "ping": "pong"
}
(2)远程命令模块
1)command模块
ansible test -m command -a ‘hostname‘
ansible test -m command -a ‘/sbin/shutdown -t now‘
ansible test -a ‘hostname‘ansible test -m command -a ‘cat /etc/passwd | wc -l‘192.168.1.40 | FAILED | rc=1 >>
cat:无效选项 -- l
Try ‘cat --help‘ for more information.non-zero return code
192.168.1.80 | FAILED | rc=1 >>
cat:无效选项 -- l
Try ‘cat --help‘ for more information.non-zero return code2)raw模块
[root@python ~]#  ansible test -m raw -a ‘cat /etc/passwd | wc -l‘
192.168.1.80 | CHANGED | rc=0 >>
45
Shared connection to 192.168.1.80 closed.

192.168.1.40 | CHANGED | rc=0 >>
44
Shared connection to 192.168.1.40 closed.3)shell模块
[root@python ~]# ansible test -m shell -a ‘cat /etc/passwd | wc -l‘
192.168.1.40 | CHANGED | rc=0 >>
44
192.168.1.80 | CHANGED | rc=0 >>
45ansible test -m shell -a ‘/home/test/test.sh‘统计某个文件有多少行
[root@python ~]# ansible common -m raw -a ‘cat /etc/passwd | wc -l‘
192.168.1.40 | CHANGED | rc=0 >>
43
Shared connection to 192.168.1.40 closed.

192.168.1.80 | CHANGED | rc=0 >>
45
Shared connection to 192.168.1.80 closed.

[root@python ~]# ansible common -m shell -a ‘cat /etc/passwd | wc -l‘
192.168.1.40 | CHANGED | rc=0 >>
43
192.168.1.80 | CHANGED | rc=0 >>
45[root@python ~]# vim test.sh
#!/usr/bin/bash
cat /etc/passwd | wc -l
[root@python ~]# ansible common -m script -a ‘test.sh‘
192.168.1.40 | CHANGED => {
"changed": true,
"rc": 0,
"stderr": "Shared connection to 192.168.1.40 closed.\r\n",
"stderr_lines": [
"Shared connection to 192.168.1.40 closed."
],
"stdout": "43\r\n",
"stdout_lines": [
"43"
]
}
192.168.1.80 | CHANGED => {
"changed": true,
"rc": 0,
"stderr": "Shared connection to 192.168.1.80 closed.\r\n",
"stderr_lines": [
"Shared connection to 192.168.1.80 closed."
],
"stdout": "45\r\n",
"stdout_lines": [
"45"
]
}(3)file
file模块使用示例:
# 创建一个目录
ansible test -m file -a ‘path=/tmp/dd state=directory mode=0o755‘

# 修改文件的权限
ansible test -m file -a "path=/tmp/dd state=touch mode=‘u=rw,g=r,o=r‘"

# 创建一个软链接
ansible test -m file -a ‘src=/tmp/dd dest=/tmp/dd1 state=link owner=root group=root‘

# 修改一个文件的所有者
ansible test -m file -a "path=/tmp/dd owner=root group=root mode=0o644" -become
file模块中重要选项:
1. path: 指定文件/目录的路径
2. recurse: 递归设置文件属性,只对目录有效
3. group: 定义文件/目录的组
4. mode: 定义文件/目录的权限
5. owner: 定义文件/目录的所有者
6. src: 要被链接的源文件路径,只应用于state为link的情况
7. dest: 被链接到的路径,只应用于state为link的情况
8. force: 在两种情况下会强制创建软链接,一种情况是源文件不存在,但之后会建立的情况;另一种情况是目标软链接已经存在,需要先取消了之前的软链接,然后再创建新的软链接,默认取值为no
9. state: 该选项有多个取值,包括directory、file、link、hard、touch、absent。各个取值的含义如下:取值为directory,如果目录不存在,创建目录;取值为file时,即使文件不存在也不会被创建;取值为link时,创建软链接;取值为hard时,创建硬链接;取值为touch时,如果文件不存就创建一个新文件,如果文件或目录已经存在,更新其最后访问时间和修改时间;取值为absent时,删除目录、文件或者链接
创建文件
[root@python ~]# ansible common -m file -a ‘path=/opt/test.md state=touch‘查看一下
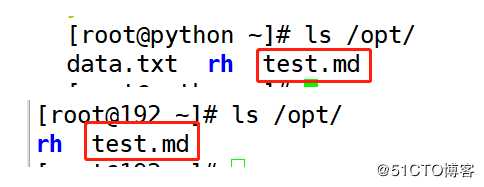
创建目录
[root@python ~]# ansible common -m file -a ‘path=/opt/test mode=0755 state=directory‘查看一下
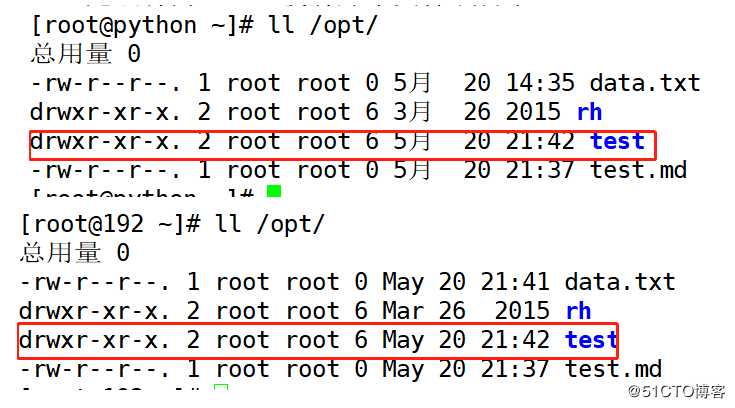
创建并删除文件
[root@python ~]# ansible  common -m file -a ‘path=/opt/abc mode=0640 state=touch‘
//创建
查看一下
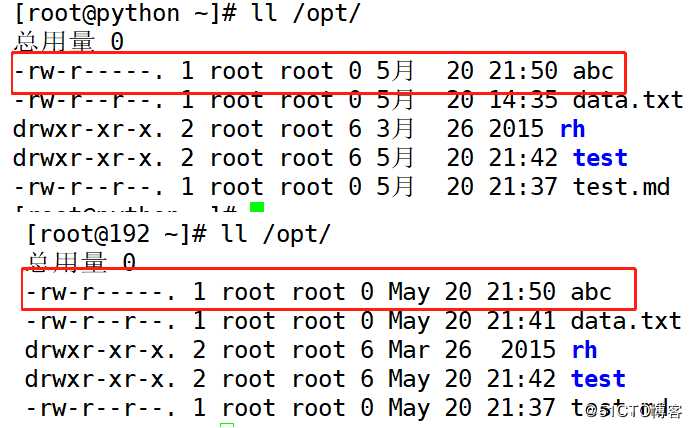
[root@python ~]# ansible common -m file -a ‘path=/opt/abc mode=0640 state=absent‘
创建并改变文件所有者
[root@python ~]# ansible  common -m file -a ‘path=/opt/abc mode=0640 state=touch‘

[root@python ~]# ansible  common -m file -a ‘path=/opt/abc mode=0640 owner=test group=root‘ -become
(4)copy
# 拷贝文件到远程服务器
ansible test -m copy -a ‘src=test.sh dest=/tmp/test.sh‘

# 拷贝文件到远程服务器,如果远程服务器已经存在这个文件,则备份文件
ansible test -m copy -a ‘src=test.sh dest=/tmp/test.sh backup=yes force=yes‘

# 拷贝文件到远程服务器,并且修改文件的所有者和权限
ansible test -m copy -a ‘src=tes.sh dest=/tmp/tes.sh owner=root group=root mode=644 force=yes‘ -become1. src:要复制到远程服务器的文件地址,可以是绝对路径,也可以是相对路径。如果路径时一个目录,将递归复制。在这种情况下,如果使用“/”结尾,则复制目录里的内容;如果没有用“/”来结尾,则将包含目录在内的整个内容复制,类似于rsync
2. dest:文件要复制到的目的地,必须是一个绝对路径,如果源文件是一个目录,那么dest指向的也必须是一个目录
3. force:默认取值为yes,表示目标主机包含该文件,但是内容不同时,会强制覆盖;如果该选项设置为no,只有当目标主机的目标位置不存在该文件时,才会进行复制
4. backup:默认取值为no,如果取值为yes,那么在覆盖之前将原文件进行备份
5. directory_mode:递归设定目录权限,默认为系统默认权限
6. others:所有file模块里的选项都可以在这里使用(5)user/group
# 创建一个用户
ansible test -m user -a ‘name=John comment="John Doe" uid=1239 group=root‘ -become

# 删除一个用户
ansible test -m user -a ‘name=John state=absent‘ -become

# 创建一个用户,并且产生一对密钥
ansible test -m user -a ‘name=John comment="John Doe" generate_ssh_key=yes ssh_key_bits=2048‘ -become

# 创建群组
ansible test -m group -a ‘name=ansible state=present gid=1234‘ -become

# 删除群组
ansible test -m group -a ‘name=ansible state=absent‘ -become1. name:需要操作的用户名或群组名
2. comment:用户的描述信息
3. createhome:创建用户时,是否创建家目录,默认为yes
4. home:指定用户的家目录,需要与createhome选项配合使用
5. group:指定用户的属组
6. uid:设置用户的id
7. gid:设置群组的id
8. password:设置用户的密码
9. state:是创建用户或群组,还是删除用户后群组,取值包括present和absent
10. expires:用户的过期时间
11. shell:指定用户的shell环境(6)yum
# 安装软件包
ansible?test?-m?yum?-a?‘name=nginx?disable_gpg_check=yes‘
ansible?test?-m?yum?-a?‘name=nginx?state=present?disable_gpg_check=yes‘
ansible?test?-m?yum?-a?‘name=nginx?state=installed?disable_gpg_check=yes‘
ansible?test?-m?yum?-a?‘name=nginx?state=latest?disable_gpg_check=yes‘

# 卸载软件包
ansible?test70?-m?yum?-a?‘name=nginx?state=absent‘
ansible?test70?-m?yum?-a?‘name=nginx?state=removed‘1. name:必须参数,用于指定需要管理的软件包,比如nginx
2. state:用于指定软件包的状态 ,默认值为present,表示确保软件包已经安装,除了present,其他可用值有installed、latest、absent、removed,其中installed与present等效,latest表示安装yum中最新的版本,absent和removed等效,表示删除对应的软件包
3. disable_gpg_check:用于禁用对rpm包的公钥gpg验证,默认值为no,表示不禁用验证,设置为yes表示禁用验证,即不验证包,直接安装,在对应的yum源没有开启gpg验证的情况下,需要将此参数的值设置为yes,否则会报错而无法进行安装
4. enablerepo:用于指定安装软件包时临时启用的yum源,假如你想要从A源中安装软件,但是你不确定A源是否启用了,你可以在安装软件包时将此参数的值设置为yes,即使A源的设置是未启用,也可以在安装软件包时临时启用A源
5. disablerepo:用于指定安装软件包时临时禁用的yum源,某些场景下需要此参数,比如,当多个yum源中同时存在要安装的软件包时,你可以使用此参数临时禁用某个源,这样设置后,在安装软件包时则不会从对应的源中选择安装包
6. enablerepo参数和disablerepo参数可以同时使用(7)get_url
# 下载文件到远程服务器
ansible test -m get_url -a ‘url=http://localhost:8000/data.tar.gz dest=/tmp/data.tar.gz‘

# 下载文件到远程服务器,并且修改文件的权限
ansible test -m get_url -a ‘url=http://localhost:8000/data.tar.gz dest=/tmp/data.tar.gz mode=0777‘

# 下载文件到远程服务器,并且检查文件的MD5校验是否与控制端的MD5校验相同
[root@bogon ~]# md5sum s.txt
d41d8cd98f00b204e9800998ecf8427e  s.txt
[root@bogon ~]# ansible 127.0.0.1 -m get_url -a ‘url=http://localhost:8000/s.txt dest=/tmp/s.txt checksum=md5:d41d8cd98f00b204e9800998ecf8427e‘
127.0.0.1 | CHANGED => {
    "ansible_facts": {
        "discovered_interpreter_python": "/usr/bin/python"
    },
    "changed": true,
    "checksum_dest": null,
    "checksum_src": "da39a3ee5e6b4b0d3255bfef95601890afd80709",
    "dest": "/tmp/s.txt",
    "elapsed": 0,
    "gid": 0,
    "group": "root",
    "md5sum": "d41d8cd98f00b204e9800998ecf8427e",
    "mode": "0644",
    "msg": "OK (0 bytes)",
    "owner": "root",
    "secontext": "unconfined_u:object_r:admin_home_t:s0",
    "size": 0,
    "src": "/root/.ansible/tmp/ansible-tmp-1584171703.8607588-137457225931919/tmpG3otIP",
    "state": "file",
    "status_code": 200,
    "uid": 0,
    "url": "http://localhost:8000/s.txt"
}
[root@bogon ~]# ansible 127.0.0.1 -m get_url -a ‘url=http://localhost:8000/s.txt dest=/tmp/s.txt checksum=md5:d41d8cd98f00b204e9800998ecf84270‘
127.0.0.1 | FAILED! => {
    "ansible_facts": {
        "discovered_interpreter_python": "/usr/bin/python"
    },
    "changed": false,
    "checksum_dest": "da39a3ee5e6b4b0d3255bfef95601890afd80709",
    "checksum_src": "da39a3ee5e6b4b0d3255bfef95601890afd80709",
    "dest": "/tmp/s.txt",
    "elapsed": 0,
    "msg": "The checksum for /tmp/s.txt did not match d41d8cd98f00b204e9800998ecf84277e; it was d41d8cd98f00b204e9800998ecf8427e.",
    "src": "/root/.ansible/tmp/ansible-tmp-1584171717.7448506-78799482489470/tmpyczfH3",
    "url": "http://localhost:8000/s.txt"
}1. dest:必传选项,指定将文件下载的绝对路径
2. url:必传选项,文件的下载地址(网址)
3. url_username: 用于http基本认证的用户名
4. url_password: 用于http基本认证的密码
5. validate_certs: 如果否,SSL证书将不会验证。这只应在使用自签名证书的个人控制站点上使用
6. owner: 指定属主
7. group: 指定属组
8. mode: 指定权限
9. checksum:文件的校验码
10. headers:传递给下载服务器的HTTP Headers
11. backup:如果本地已经存在同名文件,备份文件
12. timeout:下载的超时时间(8)unarchive
# 先创建一个目录
ansible test - m file -a ‘path=/tmp/data state=directory‘

# 解压本地文件
ansible test - m unarchive -a ‘src=data.tar.gz dest=/tmp/data list_files=yes‘

# 将本地文件拷贝到远程服务器
ansible test -m copy -a ‘src=data.tar.bz2 dest=/tmp/data.tar.bz2‘

# 解压远程的文件
ansible test -m unarchive -a ‘src=/tmp/data.tar.bz2 dest=/tmp remote_src=yes‘1. remote_src:该选项可以取值为yes或no,用来表示解压的文件存在远程服务器中,还是存在控制节点所在的服务器中。默认取值为no,表示在解压文件之前,先将控制节点的文件复制到远程主机中,然后在进行解压
2. src:指定压缩文件的路径,该选项的取值取决于remote_src的取值。如果remote_src取值为yes,则src指定的是远程服务器中压缩包的地址;如果remote_src的取值为no,则src指向的是控制节点中的路径
3. dest:该选项指定的是远程服务器上的绝对路径,表示压缩文件解压的路径
4. list_files:默认情况下该选项取值为no,如果该选项取值为yes,也会解压文件,并且在ansible的返回值中列出压缩包里的文件
5. exclude:解压文件时排除exclude选项指定的文件或目录列表
6. keep_newer:默认取值为False,如果该选项取值为True,那么当目标地址中存在同名的文件,并且文件比压缩包中的文件更新时,不进行覆盖
7. owner:文件或目录解压以后的所有者
8. group:文件或目录解压以后所属的群组
9. mode:文件或目录解压以后的权限(9)git
#将requests克隆到/tmp/requests目录下
ansible test -m git -a ‘repo=https://github.com/psf/requests.git dest=/tmp/requests version=HEAD‘

# 从源码安装requests
ansible test -a ‘python setup.py install chdir=/tmp/requests‘ -become

# 验证requests是否安装成功
ansible test -a "python -c ‘import requests‘"1. repo:远程git库的地址,可以是一个git协议、ssh协议或http协议的git库地址
2. dest:必选选项,git库clone到本地服务器以后保存的绝对路径
3. version:克隆远程git库的版本,取值可以为HEAD、分支的名称、tag的名称,也可以是一个commit的hash值
4. force:默认取值为no,当该选项取值为yes时,如果本地的git库有修改,将会抛弃本地的修改
5. accept_hostkey:当该选项取值为yes时,如果git库的服务器不在know_hosts中,则添加到konw_hosts中,key_file指定克隆远程git库地址是使用的私钥(10)stat
# 获取文件的详细信息
ansible test -m stat -a ‘path=/etc/passwd‘
(11)cron
# 增加一个crontab任务
ansible test -m cron -a ‘backup=yes name="测试计划任务" minute=*/2 hour=* job="ls /tmp >/dev/null"‘

# 进入服务器,查看新增的crontab任务
crontab -l1. backup:取值为yes或no,默认
上一篇:python 排球比赛模拟
下一篇:Java和C++的区别
文章标题:python自动化管理Ansible(Ansible,Fabric,hosts)
文章链接:http://soscw.com/index.php/essay/42610.html