标签:pac 微软雅黑 alt rust 创建 制作 width cut 脚本
Unity镜子效果的制作过程
Create Mirror —— 创建镜子
1. 在场景中创建一个 Plane —— 用来作为镜子
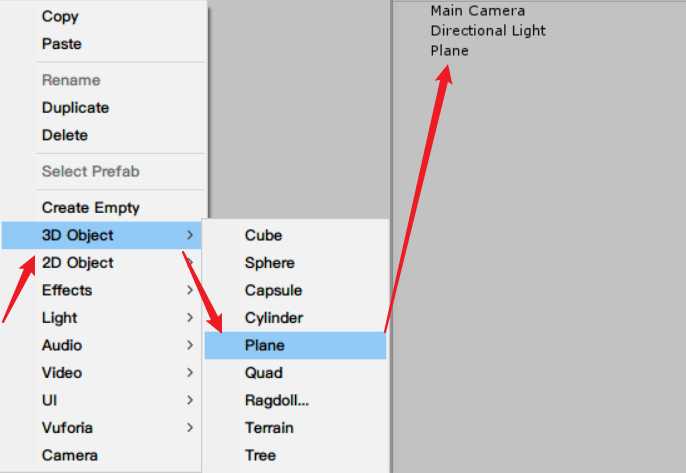
2. 同时创建一个材质球 /Material —— 给到 Plane 上
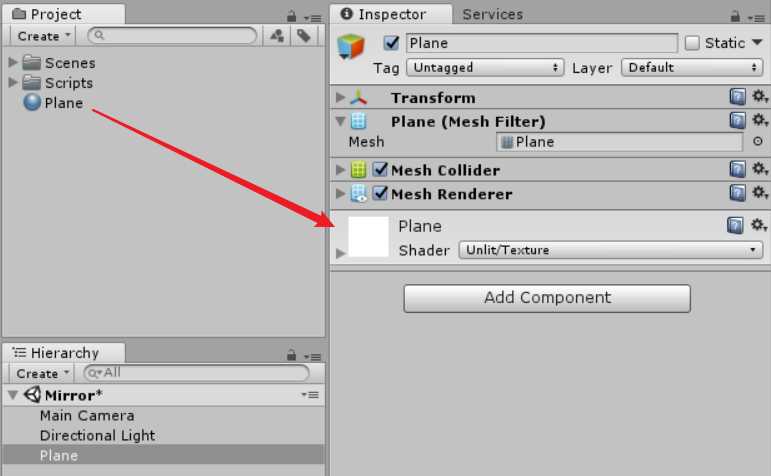
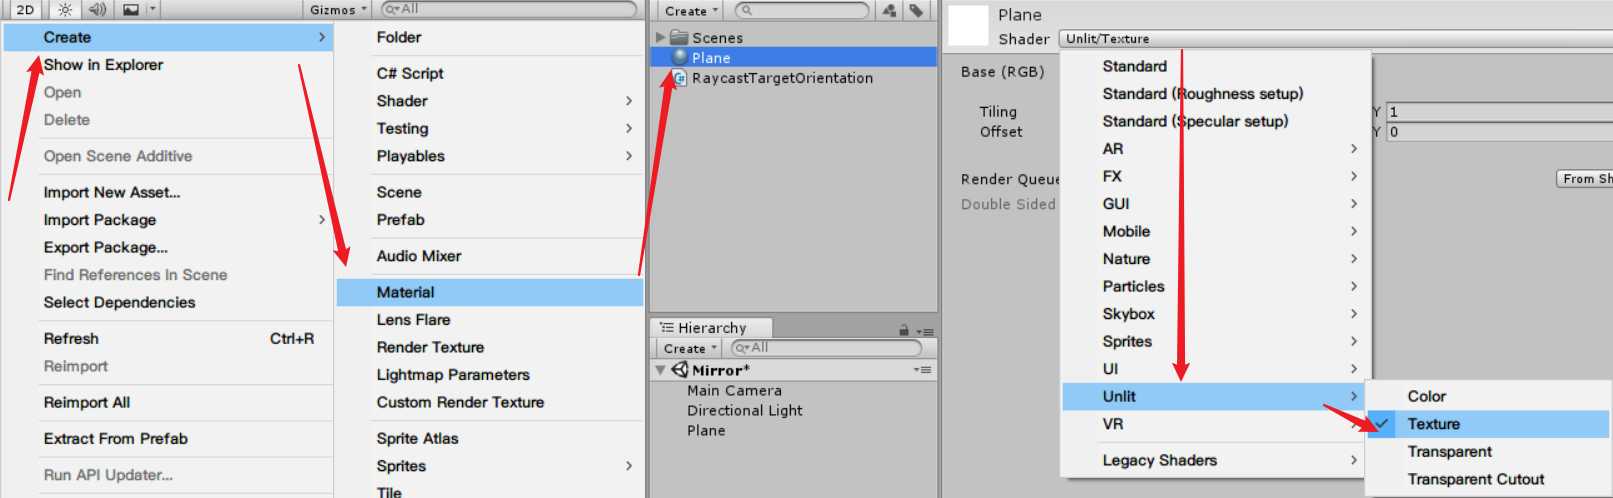
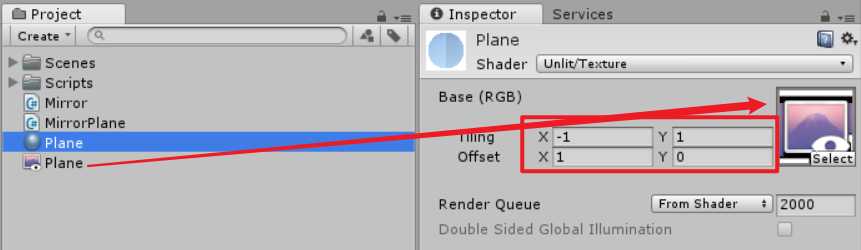
3. 修改新创建的 Material 的 Shader 为 Unlit/Texture
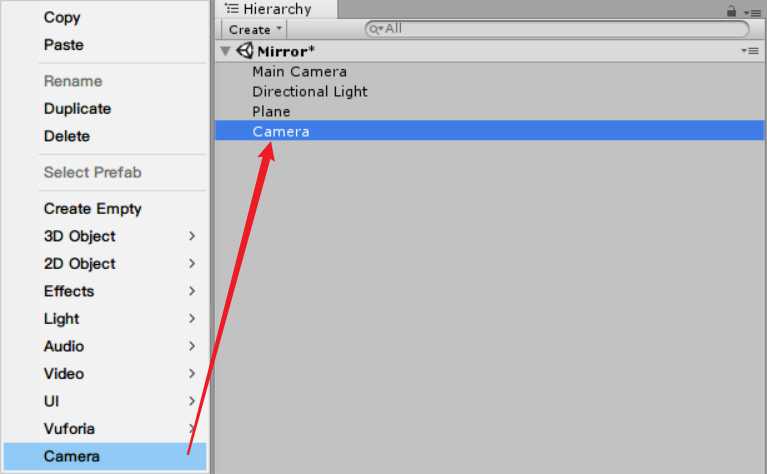
Create Camera —— 创建一个新相机
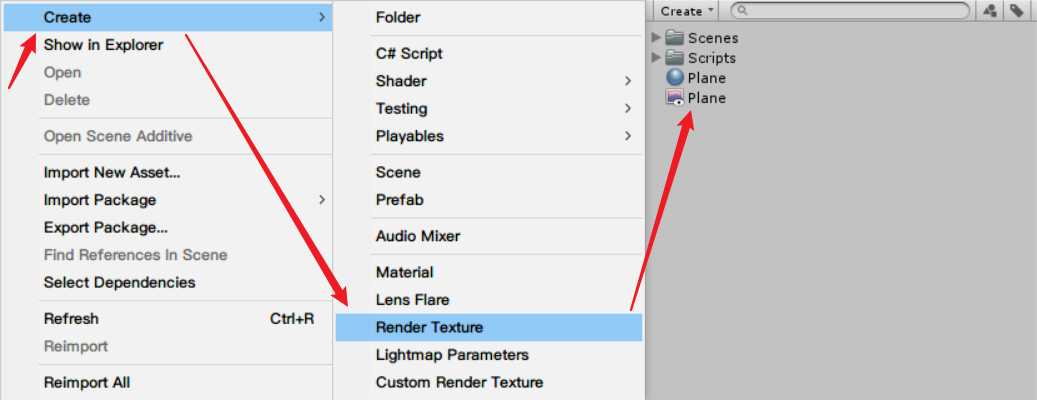
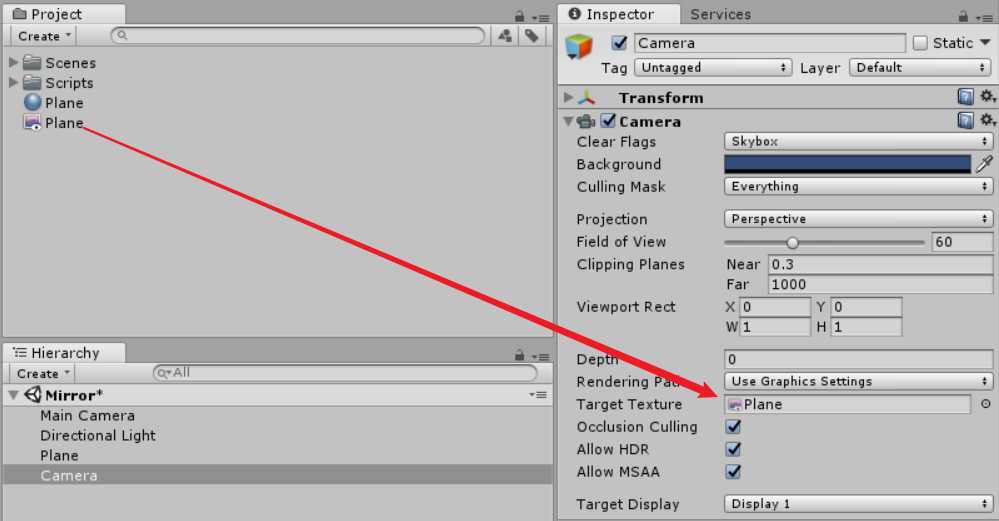
1. 新建一个 Render Texture(这里重新命名为 Plane 便于区分和理解)
2. 右键 层次列表/Hierarchy —— 创建一个新的 Camera
3. 将新建的 Render Texture(Plane)给新建的 Camera 组件中的 Target Texture
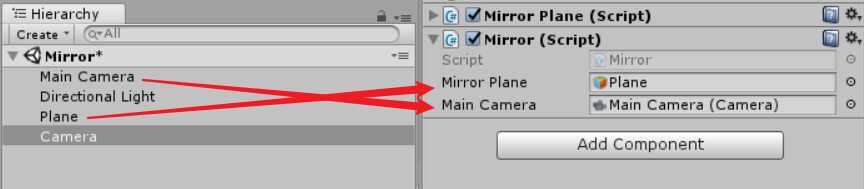
4. 给新建的 Camera相机,添加脚本 MirrorPlane
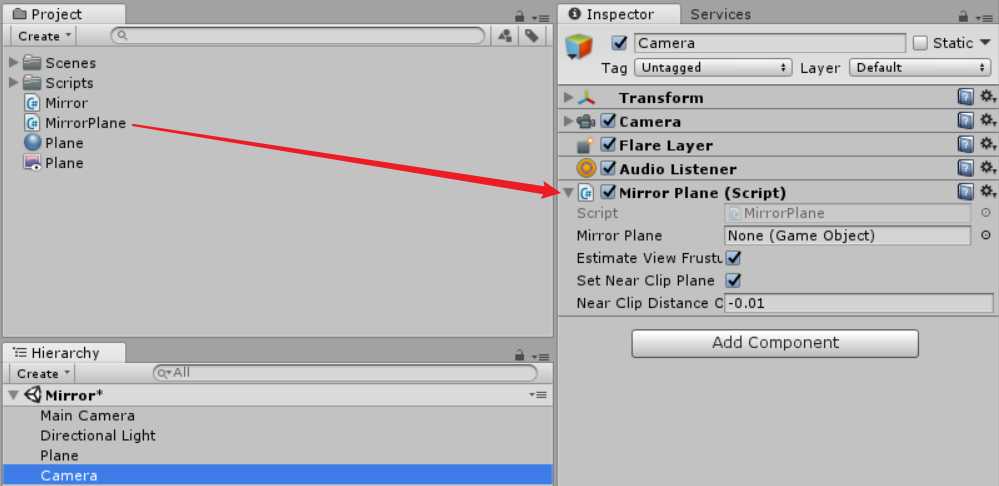
并将 Plane 拖到 Inspector 面板中对应的属性里

5. 给新建的 Camera相机,添加脚本 Mirror
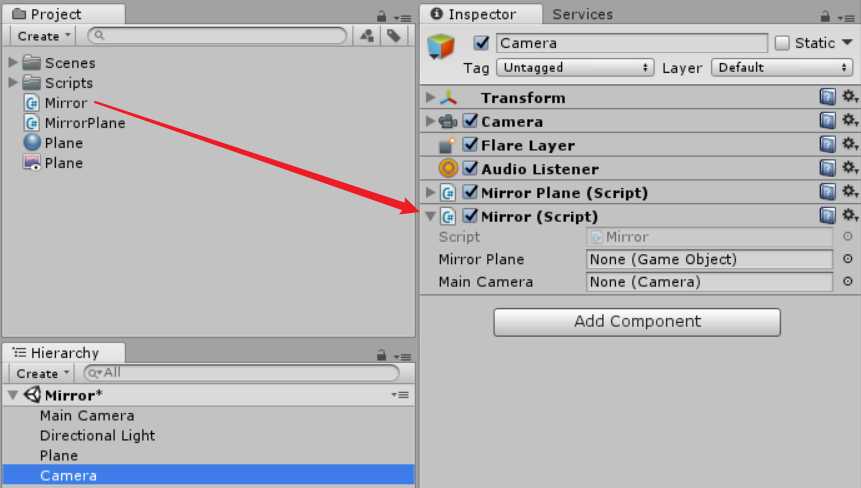
并将Main Camera与 Plane 拖至 Inspector 面板中
注意: 一定要修改 Plane 材质的属性为:
两个脚本,具体代码如下 :
  1 using UnityEngine;
  2
  3 ///
  4 /// Plane管理脚本 —— 挂载新建的Camera上
  5 ///
  6 [ExecuteInEditMode] //编辑模式中执行
  7 public class MirrorPlane : MonoBehaviour
  8 {
  9     public GameObject mirrorPlane; //镜子Plane
 10     public bool estimateViewFrustum = true;
 11     public bool setNearClipPlane = true;   //是否设置近剪切平面
 12     public float nearClipDistanceOffset = -0.01f; //近剪切平面的距离
 13     private Camera mirrorCamera;                    //镜像摄像机
 14     private Vector3 vn;                              //屏幕的法线
 15     private float l;                               //到屏幕左边缘的距离
 16     private float r;                               //到屏幕右边缘的距离
 17     private float b;                               //到屏幕下边缘的距离
 18     private float t;                               //到屏幕上边缘的距离
 19     private float d;                               //从镜像摄像机到屏幕的距离
 20     private float n;                               //镜像摄像机的近剪切面的距离
 21     private float f;                               //镜像摄像机的远剪切面的距离
 22     private Vector3 pa;                              //世界坐标系的左下角
 23     private Vector3 pb;                              //世界坐标系的右下角
 24     private Vector3 pc;                              //世界坐标系的左上角
 25     private Vector3 pe;                              //镜像观察角度的世界坐标位置
 26     private Vector3 va;                              //从镜像摄像机到左下角
 27     private Vector3 vb;                              //从镜像摄像机到右下角
 28     private Vector3 vc;                              //从镜像摄像机到左上角
 29     private Vector3 vr;                              //屏幕的右侧旋转轴
 30     private Vector3 vu;                              //屏幕的上侧旋转轴
 31     private Matrix4x4 p = new Matrix4x4();
 32     private Matrix4x4 rm = new Matrix4x4();
 33     private Matrix4x4 tm = new Matrix4x4();
 34     private Quaternion q = new Quaternion();
 35
 36     private void Start()
 37     {
 38         mirrorCamera = GetComponent();
 39     }
 40
 41     private void Update()
 42     {
 43         if (null == mirrorPlane || null == mirrorCamera) return;
 44         pa = mirrorPlane.transform.TransformPoint(new Vector3(-5.0f, 0.0f, -5.0f)); //世界坐标系的左下角
 45         pb = mirrorPlane.transform.TransformPoint(new Vector3(5.0f, 0.0f, -5.0f)); //世界坐标系的右下角
 46         pc = mirrorPlane.transform.TransformPoint(new Vector3(-5.0f, 0.0f, 5.0f));  //世界坐标系的左上角
 47         pe = transform.position;                                                    //镜像观察角度的世界坐标位置
 48         n = mirrorCamera.nearClipPlane;                                            //镜像摄像机的近剪切面的距离
 49         f = mirrorCamera.farClipPlane;                                             //镜像摄像机的远剪切面的距离
 50         va = pa - pe;                                                               //从镜像摄像机到左下角
 51         vb = pb - pe;                                                               //从镜像摄像机到右下角
 52         vc = pc - pe;                                                               //从镜像摄像机到左上角
 53         vr = pb - pa;                                                               //屏幕的右侧旋转轴
 54         vu = pc - pa;                                                               //屏幕的上侧旋转轴
 55         if (Vector3.Dot(-Vector3.Cross(va, vc), vb) 0.0f)                         //如果看向镜子的背面
 56         {
 57             vu = -vu;
 58             pa = pc;
 59             pb = pa + vr;
 60             pc = pa + vu;
 61             va = pa - pe;
 62             vb = pb - pe;
 63             vc = pc - pe;
 64         }
 65         vr.Normalize();
 66         vu.Normalize();
 67         vn = -Vector3.Cross(vr, vu); //两个向量的叉乘,最后在取负,因为Unity是使用左手坐标系
 68         vn.Normalize();
 69         d = -Vector3.Dot(va, vn);
 70         if (setNearClipPlane)
 71         {
 72             n = d + nearClipDistanceOffset;
 73             mirrorCamera.nearClipPlane = n;
 74         }
 75         l = Vector3.Dot(vr, va) * n / d;
 76         r = Vector3.Dot(vr, vb) * n / d;
 77         b = Vector3.Dot(vu, va) * n / d;
 78         t = Vector3.Dot(vu, vc) * n / d;
 79
 80         //投影矩阵
 81         p[0, 0] = 2.0f * n / (r - l);
 82         p[0, 1] = 0.0f;
 83         p[0, 2] = (r + l) / (r - l);
 84         p[0, 3] = 0.0f;
 85
 86         p[1, 0] = 0.0f;
 87         p[1, 1] = 2.0f * n / (t - b);
 88         p[1, 2] = (t + b) / (t - b);
 89         p[1, 3] = 0.0f;
 90
 91         p[2, 0] = 0.0f;
 92         p[2, 1] = 0.0f;
 93         p[2, 2] = (f + n) / (n - f);
 94         p[2, 3] = 2.0f * f * n / (n - f);
 95
 96         p[3, 0] = 0.0f;
 97         p[3, 1] = 0.0f;
 98         p[3, 2] = -1.0f;
 99         p[3, 3] = 0.0f;
100
101         //旋转矩阵
102         rm[0, 0] = vr.x;
103         rm[0, 1] = vr.y;
104         rm[0, 2] = vr.z;
105         rm[0, 3] = 0.0f;
106
107         rm[1, 0] = vu.x;
108         rm[1, 1] = vu.y;
109         rm[1, 2] = vu.z;
110         rm[1, 3] = 0.0f;
111
112         rm[2, 0] = vn.x;
113         rm[2, 1] = vn.y;
114         rm[2, 2] = vn.z;
115         rm[2, 3] = 0.0f;
116
117         rm[3, 0] = 0.0f;
118         rm[3, 1] = 0.0f;
119         rm[3, 2] = 0.0f;
120         rm[3, 3] = 1.0f;
121
122         tm[0, 0] = 1.0f;
123         tm[0, 1] = 0.0f;
124         tm[0, 2] = 0.0f;
125         tm[0, 3] = -pe.x;
126
127         tm[1, 0] = 0.0f;
128         tm[1, 1] = 1.0f;
129         tm[1, 2] = 0.0f;
130         tm[1, 3] = -pe.y;
131
132         tm[2, 0] = 0.0f;
133         tm[2, 1] = 0.0f;
134         tm[2, 2] = 1.0f;
135         tm[2, 3] = -pe.z;
136
137         tm[3, 0] = 0.0f;
138         tm[3, 1] = 0.0f;
139         tm[3, 2] = 0.0f;
140         tm[3, 3] = 1.0f;
141
142         mirrorCamera.projectionMatrix = p; //矩阵组
143         mirrorCamera.worldToCameraMatrix = rm * tm;
144         if (!estimateViewFrustum) return;
145         q.SetLookRotation((0.5f * (pb + pc) - pe), vu); //旋转摄像机
146         mirrorCamera.transform.rotation = q;            //聚焦到屏幕的中心点
147
148         //估值 —— 三目简写
149         mirrorCamera.fieldOfView = mirrorCamera.aspect >= 1.0 ? Mathf.Rad2Deg *
150             Mathf.Atan(((pb - pa).magnitude + (pc - pa).magnitude) / va.magnitude) :
151             Mathf.Rad2Deg / mirrorCamera.aspect *
152             Mathf.Atan(((pb - pa).magnitude + (pc - pa).magnitude) / va.magnitude);
153         //在摄像机角度考虑,保证视锥足够宽
154     }
155 }
 1 using UnityEngine;
 2
 3 ///
 4 /// 镜子管理脚本 —— 挂在新建的Camera上
 5 ///
 6 [ExecuteInEditMode]
 7 public class Mirror : MonoBehaviour
 8 {
 9     public GameObject mirrorPlane;  //镜子
10     public Camera mainCamera;   //主摄像机
11     private Camera mirrorCamera; //镜像摄像机
12
13     private void Start()
14     {
15         mirrorCamera = GetComponent();
16     }
17
18     private void Update()
19     {
20         if (null == mirrorPlane || null == mirrorCamera || null == mainCamera) return;
21         //将主摄像机的世界坐标位置转换为镜子的局部坐标位置
22         Vector3 postionInMirrorSpace = mirrorPlane.transform.
23             InverseTransformPoint(mainCamera.transform.position);
24         //一般y为镜面的法线方向
25         postionInMirrorSpace.y = -postionInMirrorSpace.y;
26         //转回到世界坐标系的位置
27         mirrorCamera.transform.position = mirrorPlane.transform.TransformPoint(postionInMirrorSpace);
28     }
29 }
Create Cube —— 创建一个立方体
为了看镜子的效果
在场景中创建一个 Cube —— 用来作为参照对象
然后点击运行后,即可看到镜子效果已经完成

Indistinct —— 显示效果不清晰
如果发现,镜子的显示效果并不清晰
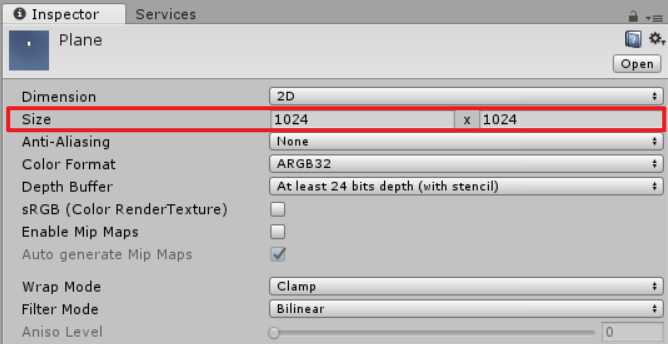
这是因为我们创建的 Render Texture 时使用的是默认的分辨率 256*256
修改成较高的分辨率即可,这里我修改为:1024*1024 (可视情况自己设定)
注意:分辨率设置越高,是越耗性能的
镜面显示效果

END
Unity镜子效果的实现
标签:pac 微软雅黑 alt rust 创建 制作 width cut 脚本
原文地址:https://www.cnblogs.com/ChenZiRong1999/p/12894079.html