springboot-01
2021-02-04 22:17
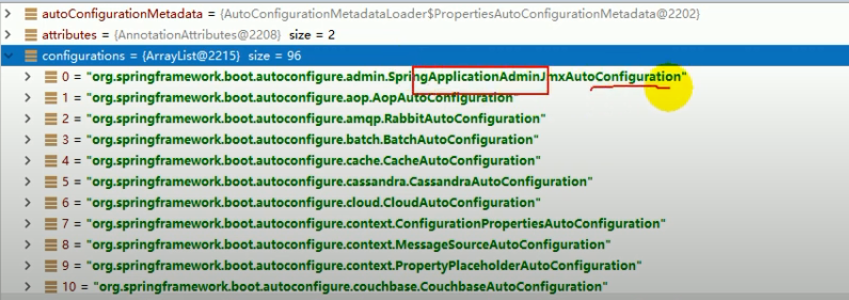
标签:ott table 告诉 多少 nts runtime iter 响应 main方法 1、统一环境 2、maven设置 [图8] 3、idea设置maven [图9] 4、spring boot helloworld 浏览器发送hello,服务器接收、处理、响应helloworld 4.2 编写主程序 4.3 编写controller service 4.4 运行主程序测试 4.5 程序部署 使用java -jar来运行 什么叫做spring-boot-starter呢? 这个叫做spring-boot的场景启动器。 帮我们导入了web模块正常运行所依赖的组件的。 springboot当中有更多的starter springboot将所有的功能场景,都抽取出来了,做成了一个个的starters, 我们称之为启动器,我们只需要在项目当中引入这些starter, 相关场景的所有依赖,都会导入进来的,版本控制,由springboot负责。 要用什么功能,就导入什么场景的启动器。 @SpringBootApplication,SpringBoot应用,标注在某个类上,说明这个类是SpringBoot的主配置类, SpringBoot就应该运行这个类的main方法来启动springboot应用。 @SpringBootApplication是一个组合注解 @SpringBootConfiguration: SpringBoot配置类 这个注解,标注在某个类上,表示这是一个SpringBoot的配置类。 这个注解,点进去看,如下: @Configuration:配置类上,来标注这个注解; 配置类和以前的配置文件,是一样的。 我们以前要编写很多配置文件,现在都替换成一个个的配置类。 比如我们可以给容器中注入组件,以前配置文件的功能都能做。 Springboot怎么知道一个类是做配置的,就要标注@Configuration,这个注解是Spring底层定义的注解。 Configur这个类,我们点入进去,它就是一个组件:Component。 配置类,也是容器当中的一个组件。 @EnableAutoConfiguration 开启自动配置功能。 以前我们需要配置的东西,SpringBoot帮我们自动配置。 这个注解告诉SpringBoot开启自动配置功能。 这样自动配置的功能才能生效。 @AutoConfigurationPackage: 自动配置包 @AutoConfigurationPackage 这个注解的意思就是: 将主配置类@SpringBootApplication注解标注的类,所在包,下面的所有子包,里面的所有组件, 扫描到Spring容器当中。 点进去这个注解,可以看到 @Import(AutoConfigurationPackage.Registrar.class) 这个是Spring当中的底层注解, 作用是给容器当中导入组件。 导入的组件由AutoConfigurationPackage.Registrar.class指定。 谷粒学院 - Spring注解版 - 这当中的讲解。 @Import(EnableAutoConfigurationImportSelector.class) 导入哪些组件的选择器 将所有需要导入的组件,以全类名的方式,返回。 这些组件,就会被添加到容器中。 会给容器中导入非常多的,自动配置类(XXXAutoConfiguration); 就是给容器中导入这个场景当中需要的所有组件,并配置好这些组件; 有了这些自动配置类,就免去了手动编写配置和注入功能组件的工作。 SpringFactoriesLoader.loadFactoryNames,这个方法。 这个方法当中传入两个参数。 第一个参数的值是:EnableAutoConfiguration.class。 第二个参数的值是:classLoader。 SpringFactoriesLoader.loadFactoryNames(EnableAutoConfiguration.class,classLoader) springboot在启动的时候,从类路径下的META-INF/spring.factories中获取EnableAutoConfiguration指定的值, 将这些值,作为自动配置类,导入到容器中,自动配置类就生效了,就能够帮我们进行自动配置工作了。 以前的,我们需要自己配置的东西,自动配置类都帮我们做了。 在底层用Spring当中, J2EE的整体整合解决方案和自动配置都在spring-boot-autoconfigure-1.5.9.RELEASE.jar 如果这里面的配置不满意,我们也可以自己改善一下他们的配置。 总结: 6、使用spring initializer快速创建spring boot项目 IDE都支持使用spring的项目创建向导快速创建一个spring boot项目; springboot使用一个全局的配置文件,配置文件名是固定的: 配置文件的作用:修改springboot自动配置的默认值 springboot在底层将所有的东西,都给我们自动配置好了。 YAML Ain‘t Markup Language YAML A Markup Language 标记语言: 如果是xml的写法,就是: 基本语法: 属性和值,也是大小写敏感的。 1、字面量:普通的值,数字、字符串、布尔值。封装到javabean当中,要用的。 2、对象:属性和值,映射过来就是键值对,Map 还有一个 3、数组:集合,list,set 用 还有一个行内写法: ConfigurationProperties这个注解错误, 请参考这篇文章: https://www.cnblogs.com/Guhongying/p/10848251.html 配置文件: JavaBean: 我们可以导入配置文件处理器,以后编写配置,就有提示了: 进行单元测试: JSR303数据校验,要使用@Validated。 配置文件不管是yaml还是properties,他们都能够获取到值。 如果说,我们只是在某个业务逻辑中,需要获取一下配置文件当中的某项值,我们就使用@Value。 如果说,我们专门编写了一个javaBean来和配置文件进行映射的时候,我们就直接使用@ConfigurationProperties。 springboot-01 标签:ott table 告诉 多少 nts runtime iter 响应 main方法 原文地址:https://www.cnblogs.com/gnuzsx/p/12791214.html /**
* @SpringBootApplication 来标注一个主程序类,说明这是一个Spring Boot应用
*/
@SpringBootApplication
public class HelloWorldMainApplication {
// spring应用启动起来
public static void main(String[] args) {
SpringApplication.run(HelloWorldMainApplication.class,args);
}
}
@Controller
public class HelloController {

    @ResponseBody
    @RequestMapping("/hello")
    public String hello(){
        return "Hello World!";
    }
}
5. helloworld探究
helloworld主程序
@SpringBootApplication
@SpringBootApplication
public class HelloWorldMainApplication {

    // spring应用启动起来
    public static void main(String[] args) {
        SpringApplication.run(HelloWorldMainApplication.class,args);
    }
}
@Target({ElementType.TYPE})
@Retention(RetentionPolicy.RUNTIME)
@Documented
@Inherited
@SpringBootConfiguration
@EnableAutoConfiguration
@ComponentScan(
    excludeFilters = {@Filter(
    type = FilterType.CUSTOM,
    classes = {TypeExcludeFilter.class}
), @Filter(
    type = FilterType.CUSTOM,
    classes = {AutoConfigurationExcludeFilter.class}
)}
)
public @interface SpringBootApplication {
@SpringBootConfiguration
@Target(ElementType.TYPE)
@Retention(RetentionPolicy.RUNTIME)
@Documented
@Configuration
public @interface SpringBootConfiguration {

}
@Target(ElementType.TYPE)
@Retention(RetentionPolicy.RUNTIME)
@Documented
@Component
public @interface Configuration {

}
@EnableAutoConfiguration
@SuppressWarnings("deprecation")
@Target(ElementType.TYPE)
@Retention(RetentionPolicy.RUNTIME)
@Documented
@Inherited
@AutoConfigurationPackage
@Import(EnableAutoConfigurationImportSelector.class)
public @interface EnableAutoConfiguration{

}
@Target(ElementType.TYPE)
@Retention(RetentionPolicy.RUNTIME)
@Documented
@Inherited
@Import(AutoConfigurationPackage.Registrar.class)
public @interface AutoConfigurationPackage{

}


配置文件
YAML
以前的配置文件: 大多都使用的是 xxx.xml文件;

YAML比XML更加优秀,以数据为中心,比json和xml更适合做配置文件。
server:
  port: 8081
yaml基本语法
key:(空格)value ---> 表示一对键值对,这个空格是必须有的。

以空格的缩进来控制层级关系;

空格的多少无所谓,空格的左对齐,就是同一个层级的。
server:
	port: 8081
	path: /hello
yaml的值的写法
k: v ----> 字面量直接来写;

字符串默认不用加上单引号或者双引号。

双引号和单引号内的字符串,是不一样的。

双引号,不会转移字符串里面的特殊字符;特殊字符会作为本身表示的意思输出。

name: "zhangsan \n lisi" -----> zhangsan 换行 lisi

单引号:会转义特殊字符,特殊字符最终只是一个普通的字符串数据

name: "zhangsan \n lisi" -----> zhangsan \n lisi
k: v ----> 对象还是k: v的方式 在下一行来写对象的属性和值的关系,注意缩进。
friends:
	lastName: zhangsan
	age: 20
行内写法:friends: {lastName: zhangsan,age: 20}
- 值表示数组当中的一个元素:pets:
- cat
- dog
- pig
pets: [cat,dog,pig]
idea当中写yaml
配置文件值注入
server:
  port: 8081

person:
  lastName: zhangsan
  age: 18
  boss: false
  birth: 2017/12/12
  maps: {k1: v1,k2: 12}
  lists:
    - lisi
    - zhaoliu
  dog:
    name: 小狗
    age: 2
package com.atguigu.springboot.bean;
import org.springframework.boot.context.properties.ConfigurationProperties;
import org.springframework.stereotype.Component;
import java.util.Date;
import java.util.List;
import java.util.Map;
/**
* 将配置文件当中配置的值,映射到这个组件中
* @ConfigurationProperties: 告诉SpringBoot将本类当中的所有属性,和配置文件中相关的配置绑定
* @ConfigurationProperties(prefix = "person") 配置文件中哪个下面的所有属性,进行一一映射
*
* 只有这个组件,是容器当中的组件,才能够使用,容器提供的功能。
*/
@Component
@ConfigurationProperties(prefix = "person")
public class Person {
private String lastName;
private Integer age;
private Boolean boss;
private Date birth;
private Map
package com.atguigu.springboot;

import com.atguigu.springboot.bean.Person;
import org.junit.jupiter.api.Test;
import org.springframework.beans.factory.annotation.Autowired;
import org.springframework.boot.test.context.SpringBootTest;

/**
 *  Springboot的单元测试
 *
 *  可以在测试期间,很方便的,类似编码一样,使用,进行自动注入等容器的功能。
 */

@SpringBootTest
class SpringBoot02ConfigApplicationTests {

    @Autowired
    Person person;

    @Test
    void contextLoads() {
        System.out.println(person);
    }

}
@Value和@ConfigurationProperties
@ConfigurationProperties
@Value
功能
批量注入配置文件中的属性
一个个指定
松散绑定(松散语法)
支持
不支持
SpEL
不支持
支持
JSR303数据校验
支持
不支持
复杂类型封装
支持
不支持
@Component
@ConfigurationProperties(prefix = "person")
@Validated
public class Person {
/**
*