CentOS Inatall Rancher & Kubernetes
2021-02-05 04:14
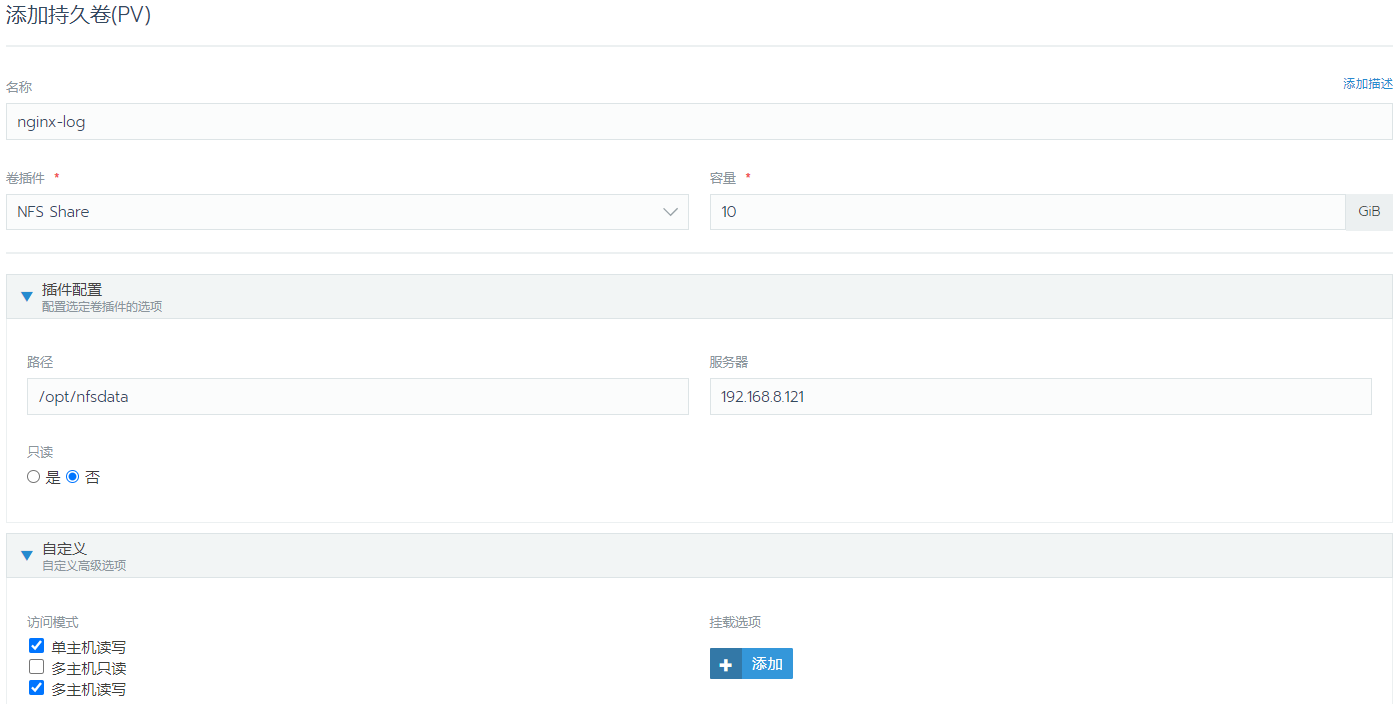
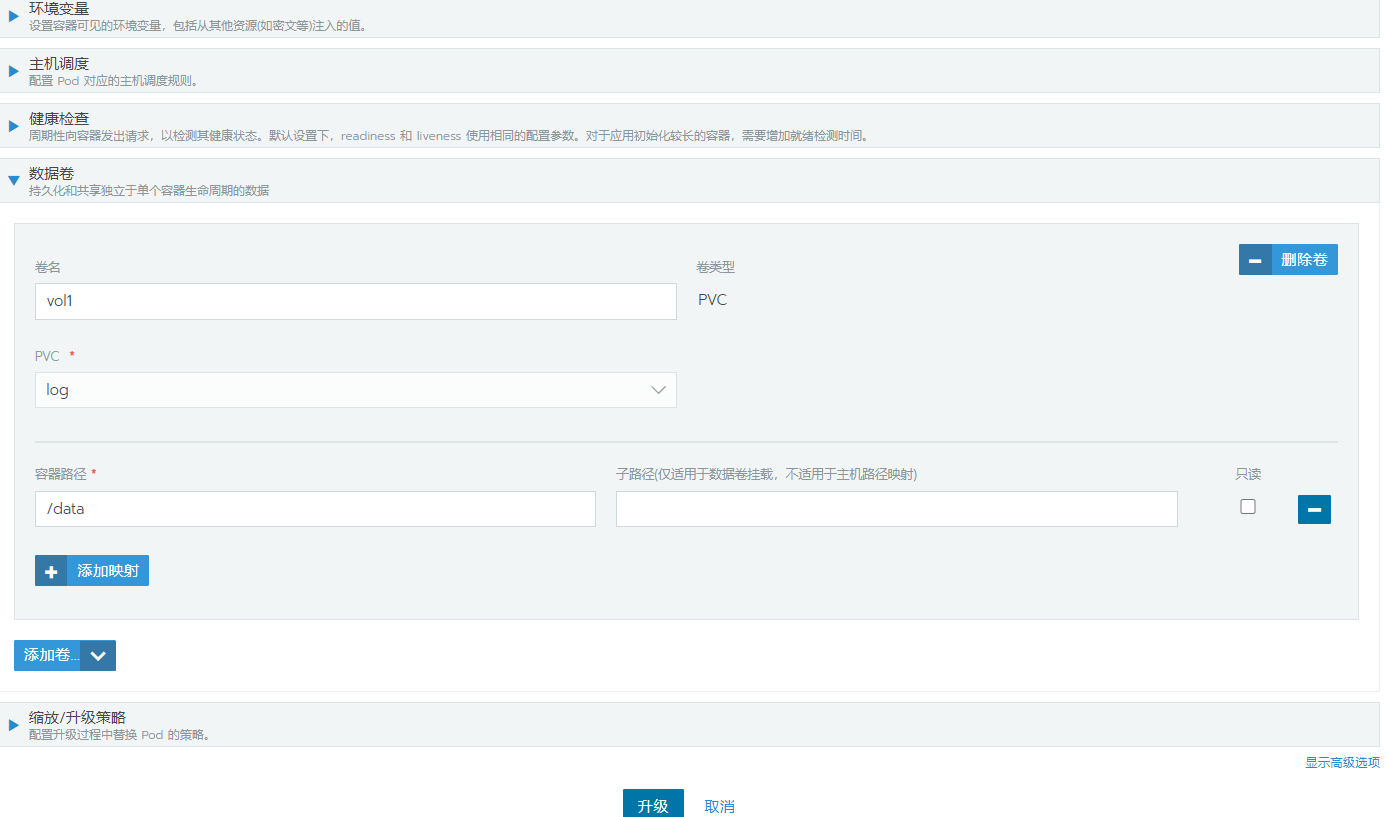
标签:async 规划 star image 跳转 防火 centos tps http 集群划分 防火墙、yum 源、关闭 selinux(全部节点):https://www.cnblogs.com/jhxxb/p/12596244.html Docker、Docker-Compose(全部节点):https://www.cnblogs.com/jhxxb/p/11410816.html Harbor(指定节点):https://www.cnblogs.com/jhxxb/p/13647369.html NFS 文件服务(指定节点) NFS 配置文件参数:https://blog.csdn.net/m0_46327721/article/details/108006037 启动后访问 8080,忽略证书错误,会自动跳转到 8443 端口 IP 默认 点全局,然后点添加集群,选择自定义。 填写集群名称,选择 K8S 版本,点击下一步 根据规划勾选,然后复制命令到不同的主机上执行,最后点击完成。安装过程有点慢,耐心等待 安装完成 以 Nginx 为例 填写名称和镜像,点击启动 配置到 80 端口 完成后出现访问地址 可以启动两份 Pod,验证负载均衡(可以查看两个 Pod 的日志来验证) 完成 先添加 PV 路径和 IP 是上面安装时定的 然后再挂载 PVC 选择刚创建的 PV 然后升级 Nginx 的 Pod,找到数据卷选项,选择使用现有 PVC,把容器内的 /data 目录挂载出来 之后对容器内 /data 目录的操作都会映射到 NFS 文件服务器上 https://docs.rancher.cn/ CentOS Inatall Rancher & Kubernetes 标签:async 规划 star image 跳转 防火 centos tps http 原文地址:https://www.cnblogs.com/jhxxb/p/14359644.html192.168.8.121 Rancher-Server、K8S(etcd、control)、Harbor、NFS-Server
192.168.8.122 Rancher-Agent、K8S(worker)
192.168.8.123 Rancher-Agent、K8S(worker)
一、基本环境准备
yum install -y nfs-common nfs-utils rpcbind

# 分配权限
mkdir /opt/nfsdata
chmod 666 /opt/nfsdata
chown nfsnobody /opt/nfsdata

# 配置挂载
vim /etc/exports

/opt/nfsdata *(rw,no_root_squash,no_all_squash,sync)

# 启动
systemctl start rpcbind
systemctl enable rpcbind
systemctl start nfs
systemctl enable nfs
# systemctl start nfs-server
# systemctl enable nfs-server
参数
作用
ro
只读(read only)
rw
读写(read write)
root_squash
当 NFS 客户端以 root 管理员访问时,映射为 NFS 服务器匿名用户
no_root_squash
当 NFS 客户端以 root 管理员访问时,映射为 NFS 服务器的 root 管理员
sync
同时将数据写入到内存与硬盘中,保证不丢失数据
async
优先将数据保存到内存,然后再写入硬盘,效率更高,但可能丢失数据
二、安装 Rancher
docker run -d --restart=unless-stopped --privileged -p 8080:80 -p 8443:443 -e CATTLE_SYSTEM_CATALOG=bundled -e AUDIT_LEVEL=3 rancher/rancher
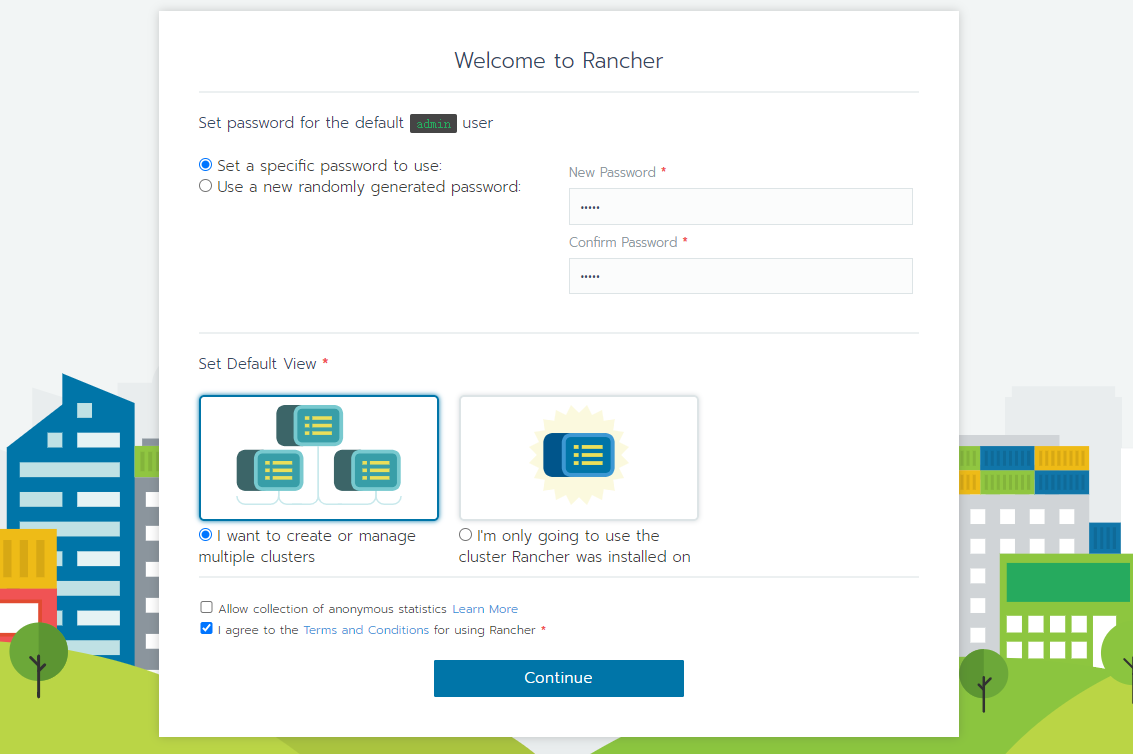
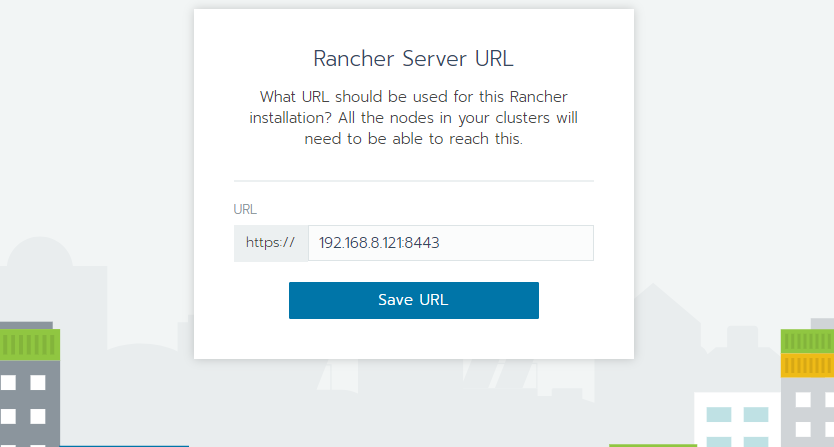
三、使用 Rancher 安装 Kubernetes
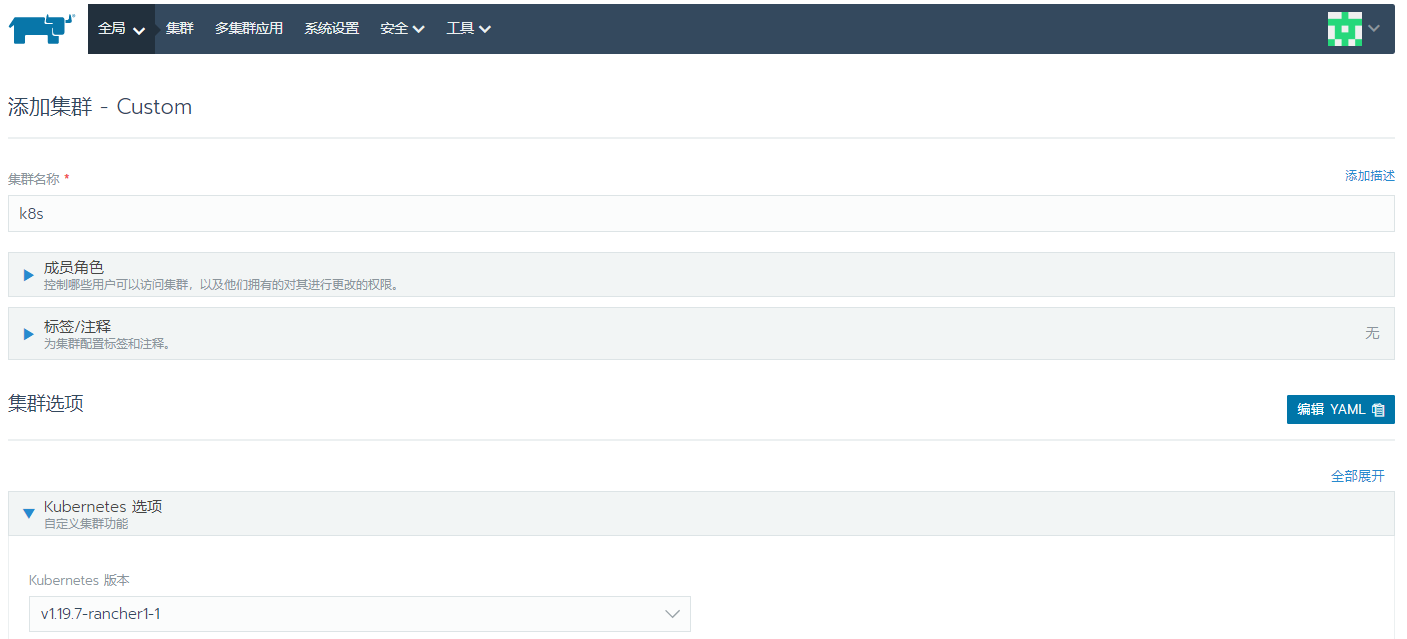

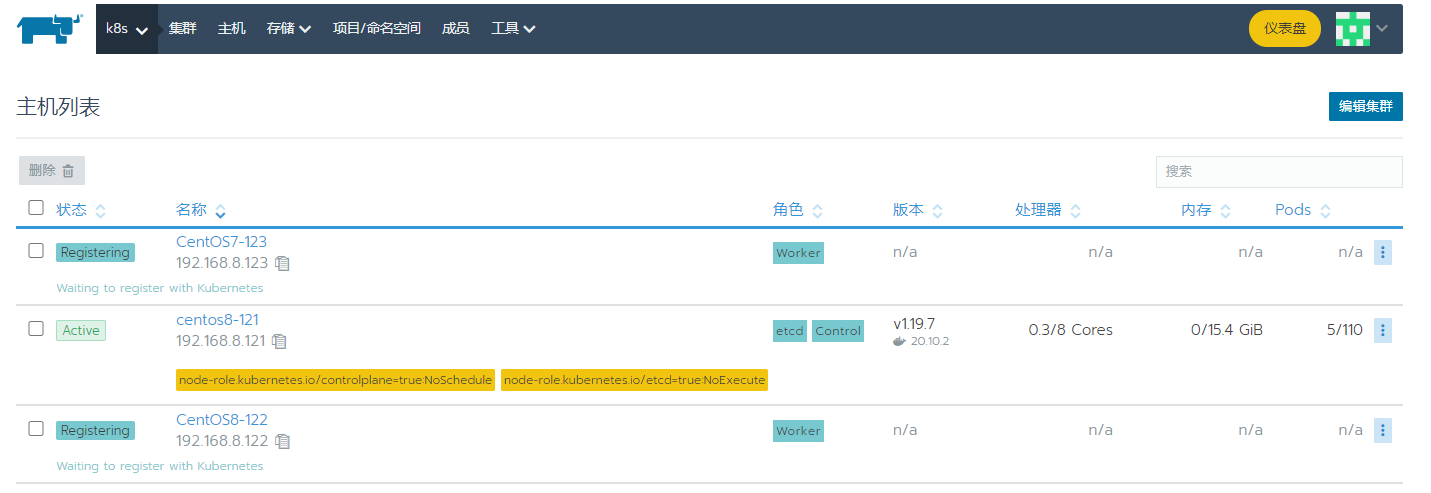

四、部署应用
1、启动 Nginx

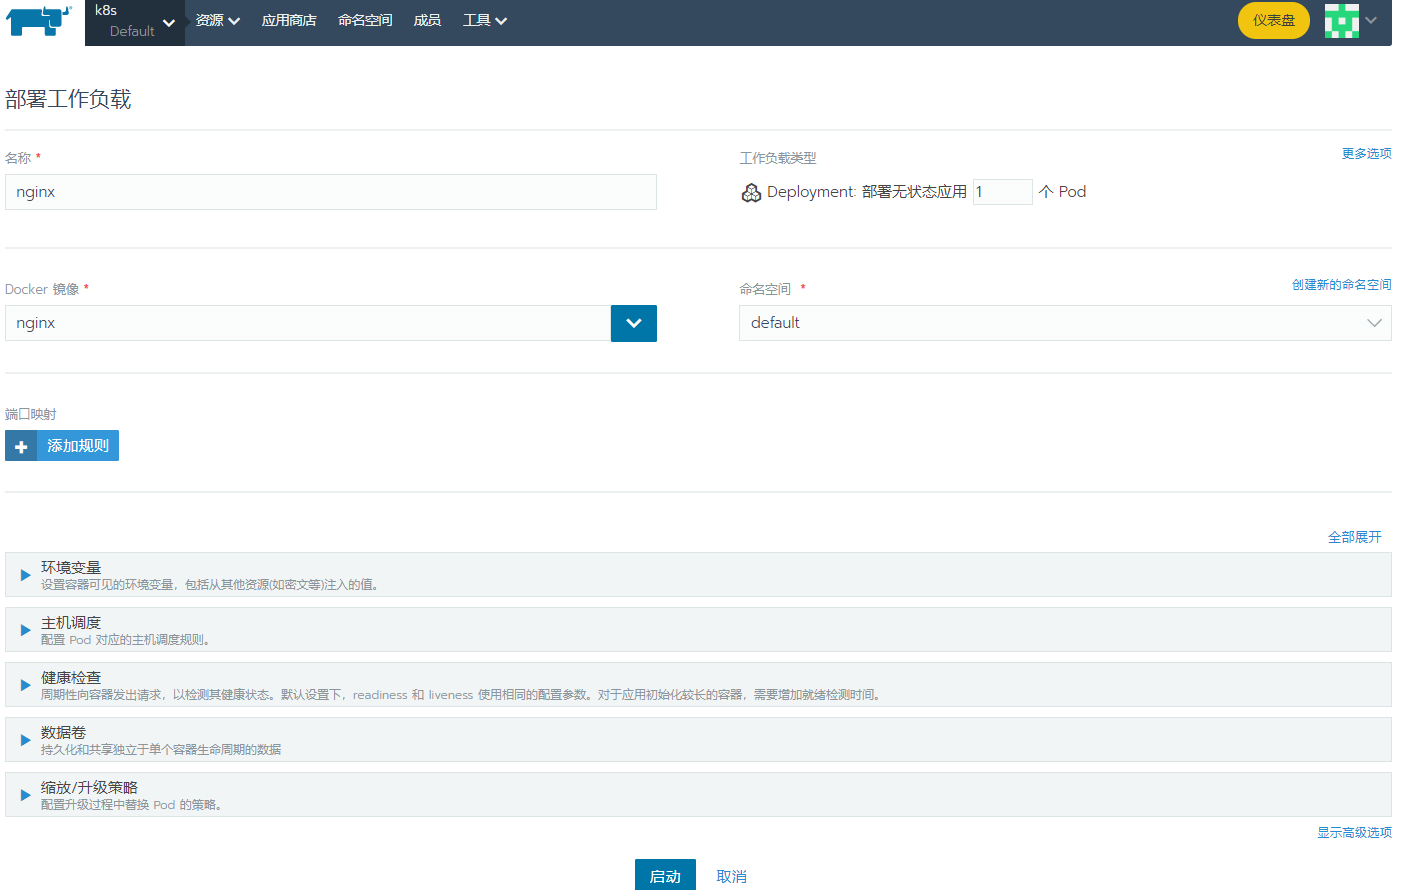
2、配置负载均衡,让 Nginx 可以访问

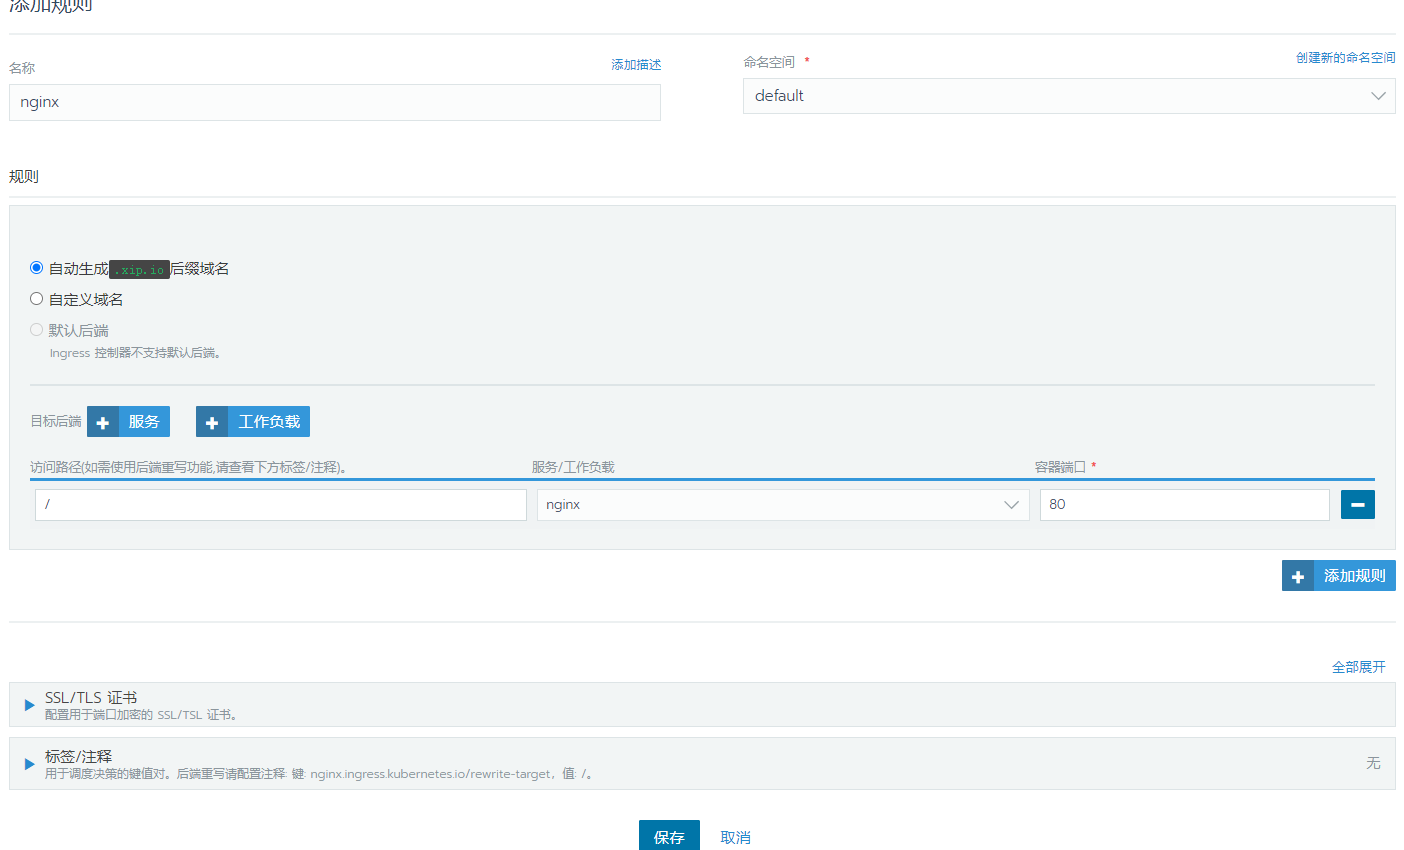

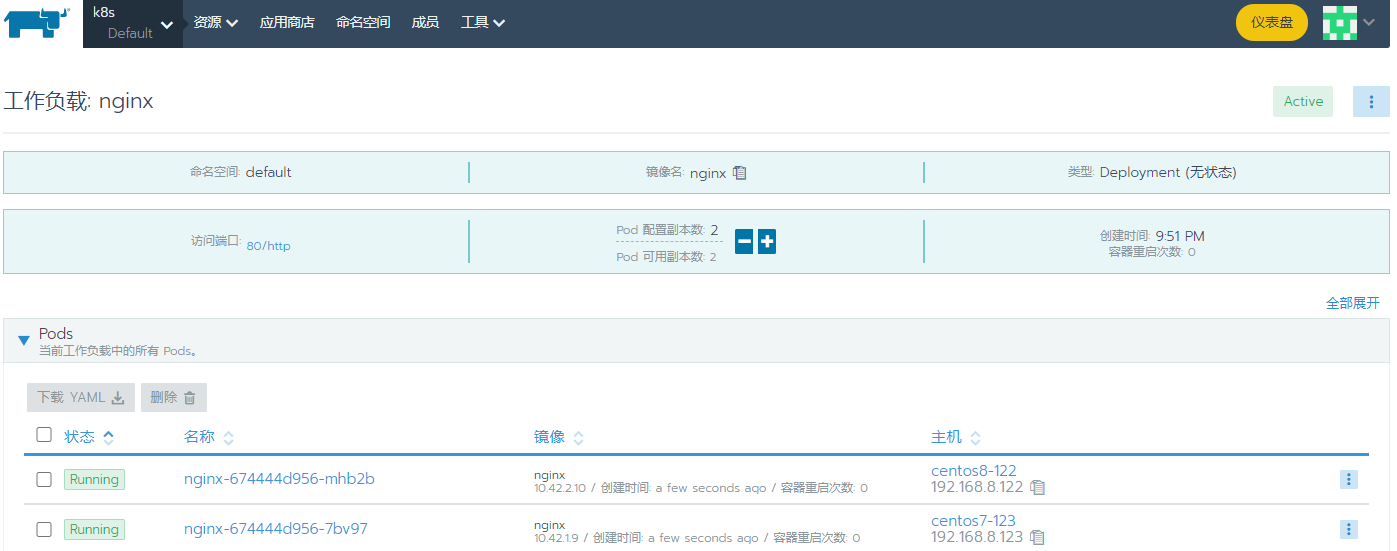
3、升级 Pod,添加映射规则,配置端口,让 Nginx 可访问
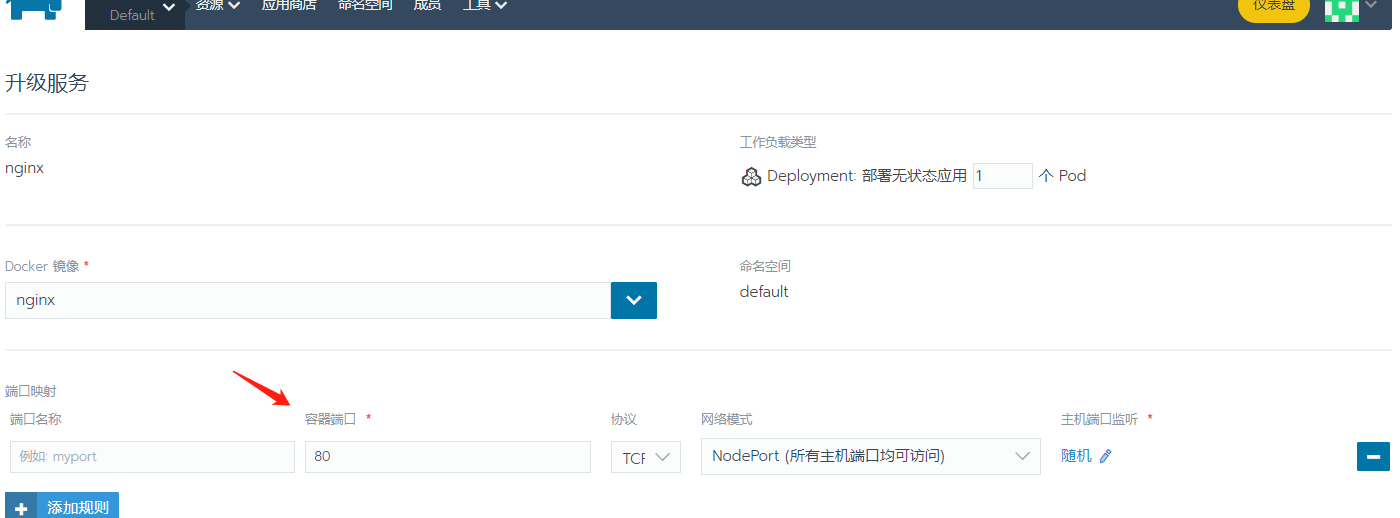

4、PVC 挂载



上一篇:java的锁机制
下一篇:WebSocket接口怎么做测试
文章标题:CentOS Inatall Rancher & Kubernetes
文章链接:http://soscw.com/index.php/essay/51159.html