配置一个简单的webpack打包,less预编译+devserver热更新
2021-02-14 10:19
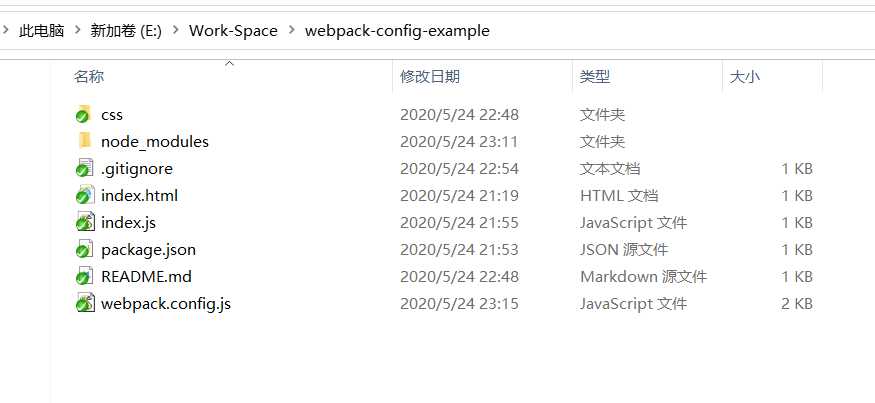
标签:host config 指定 class 通过命令 name 程序 ini pts 1.安装nodejs 2.创建一个文件夹并进入到该文件夹目录下使用cmd命令执行 文件目录如图 3.手动创建其他文件,css目录下是index.less 4.执行命令下载相关包 5.配置webpack.config.js文件,执行webpack打包时webpack默认会获取根目录下webpack.config.js文件中的配置。(也可以通过命令指定获取某个文件的配置) 6.在package.json中配置npm脚本命令 以上"build": "webpack --mode production" build表示命令名可以自行定义,webpack是可执行程序,--mode是webpack的配置参数,production/develoment是参数表示生产环境/开发环境。 7.执行npm run dev 启动一个本地服务 打开http://localhost:3000/可以看到你的网页,执行npm run build会将代码打包,打包后的代码会压缩成一行。 (案例放到github上可直接克隆下载:https://github.com/wangziwen-hubei/webpack-config-example.git) 配置一个简单的webpack打包,less预编译+devserver热更新 标签:host config 指定 class 通过命令 name 程序 ini pts 原文地址:https://www.cnblogs.com/life-technology-blog/p/12994826.htmlnpm init

npm install webpack webpack-cli webpack-dev-server -D
npm install css-loader less-loader style-loader html-webpack-plugin -D
npm install less --save
 1 const path = require(‘path‘);
 2 const HtmlWebpackPlugin = require(‘html-webpack-plugin‘)
 3
 4 module.exports = {
 5     // mode: ‘development‘,   // 通过命令传递--mode 配置参数
 6     entry: ‘./index.js‘,   //打包入口文件
 7     output: {
 8         filename: ‘[name].js‘,   //输出文件名
 9         path: path.resolve(__dirname, ‘dist‘)   //输出路径
10     },
11     module: {
12         rules: [         //loader
13             {
14                 test: /\.css$/,
15                 use: [‘style-loader‘, ‘css-loader‘]
16             },
17             {
18                 test: /\.less$/,
19                 use: [‘style-loader‘, ‘css-loader‘, ‘less-loader‘]
20             }
21         ]
22     },
23     plugins: [
24         new HtmlWebpackPlugin({   //html编译插件
25             template: ‘./index.html‘
26         }),
27     ],
28     devServer: {
29         port: 3000, //设置端口号
30         hot: true, //热更新
31         contentBase: ‘./‘, //path.join(__dirname, ‘dist‘), //默认打开文件位置
32         open: false  //自动打开
33     }
34 };
"scripts": {
    "build": "webpack --mode production",
    "dev": "webpack-dev-server --mode development"
  },
下一篇:html单选框和复选框
文章标题:配置一个简单的webpack打包,less预编译+devserver热更新
文章链接:http://soscw.com/index.php/essay/55181.html