Springboot集成Redis
2021-03-01 10:26
标签:actor 安装redis lis 业界 out 多线程 线程 连接数量 网址 Redis技术栈目前广泛使用于开发领域,掌握Redis技术栈与Springboot的集成至关重要。 Redis是目前业界使用最广泛的内存数据存储。相比memcached,Redis支持更丰富的数据结构,例如hashes, lists, sets等,同时支持数据持久化。除此之外,Redis还提供一些类数据库的特性,比如事务,HA,主从库。可以说Redis兼具了缓存系统和数据库的一些特性,因此有着丰富的应用场景。 1.安装redis 下载地址:https://github.com/MSOpenTech/redis/releases。 Redis的目录结构 Redis 命令参考网址 : http://doc.redisfans.com/ 2.Springboot集成Redis (1)引入spring-boot-starter-redis 在springboot2之后,redis默认集成的是lettuce. 1.5的版本默认采用的连接池技术是jedis , 2.0以上版本默认连接池是lettuce. 1.5版本的springboot集成redis与2.0有所不同(核心配置类的书写也有很大的区别),主要是因为连接池技术使用的差异,这里主要介绍springboot的2.x版本。 Jedis与Lettuce的区别 如果你在网上搜索Redis 的Java客户端,你会发现,大多数文献介绍的都是 Jedis。 不可否认,Jedis是一个优秀的基于Java语言的Redis客户端。 与Jedis相比,Lettuce则完全克服了其线程不安全的缺点:Lettuce是一个可伸缩的线程安全的Redis客户端,支持同步、异步和响应式模式。 (2)添加配置文件 (3)书写核心集成配置类(***) Springboot集成Redis 标签:actor 安装redis lis 业界 out 多线程 线程 连接数量 网址 原文地址:https://www.cnblogs.com/JoePotter/p/14444252.html
Redis 支持 32 位和 64 位。这个需要根据你系统平台的实际情况选择

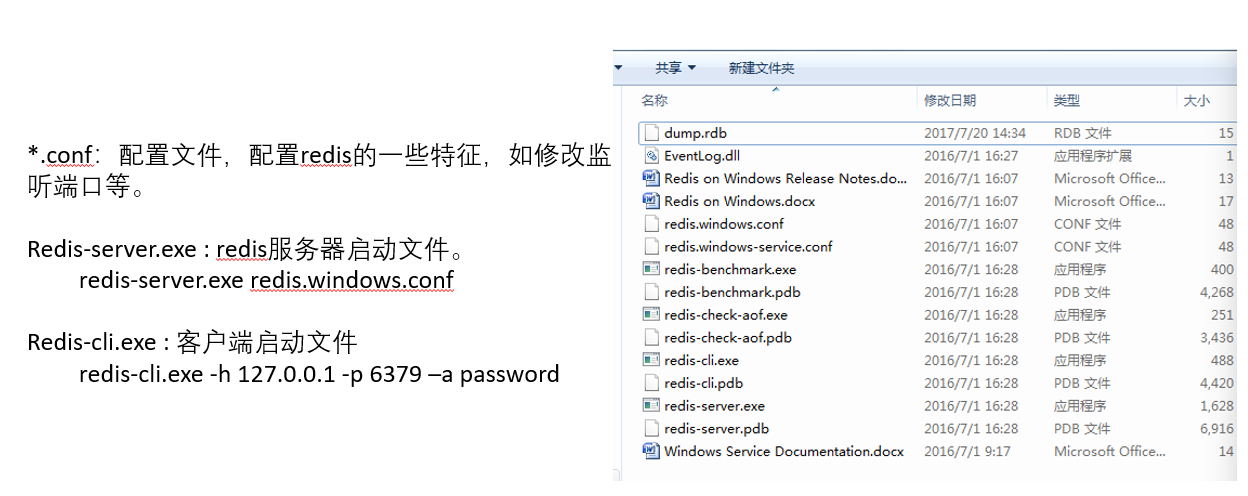
*.conf:配置文件,配置redis的一些特征,如修改监听端口等。

Redis-server.exe : redis服务器启动文件。
	redis-server.exe redis.windows.conf

Redis-cli.exe : 客户端启动文件
	redis-cli.exe -h 127.0.0.1 -p 6379 –a password
但是,其不足也很明显:Jedis在实现上是直接连接Redis-Server,在多个线程间共享一个Jedis实例时是线程不安全的,如果想要在多线程场景下使用Jedis,需要使用连接池,每个线程都使用自己的Jedis实例,当连接数量增多时,会消耗较多的物理资源。
多个线程可以共享一个连接实例,而不必担心多线程并发问题。
它基于优秀Netty NIO框架构建,支持Redis的高级功能,如Sentinel,集群,流水线,自动重新连接和Redis数据模型。# REDIS (RedisProperties)
# Redis数据库索引(默认为0)
spring.redis.database=0
# Redis服务器地址
spring.redis.host=127.0.0.1
# Redis服务器连接端口
spring.redis.port=6379
# Redis服务器连接密码(默认为空)
spring.redis.password=
# 连接池最大连接数(使用负值表示没有限制)
spring.redis.pool.max-active=8
# 连接池最大阻塞等待时间(使用负值表示没有限制)
spring.redis.pool.max-wait=-1
# 连接池中的最大空闲连接
spring.redis.pool.max-idle=8
# 连接池中的最小空闲连接
spring.redis.pool.min-idle=0
# 连接超时时间(毫秒)
spring.redis.timeout=1000

package com.study.springboot.config;
import java.time.Duration;
import org.springframework.cache.CacheManager;
import org.springframework.cache.annotation.CachingConfigurerSupport;
import org.springframework.cache.annotation.EnableCaching;
import org.springframework.context.annotation.Bean;
import org.springframework.context.annotation.Configuration;
import org.springframework.data.redis.cache.RedisCacheConfiguration;
import org.springframework.data.redis.cache.RedisCacheManager;
import org.springframework.data.redis.connection.RedisConnectionFactory;
import org.springframework.data.redis.core.RedisTemplate;
import org.springframework.data.redis.serializer.Jackson2JsonRedisSerializer;
import org.springframework.data.redis.serializer.RedisSerializationContext;
import org.springframework.data.redis.serializer.RedisSerializer;
import org.springframework.data.redis.serializer.StringRedisSerializer;
import com.fasterxml.jackson.annotation.JsonAutoDetect;
import com.fasterxml.jackson.annotation.PropertyAccessor;
import com.fasterxml.jackson.databind.ObjectMapper;
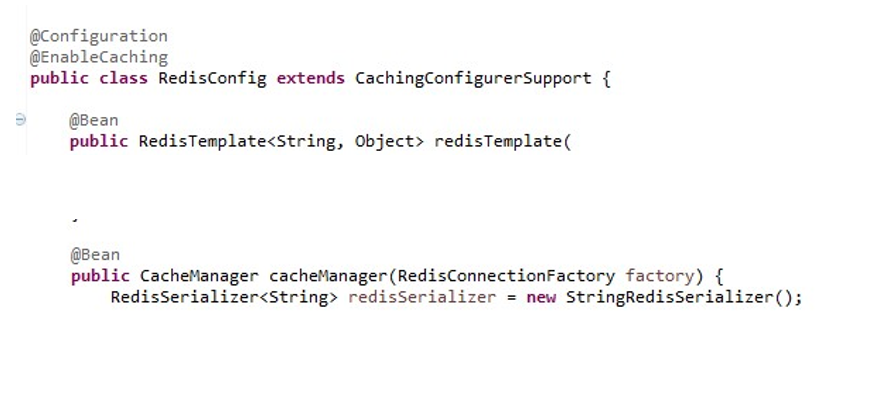
//Redis的核心配置类,这个类提供了两个方法(其实提供了两个bean,这两个bean会加载到spring的context里边,供使用者进行调用)
@Configuration //这个标签,通常与@bean结合使用,当@bean使用到该类的方法上,代表将该方法做为一个bean交给了spring的context进行了管理。
@EnableCaching //允许使用我们的缓存cache
public class RedisConfig extends CachingConfigurerSupport{
@Bean //此时,将我们的redisTemplate加载到了我们的spring的上下文中,applicationContext
public RedisTemplate
上一篇:python进阶(5)异常模块