SpringCloud(四):服务发现与Ribbon负载均衡详解
2021-03-04 01:29
标签:用户 负载均衡算法 com nta body null cto enable ado 关键词:客户端、负载均衡 关键词:正向代理 将Ribbon集成到SpringBoot中,需要依赖Eureka 导入依赖:ribbon和eureka 在配置文件application.yml中添加 在启动类上添加上Eureka注解 通过Eureka进行服务发现 修改RestTemplate配置,加上 回顾一下之前的客户端,我们之间把请求URL写死了 为了实现负载均衡,我们肯定得从eureka中去动态获取请求地址,想法就是通过名字! 很简单,这里只需要修改请求为 修改后如下 在上面,我们实现了通过Ribbon和Eureka来进行服务发现,这里我们要进行真正的负载均衡 这之前,我们的服务只有一个实例 创建方法类似springcloud-provider-dept8001#,这里只列出了几个需要注意的要点 创建完成后,数据库应该是这样的: 项目结构是这样的: 完成构建后,访问eureka中心,可以看到类似画面: 简单测试一下,dbSource是我们区分服务的重要依据! 如果你已经构建好了上面的分布式服务,并尝试通过配置了Ribbon消费者进行请求,就会发现我们已经实现了负载均衡了! 原理很简单 Ribbon默认使用的是轮询的策略,我们可以自定义负载均衡策略 相关接口:IRule 有很多实现类 AvailabilityFilteringRule : 会先过滤掉,跳闸,访问故障的服务,对剩下的进行轮询 RetryRule : 会先按照轮询获取服务,如果服务获取失败,则会在指定的时间内进行,重试 RoundRobinRule:轮询 ... 这里可以看一下轮询的源码,其实很好理解,就是维护一个计数器 如果需要修改的话,只需要修改核心的 模仿源码,自己写一个 其实只需要修改choose()方法中调用的 之后进行配置 即可 我们在上文进行了全局的IRule替换,但在实际开发中,我们可能会遇到这种情况:对于不同的服务,我们需要配置不同的负载均衡策略,使用Ribbon怎样实现? ——这就需要更加优雅的Ribbon配置方式: 另起一个配置类 注意:该类不应该被应用程序上下文的@ComponentScan注解扫描到,可以放到启动类的同级目录,比如 在SpringBoot配置类中,进行@RibonClient配置 用作标记注释,指示被注释的对象 反过来,这允许您对传递给的网址使用“逻辑标识符” 用于配置功能区客户端。 是否需要@RibbonClient? 没有!如果您正在使用服务发现,并且对所有默认的功能区设置都没问题,那么甚至不需要使用 我 至少有两种情况需要使用 *自定义功能区设置:* 定义一个 请参阅Spring Cloud *在不进行服务发现的情况下使用功能区* 如果您未使用Service 定义一个 然后在你的 @RibbonClient和@LoadBalanced之间的区别 为Ribbon Client自定义配置 视频:狂神说Spring Cloud 狂神说SpringCloud学习笔记 SpringCloud(四):服务发现与Ribbon负载均衡详解 标签:用户 负载均衡算法 com nta body null cto enable ado 原文地址:https://www.cnblogs.com/cpaulyz/p/14379424.htmlSpringCloud(四):服务发现与Ribbon负载均衡详解
1 负载均衡及Ribbon
1.1 Ribbon是什么
1.2 负载均衡
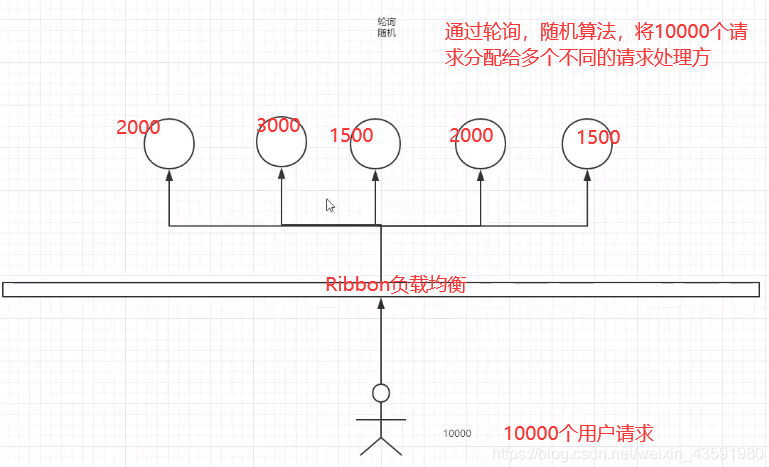
2 SpringBoot集成Ribbon
2.1 集成Ribbon
#  eureka
eureka:
  client:
    register-with-eureka: false # 不注册自己
    service-url:
      defaultZone: http://eureka7001.com:7001/eureka,http://eureka7002.com:7002/eureka,http://eureka7003.com:7003/eureka
@EnableEurekaClient
@SpringBootApplication
public class DeptConsumer_80 {
    public static void main(String[] args) {
        SpringApplication.run(DeptConsumer_80.class,args);
    }
}
2.2 服务发现
@LoadBalanced注解@Configuration
public class BeanConfig {
@Bean
@LoadBalanced // 配置负载均衡实现restTemplate
public RestTemplate getRestTemplate(){
return new RestTemplate();
}
}
@RestController
@RequestMapping("/consumer/dept")
public class DeptConsumerController {
// 理解:消费者,不应该有service层
// RestTemplate 供我们直接调用
// 注册到Spring中
@Autowired
RestTemplate restTemplate;
private static final String REST_URL_PREFIX = "http://localhost:8001";
@RequestMapping("/get/{id}")
public Dept get(@PathVariable("id") int id){
return restTemplate.getForObject(REST_URL_PREFIX+"/dept/get/"+id,Dept.class);
}
@RequestMapping("/add")
public boolean add(Dept dept){
return restTemplate.postForObject(REST_URL_PREFIX+"/dept/add",dept,Boolean.class);
}
@RequestMapping("/getAll")
public List
REST_URL_PREFIX = "http://SPRINGCLOUD-PROVIDER-DEPT";即可@RestController
@RequestMapping("/consumer/dept")
public class DeptConsumerController {
// 理解:消费者,不应该有service层
// RestTemplate 供我们直接调用
// 注册到Spring中
@Autowired
RestTemplate restTemplate;
// Ribbon: 这里地址应该是一个变量,通过服务名来访问
// private static final String REST_URL_PREFIX = "http://localhost:8001";
private static final String REST_URL_PREFIX = "http://SPRINGCLOUD-PROVIDER-DEPT";
@RequestMapping("/get/{id}")
public Dept get(@PathVariable("id") int id){
return restTemplate.getForObject(REST_URL_PREFIX+"/dept/get/"+id,Dept.class);
}
@RequestMapping("/add")
public boolean add(Dept dept){
return restTemplate.postForObject(REST_URL_PREFIX+"/dept/add",dept,Boolean.class);
}
@RequestMapping("/getAll")
public List
3 使用Ribbon实现负载均衡
3.1 构建分布式的服务
springcloud-provider-dept8001,这里我们要另外做两个实例springcloud-provider-dept8002和springcloud-provider-dept8003
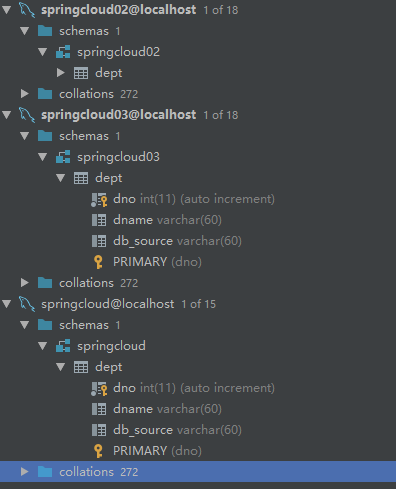
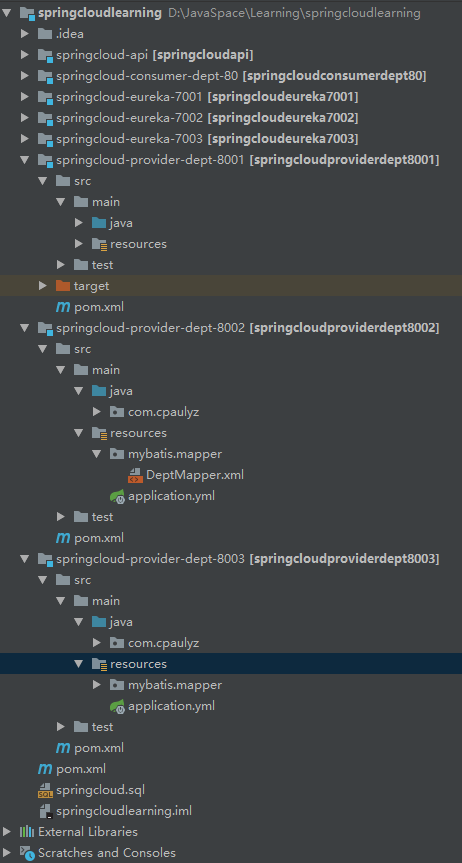


3.2 实现负载均衡
第一次访问
第二次访问
第三次访问
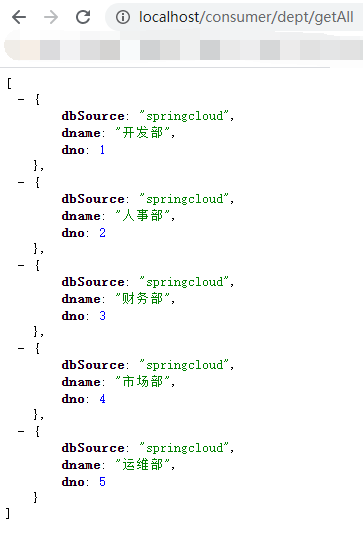
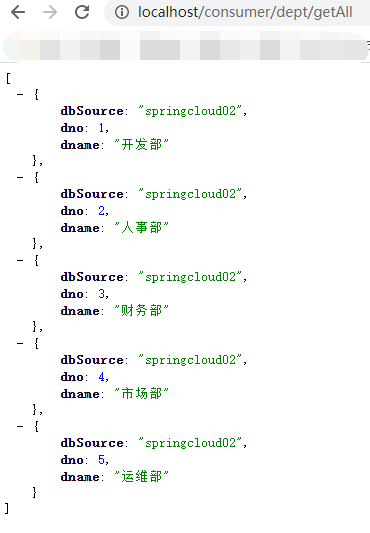
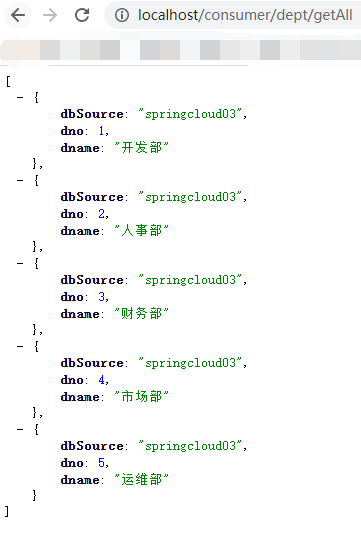
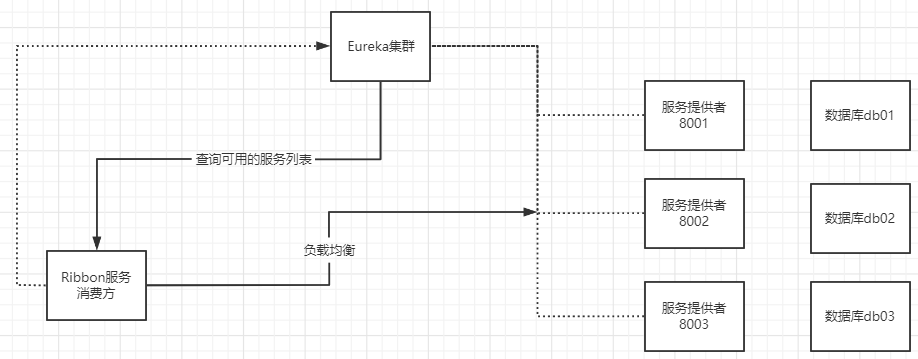
4 自定义负载均衡策略
4.1 相关接口
public interface IRule {
    Server choose(Object var1);
    void setLoadBalancer(ILoadBalancer var1);
    ILoadBalancer getLoadBalancer();
}

4.2 理解源码
public class RoundRobinRule extends AbstractLoadBalancerRule {
private AtomicInteger nextServerCyclicCounter;
private static final boolean AVAILABLE_ONLY_SERVERS = true;
private static final boolean ALL_SERVERS = false;
private static Logger log = LoggerFactory.getLogger(RoundRobinRule.class);
public RoundRobinRule() {
this.nextServerCyclicCounter = new AtomicInteger(0);
}
public RoundRobinRule(ILoadBalancer lb) {
this();
this.setLoadBalancer(lb);
}
public Server choose(ILoadBalancer lb, Object key) {
if (lb == null) {
log.warn("no load balancer");
return null;
} else {
Server server = null;
int count = 0;
while(true) {
if (server == null && count++ reachableServers = lb.getReachableServers();
Listchoose方法即可!4.3 自定义
RoundThreeRule,规则是
incrementAndGetModulo即可,下面是修改过的代码public class RoundThreeRule extends AbstractLoadBalancerRule {
private AtomicInteger nextServerCyclicCounter;
private AtomicInteger cnt;
private static final boolean AVAILABLE_ONLY_SERVERS = true;
private static final boolean ALL_SERVERS = false;
private static Logger log = LoggerFactory.getLogger(RoundThreeRule.class);
public RoundThreeRule() {
this.nextServerCyclicCounter = new AtomicInteger(0);
this.cnt = new AtomicInteger(0);
}
public RoundThreeRule(ILoadBalancer lb) {
this();
this.setLoadBalancer(lb);
}
public Server choose(ILoadBalancer lb, Object key) {
if (lb == null) {
log.warn("no load balancer");
return null;
} else {
Server server = null;
int count = 0;
while(true) {
if (server == null && count++ reachableServers = lb.getReachableServers();
List @Bean
public IRule myRule(){
return new RoundThreeRule();
}
5 更优雅的Ribbon配置方式:@RibonClient
@RibonClient
@Configuration
public class RibbonRoundThreeConfig {
    @Bean
    public IRule myRule(){
        return new RoundThreeRule();
    }
}
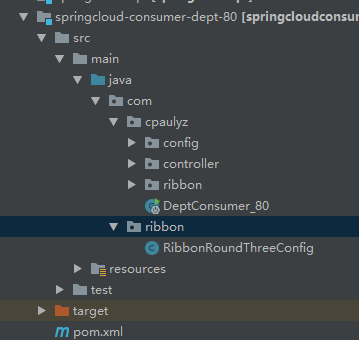
@EnableEurekaClient
@SpringBootApplication
@RibbonClient(name = "SPRINGCLOUD-PROVIDER-DEPT",configuration = RibbonRoundThreeConfig.class)
public class DeptConsumer_80 {
    public static void main(String[] args) {
        SpringApplication.run(DeptConsumer_80.class,args);
    }
}
name是服务名,对应eureka中微服务的名字configuration指明配置文件,比如这里定义了负载均衡策略5.1 @LoadBalanced和@RibbonClient的区别
(1)
@LoadBalanced
RestTemplate应使用RibbonLoadBalancerClient与您的服务进行交互。RestTemplate。这些逻辑标识符通常是服务的名称。例如:restTemplate.getForObject("http://some-service-name/user/{id}", String.class, 1);
some-service-name逻辑标识符在哪里。(2)
@RibbonClient
@RibbonClient注释。@RibbonClient什么时候应该使用?@RibbonClient
@RibbonClient@RibbonClient(name = "some-service", configuration = SomeServiceConfig.class)
name -将其设置为与功能区调用的服务相同的名称,但需要其他自定义功能区以与功能区交互。configuration-将其设置为@Configuration所有定义为的类@Beans。确保 不 选择此类,@ComponentScan否则它将覆盖所有功能区客户端的默认设置。
Netflix文档中的“自定义RibbonClient”部分(链接)
Discovery,则注释name字段@RibbonClient将用于application.properties在您传递给的URL
中的前缀以及“逻辑标识符”中为您的配置添加前缀RestTemplate。@RibbonClient@RibbonClient(name = "myservice")
application.propertiesmyservice.ribbon.eureka.enabled=false
myservice.ribbon.listOfServers=http://localhost:5000, http://localhost:5001
参考
文章标题:SpringCloud(四):服务发现与Ribbon负载均衡详解
文章链接:http://soscw.com/index.php/essay/59775.html