SpringBoot的web部署, SpringBoot开发非Web程序
2021-03-15 19:28
标签:override middle cal version 令行 pen git bash source bean 目录: 1、SpringBoot的web项目部署为war 项目结构 继承 SpringBootServletInitializer,重写configure()方法 将pom.xml的项目打包方式改为 war, 选中项目 -> 右键 -> Run as... -> Maven build... ->输入命令 clean package -DskipTests 选中项目 -> 右键 -> Properties 将demo.war放到tomcat,启动tomcat 访问 http://localhost:8080/demo/hello。 另外可以参考:netty-socketio(一)之helloworld,与springboot整合(linux注册服务启动jar服务) 将pom.xml的项目打包方式改为 jar, 选中项目 -> 右键 -> Run as... -> Maven build... ->输入命令 clean package -DskipTests 进入到 target 目录, shift + 右键 ->在此处打开命令行窗口 或 Git Bash Here 在打开的命令行窗口输入 java -jar demo.jar。 访问http://localhost:8080/hello。 pom.xml UserServiceImpl Application 运行:Application#main()方法,选中main, 右键 -> run as -> java application。当然也可以打成jar包,通过java -jar demo.jar运行。 依赖 Application 运行:Application#main()方法,选中main, 右键 -> run as -> java application。当然也可以打成jar包,通过java -jar demo.jar运行。 SpringBoot的web部署, SpringBoot开发非Web程序 标签:override middle cal version 令行 pen git bash source bean 原文地址:https://www.cnblogs.com/xy-ouyang/p/13997566.html
2、SpringBoot的web项目部署为jar
3、SpringBoot开发非Web程序
3.1、方式一:利用 main()方法
3.2、方式二:通过springboot启动加载类 CommandLineRunner#run()1、SpringBoot的web项目部署为war
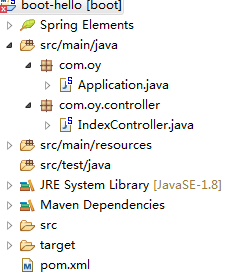


@SpringBootApplication
public class Application extends SpringBootServletInitializer {

    public static void main(String[] args) {
        SpringApplication.run(Application.class, args);
    }

    @Override
    protected SpringApplicationBuilder configure(SpringApplicationBuilder builder) {
        return builder.sources(Application.class);
    }

}
xml version="1.0" encoding="UTF-8"?>
project xmlns="http://maven.apache.org/POM/4.0.0"
    xmlns:xsi="http://www.w3.org/2001/XMLSchema-instance"
    xsi:schemaLocation="http://maven.apache.org/POM/4.0.0 https://maven.apache.org/xsd/maven-4.0.0.xsd">
    modelVersion>4.0.0modelVersion>
    parent>
        groupId>org.springframework.bootgroupId>
        artifactId>spring-boot-starter-parentartifactId>
        version>2.1.1.RELEASEversion>
    parent>

    groupId>com.oygroupId>
    artifactId>boot-helloartifactId>
    version>0.0.1-SNAPSHOTversion>
    packaging>warpackaging>
    name>boot-helloname>
    description>project for Spring Bootdescription>

    properties>
        java.version>1.8java.version>
    properties>

    dependencies>
        dependency>
            groupId>org.springframework.bootgroupId>
            artifactId>spring-boot-starter-webartifactId>
        dependency>
    dependencies>

    build>
        finalName>demofinalName>
        plugins>
            plugin>
                groupId>org.springframework.bootgroupId>
                artifactId>spring-boot-maven-pluginartifactId>
            plugin>
        plugins>
    build>

project>
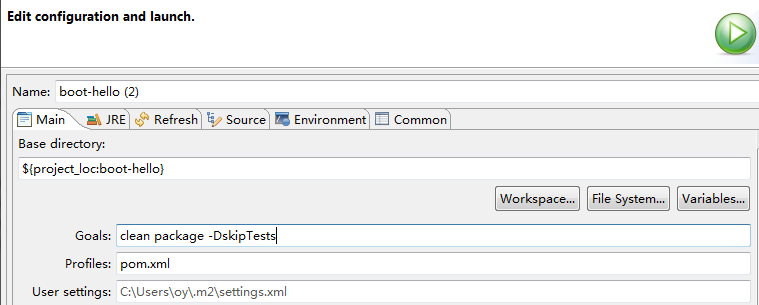

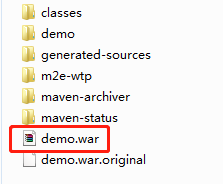
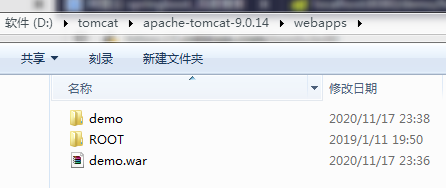
2、SpringBoot的web项目部署为jar
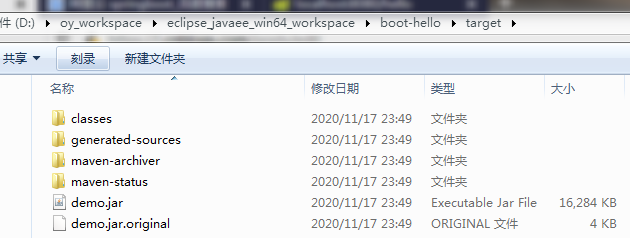
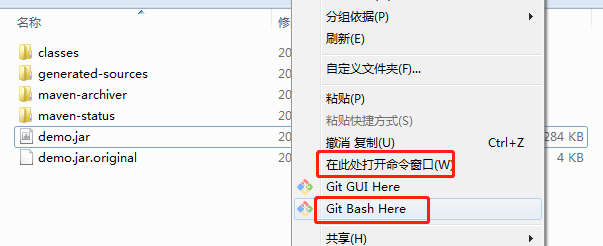
3、SpringBoot开发非Web程序
3.1、方式一:利用 main()方法
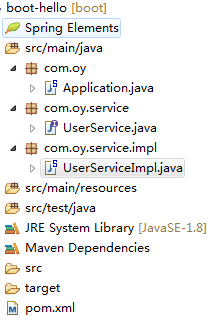
xml version="1.0" encoding="UTF-8"?>
project xmlns="http://maven.apache.org/POM/4.0.0"
    xmlns:xsi="http://www.w3.org/2001/XMLSchema-instance"
    xsi:schemaLocation="http://maven.apache.org/POM/4.0.0 https://maven.apache.org/xsd/maven-4.0.0.xsd">
    modelVersion>4.0.0modelVersion>
    parent>
        groupId>org.springframework.bootgroupId>
        artifactId>spring-boot-starter-parentartifactId>
        version>2.1.1.RELEASEversion>
    parent>

    groupId>com.oygroupId>
    artifactId>boot-helloartifactId>
    version>0.0.1-SNAPSHOTversion>
    packaging>jarpackaging>
    name>boot-helloname>
    description>project for Spring Bootdescription>

    properties>
        java.version>1.8java.version>
    properties>

    dependencies>
        dependency>
            groupId>org.springframework.bootgroupId>
            artifactId>spring-boot-starterartifactId>
        dependency>
    dependencies>

    build>
        finalName>demofinalName>
        plugins>
            plugin>
                groupId>org.springframework.bootgroupId>
                artifactId>spring-boot-maven-pluginartifactId>
            plugin>
        plugins>
    build>

project>
@Service
public class UserServiceImpl implements UserService {

    @Override
    public void getUser(Integer id) {
        System.out.println("id = " + id);
    }

}
@SpringBootApplication
public class Application {

    public static void main(String[] args) {
        ConfigurableApplicationContext context = SpringApplication.run(Application.class, args);
        UserService userService = (UserService)context.getBean(UserService.class);
        userService.getUser(1);
    }

}
3.2、方式二:通过springboot启动加载类 CommandLineRunner#run()
dependency>
    groupId>org.springframework.bootgroupId>
    artifactId>spring-boot-starterartifactId>
dependency>
@SpringBootApplication
public class Application implements CommandLineRunner {

    @Autowired
    private UserService userService;

    public static void main(String[] args) {
         SpringApplication.run(Application.class, args);
    }

    @Override
    public void run(String... args) throws Exception {
        userService.getUser(2);
    }

}
下一篇:python安装步骤
文章标题:SpringBoot的web部署, SpringBoot开发非Web程序
文章链接:http://soscw.com/index.php/essay/65064.html