webpack4 化繁为简(一)
2021-03-18 10:27
YPE html>
webpack4前言背景用途不多说,上来就干。从最简单的demo到项目中的实践。(指令是window 平台下,并且使用了cnpm 来安装包的依赖.)
一.基础demo
1.初始化项目
npm init -y会在项目目录下创建package.json 文件.
2.安装webpack webpack-cli
cnpm install webpack webpack-cli --save-dev3.下面来写最简单的一个入门demo。创建src dist 两个文件夹,分别用来放源码和打包后的代码
mkdir src
mkdir dist
在src 手动创建entry.js
document.getElementById(‘title‘).innerHTML=‘monkeykg‘在项目的根目录创建webpack.config.js,内容如下
const path=require(‘path‘);
module.exports={
    mode:"development",
    entry:[
        path.join(__dirname,‘./src/entry.js‘)
    ],
    output:{
        path:path.join(__dirname,‘dist‘),
        filename:‘bundle.js‘
    },
    // module:{},
    // plugins:[],
    // devServer:{}
}
为了简化webpack 运行的指令输入,可以在package.json文件的添加配置如下
"scripts": {
    "test": "echo \"Error: no test specified\" && exit 1",
    "build":"npx webpack --config webpack.config.js"//手动添加
  },
可以在命令行中运行了。。
npm run buildwebpack最简单的一个demo完成,在dist目录下面会生成一个bundle.js文件,同时手动创建一个index.html在dist目录下,内容如下
Document
浏览器运行index.html,就可以看到打包文件的js已经生效,页面上有 monkeykg 显示。
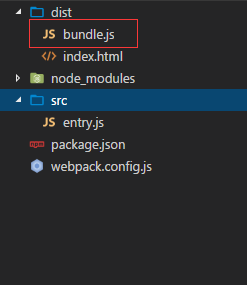
附上项目的demo 的目录结构
二.进阶
1.多个入口
webpack.config.js修改如下
const path=require(‘path‘);
module.exports={
    mode:"development",
    entry:[
        path.join(__dirname,‘./src/entry.js‘),
        path.join(__dirname,‘./src/entry1.js‘),//添加一个入口文件
    ],
    output:{
        path:path.join(__dirname,‘dist‘),
        filename:‘[name].js‘//出口文件
    },
    // module:{},
    // plugins:[],
    // devServer:{}
}
entry1.js文件的内容如下
document.getElementById(‘title‘).style.color=‘red‘;删除dist的bundle.js,然后运行npm run build,打包生成一个main.js文件。index.html修改引入script的路径‘./main.js‘ ,浏览器运行index.html,输出红色的 monkeykg
2.添加热更新
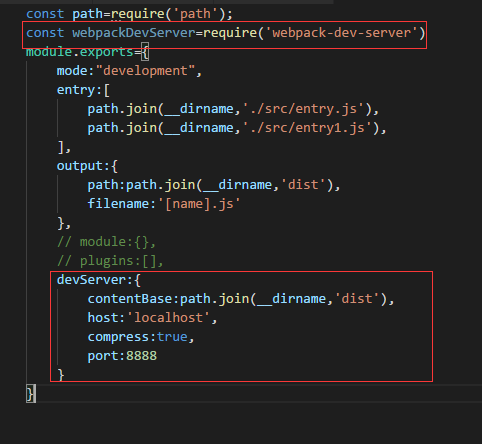
cnpm install --save-dev webpack-dev-server在webpack.config.js添加如下代码(附图)
const path=require(‘path‘);
const webpackDevServer=require(‘webpack-dev-server‘)
module.exports={
    mode:"development",
    entry:[
        path.join(__dirname,‘./src/entry.js‘),
        path.join(__dirname,‘./src/entry1.js‘),
    ],
    output:{
        path:path.join(__dirname,‘dist‘),
        filename:‘[name].js‘
    },
    // module:{},
    // plugins:[],
    devServer:{
        contentBase:path.join(__dirname,‘dist‘),
        host:‘localhost‘,
        compress:true,
        port:8888
    }
}
package.json 添加如下
"scripts": {
    "test": "echo \"Error: no test specified\" && exit 1",
    "build": "npx webpack --config webpack.config.js",
    "server":"webpack-dev-server"
  },
命令行输入npm run server 然后再浏览器打开localhost:8888,就可以看到index.html 页面,同时修改入口的 js代码,会实时的刷新浏览器,实现了热更新。
3.模块化打包css,并且单独输出css文件
安装包依赖 style-loader css-loader extract-text-webpack-plugin@next
cnpm install --save-dev style-loader css-loader extract-text-webpack-plugin@next在src 新建index.css
body{
    background:red;
    color:white;
}
并且在extry.js中引入
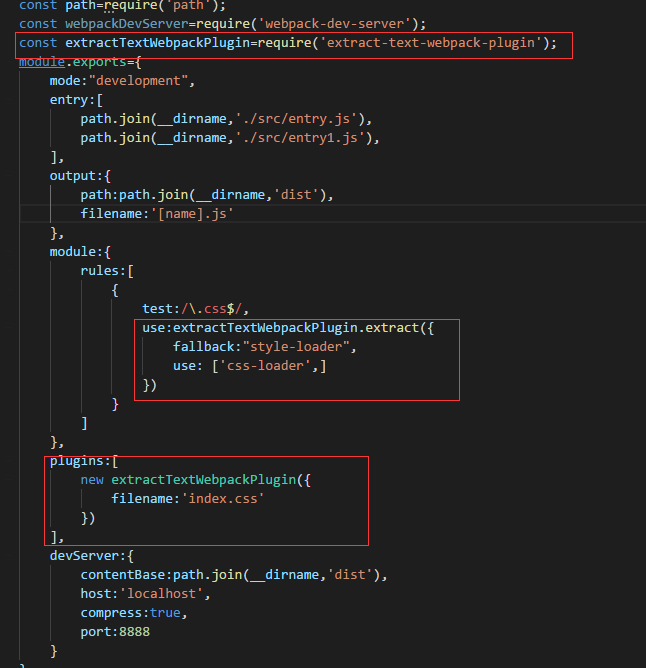
import css form ‘./index.css‘webpck.config.js修改如下:
const path=require(‘path‘);
const webpackDevServer=require(‘webpack-dev-server‘);
const extractTextWebpackPlugin=require(‘extract-text-webpack-plugin‘);
module.exports={
    mode:"development",
    entry:[
        path.join(__dirname,‘./src/entry.js‘),
        path.join(__dirname,‘./src/entry1.js‘),
    ],
    output:{
        path:path.join(__dirname,‘dist‘),
        filename:‘[name].js‘
    },
    module:{
        rules:[
            {
                test:/\.css$/,
                use:extractTextWebpackPlugin.extract({
                    fallback:"style-loader",
                    use: [‘css-loader‘,]
                })
            }
        ]
    },
    plugins:[
        new extractTextWebpackPlugin({
            filename:‘index.css‘
        })
    ],
    devServer:{
        contentBase:path.join(__dirname,‘dist‘),
        host:‘localhost‘,
        compress:true,
        port:8888
    }
}
删除main.js,命令行运行 npm run build,完成打包
在dist目录会多一个index.css文件
上一篇:php 抽象类abstract