Windows中Maven整合到Eclipse,修改成国内镜像
2021-05-04 18:28
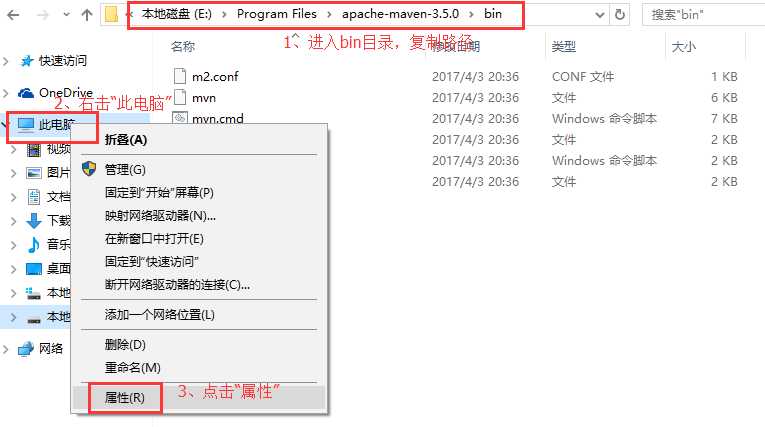
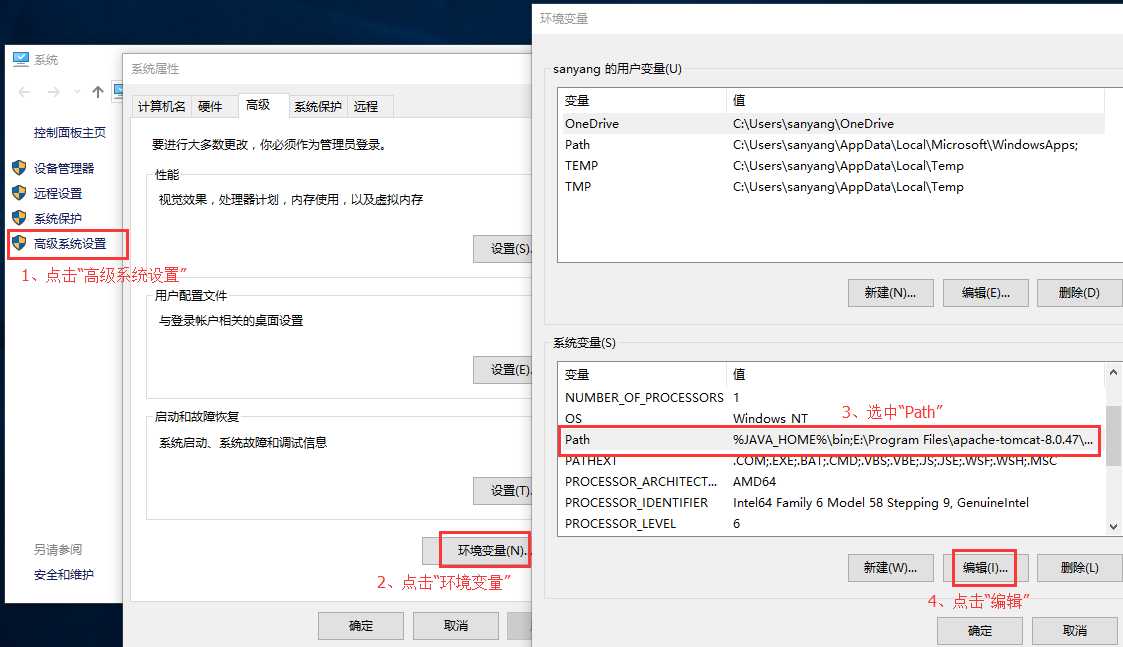
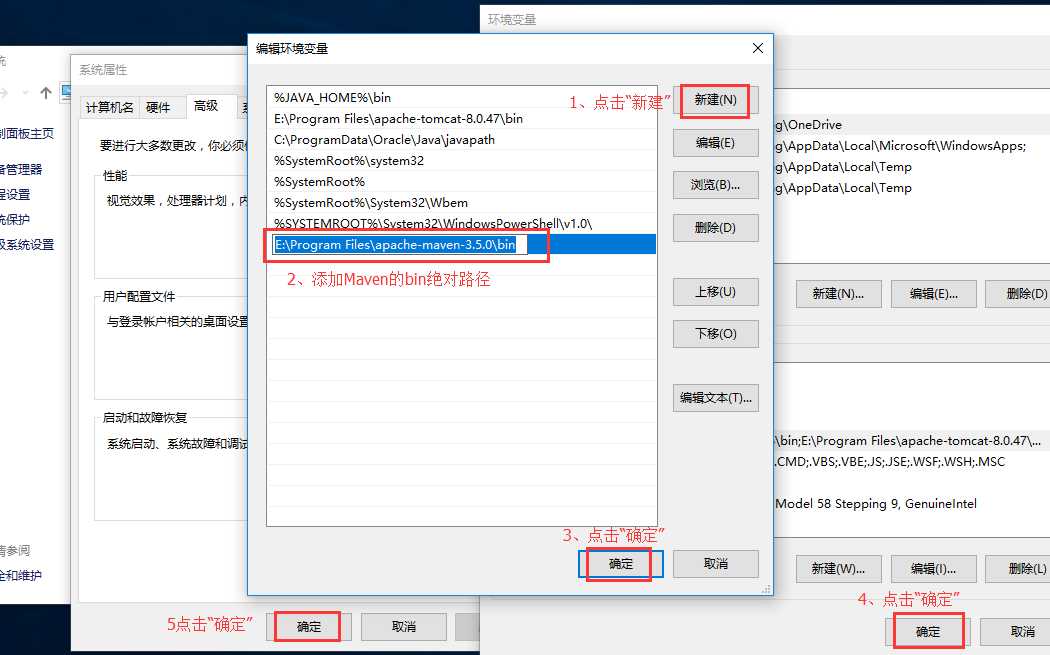
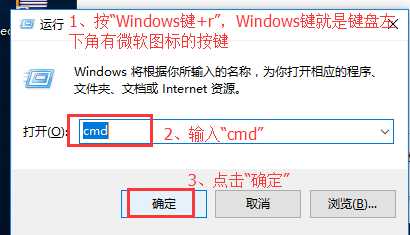
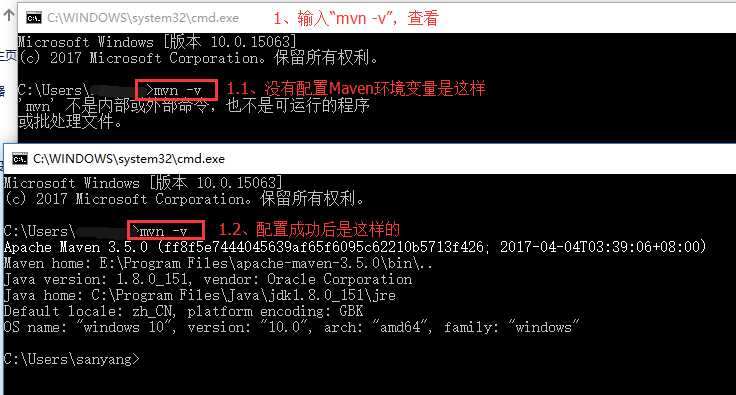
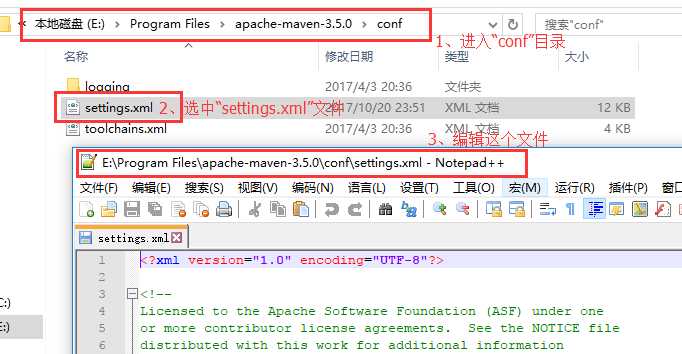
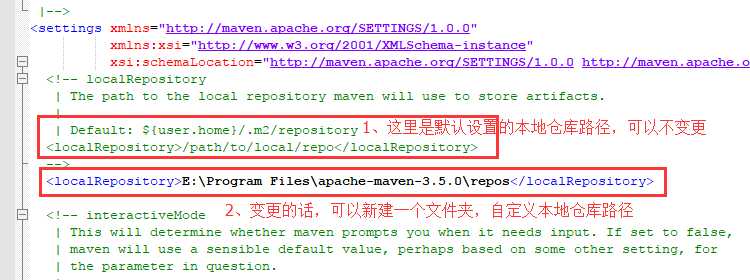
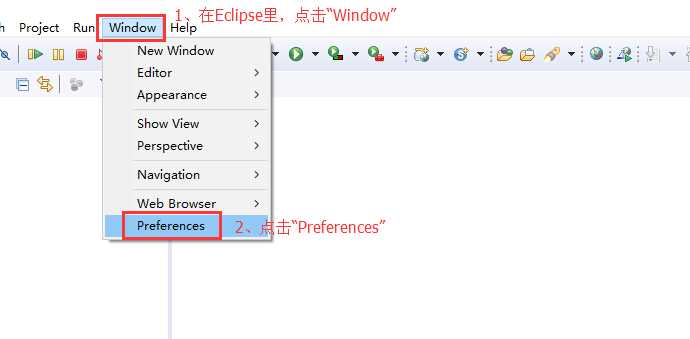
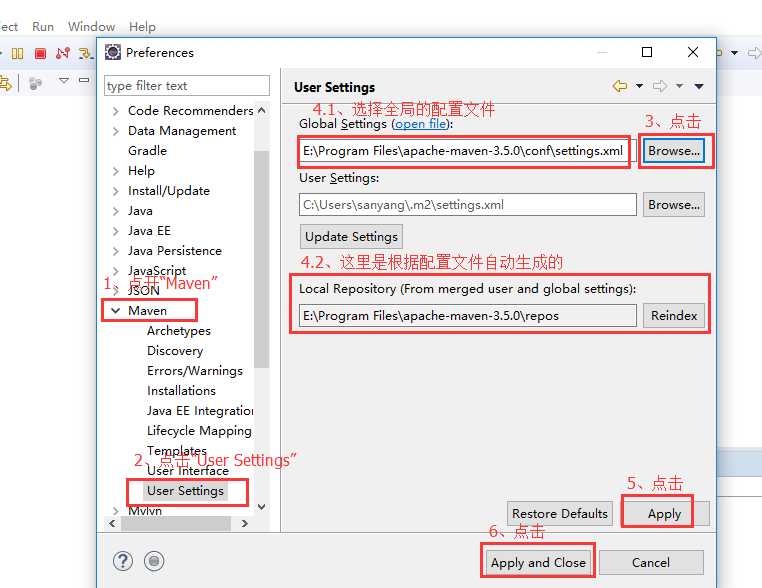
标签:配置文件 nload bin 选择 oca window 仓库 png XML Java项目中,当只使用几个jar包时,很好管理。当使用了好几十个时,jar包的版本、相互之间的依赖等,管理起来就不是很方便。 Maven最直观的就是jar包的依赖管理,当然他的使用不仅仅是这些,也不仅仅是使用在Java上。下面是在Eclipse里面整合Maven, 自定义本地仓库位置,镜像等。 1、下载Maven,下载地址:http://maven.apache.org/download.cgi 2、下载后,解压即可 3、复制Maven的bin路径,添加到环境变量 4、打开高级系统设置 5、添加路径到环境变量的“Path”,依次点击”确定“以保存 6、验证Maven配置,按”Win+r“,打开命令行提示 7、输入“mvn -v”,验证 8、编辑Maven的配置文件,“conf”下的“settings.xml” 9、配置本地仓库位置 10、设置远程仓库的镜像(网速的问题),使用阿里云镜像 10.1、代码1 10.2、代码2 11、打开Eclipse,设置“Preferences” 11、设置Maven选项 11.1、选择“Maven”的“User Settings”,配置在全局设置 11.2、应用保存后,Eclipse会初始化一下,很快的。这样就把Maven整合到Eclipse了。用国内镜像下载,还是很快的。 Windows中Maven整合到Eclipse,修改成国内镜像 标签:配置文件 nload bin 选择 oca window 仓库 png XML 原文地址:http://www.cnblogs.com/sdf-txt/p/7705285.html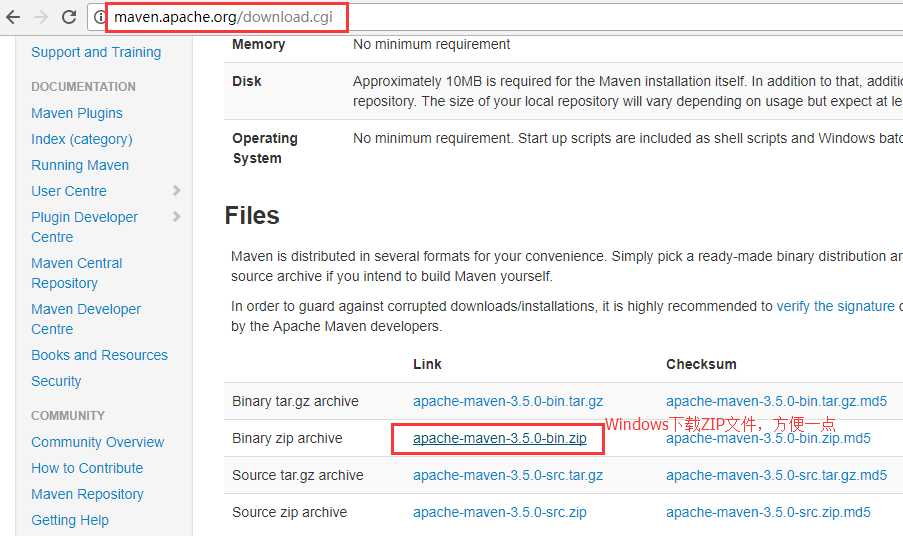

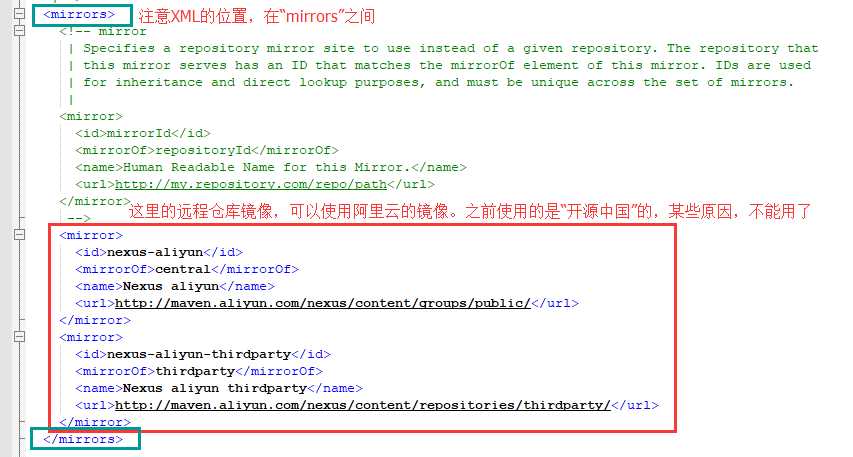
    mirror>
      id>nexus-aliyunid>
      mirrorOf>centralmirrorOf>
      name>Nexus aliyunname>
      url>http://maven.aliyun.com/nexus/content/groups/public/url>
    mirror>
    mirror>
      id>nexus-aliyun-thirdpartyid>
      mirrorOf>thirdpartymirrorOf>
      name>Nexus aliyun thirdpartyname>
      url>http://maven.aliyun.com/nexus/content/repositories/thirdparty/url>
    mirror>
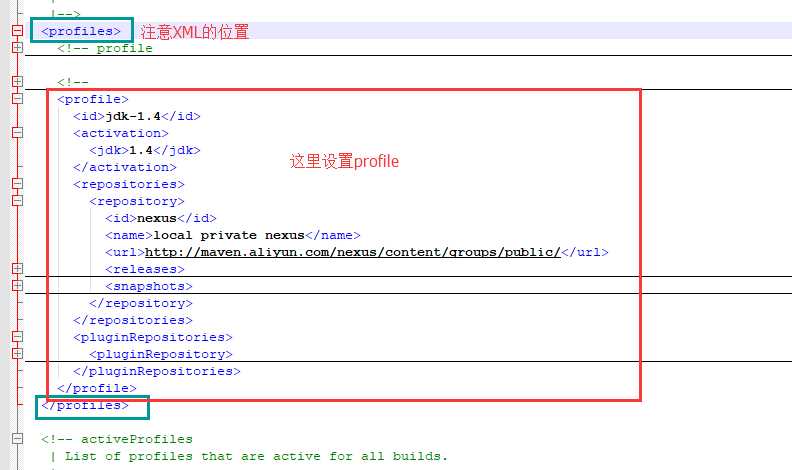
    profile>
      id>jdk-1.4id>
      activation>
        jdk>1.4jdk>
      activation>
      repositories>
        repository>
          id>nexusid>
          name>local private nexusname>
          url>http://maven.aliyun.com/nexus/content/groups/public/url>
          releases>
            enabled>trueenabled>
          releases>
          snapshots>
            enabled>falseenabled>
          snapshots>
        repository>
      repositories>
      pluginRepositories>
        pluginRepository>
              id>nexusid>
              name>local private nexusname>
              url>http://maven.aliyun.com/nexus/content/groups/public/url>
              releases>
                enabled>trueenabled>
              releases>
              snapshots>
                enabled>falseenabled>
              snapshots>
        pluginRepository>
      pluginRepositories>
    profile>
上一篇:WPF Uri的写法
下一篇:下拉框 PopupWindow
文章标题:Windows中Maven整合到Eclipse,修改成国内镜像
文章链接:http://soscw.com/index.php/essay/82385.html