asp.net core 3.1 发布到Ubuntu(nginx、Supervisor)
2021-05-30 13:02
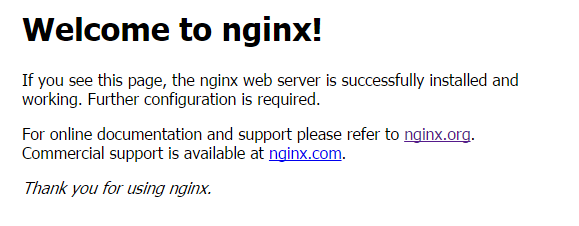
标签:header auto site 手动 没有 保存 rgba cat 环境 先为Ubuntu安装运行时,一般情况下安装运行时即可 选择对应版本即可。 也可以安装SDK Nginx好处是为了反向代理,均衡负载 1.卸载nginx,及其配置文件 2.自动全部移除不使用的软件包 3.列出与nginx相关的软件 4.删除查询出来的与nginx相关的软件,我这里只是举个例子: 假如查询出来的有这3个 安装成功后会在浏览器输入http://本机ip 即可显示该页面 Supervisor守护程序能自动监控进程,不再需要手动处理asp.net core手动启动,而且关闭后还会后台运行。 到此需要的环境基本安装好了。 在ASP.NET Core项目中涉及到注意事项, 例如MongoDB默认是127.0.0.1或localhost,所以得修改MongoDB配置文件为0.0.0.0即可 Core只会监听http://localhost:5000和http://localhost:5001 涉及的方法 环境变量 - 使用 命令行参数 - 当使用命令行启动应用时,使用 使用 首先,最简单的方式,当配置 cd到该目录下,启动web项目 这时可以去看看项目是否运行成功,curl http://ip:5000 安装好后进入目录,打开default文件并修改为一下的内容 Linux编辑命令 编辑好后重启Nginx来应用配置 创建配置文件 重新启动Supervisor应用配置 测试,重启Ubuntu后,网站不用手动打开即可访问。正常 有错留言再改这只是Demo。 End. asp.net core 3.1 发布到Ubuntu(nginx、Supervisor) 标签:header auto site 手动 没有 保存 rgba cat 环境 原文地址:https://www.cnblogs.com/luomilande/p/14673689.html一.Ubuntu环境搭建
1. 安装.NET SDK or .NET Runtime
.NET版本
Snap包
5.0
dotnet-runtime-50
3.1(LTS)
dotnet-runtime-31
3.0
dotnet-runtime-30
2.2
dotnet-runtime-22
2.1(LTS)
dotnet-runtime-21
sudo snap install dotnet-runtime-31 --classic
.NET版本
Snap包或通道
5.0
5.0
或latest/stable
3.1 (LTS)
3.1
或lts/stable
2.1 (LTS)
2.1
sudo snap install dotnet-sdk --classic --channel=3.1
2. 安装Nginx
sudo apt-get update
sudo apt-get install
sudo service ngnix start
Nginx卸载:
sudo apt-get --purge remove nginx
sudo apt-get autoremove
dpkg --get-selections|grep nginx
#只要出现nginx的逐个删除即可
sudo apt-get --purge remove nginx
sudo apt-get --purge remove nginx-common
sudo apt-get --purge remove nginx-core
#删除以后再执行
dpkg --get-selections|grep nginx
#检查没有后即可重新安装
sudo apt-get update
sudo apt-get install nginx

3.安装Supervisor守护程序
sudo apt-get update
sudo apt-get install supervisor
二.运行web项目
1.服务器连接ip
2.涉及到Core项目中你的Url监听
UseUrls() - 在Program.cs配置程序监听的URLsDOTNET_URLS或者ASPNETCORE_URLS配置URLs--urls参数指定URLslaunchSettings.json - 使用applicationUrl属性来配置URLsKestrelServerOptions.Listen() - 使用Listen()方法手动配置Kestral服务器监听的地址1.UseUrls()
IWebHostBuilder时,你可以使用UseUrls()方法硬编码绑定的URLs(Demo用)public class Program
{
public static void Main(string[] args)
{
CreateHostBuilder(args).Build().Run();
}
?
public static IHostBuilder CreateHostBuilder(string[] args) =>
Host.CreateDefaultBuilder(args)
.ConfigureWebHostDefaults(webBuilder =>
{
webBuilder.UseStartup
3.Xftp上传到服务器上
dotnet 项目.dll
4.配置Nginx
cd /etc/nginx/sites-available
sudo vim default
server {
        listen 80;
        listen [::]:80;
        #防止css/js不加载
        location ~ .*\.(js|css)$ {
             proxy_pass http://127.0.0.1:5000;
         }
?
        location / {
        #绑定跳转的ip
        proxy_pass http://192.168.14.130:5000;
        proxy_http_version 1.1;
        proxy_set_header Upgrade $http_upgrade;
        proxy_set_header Connection keep_alive;
        proxy_set_header Host $host;
        proxy_cache_bypass $http_upgrade;
        try_files $uri $uri/ =404;
        }
}
vim Program.cs  //打开或新建Program.cs文件
?
i  //进入编辑模式
?
Esc键  //退出编辑模式
?
yy  //复制光标所在行
?
5yy  //复制光标起后5行
?
p //粘贴
?
dd  //删除光标所在行
?
5dd  //删除光标起后5行
?
u   //撤销操作
?
:q!  //不保存并退出
?
:wq  //保存并退出
sudo nginx -t
sudo nginx -s reload
5.配置守护进程Supervisor
cd /etc/supervisor/conf.d
sudo vim test.conf
[program:hwappService]
command=dotnet /usr/www/Czar.Cms.Admin.dll  #要执行的命令
directory=/usr/www/  #dll所在的文件夹
autostart=true
autorestart=true
stderr_logfile=/var/log/sampleMicroService.err.log  #错误日志
stdout_logfile=/var/log/sampleMicroService.out.log  #输出日志
user=root  #用户
stopsignal=INT
sudo service supervisor restart
上一篇:html特殊字符
文章标题:asp.net core 3.1 发布到Ubuntu(nginx、Supervisor)
文章链接:http://soscw.com/index.php/essay/89554.html