.NET Core + K8S + Loki 玩转日志聚合
2021-06-01 00:01
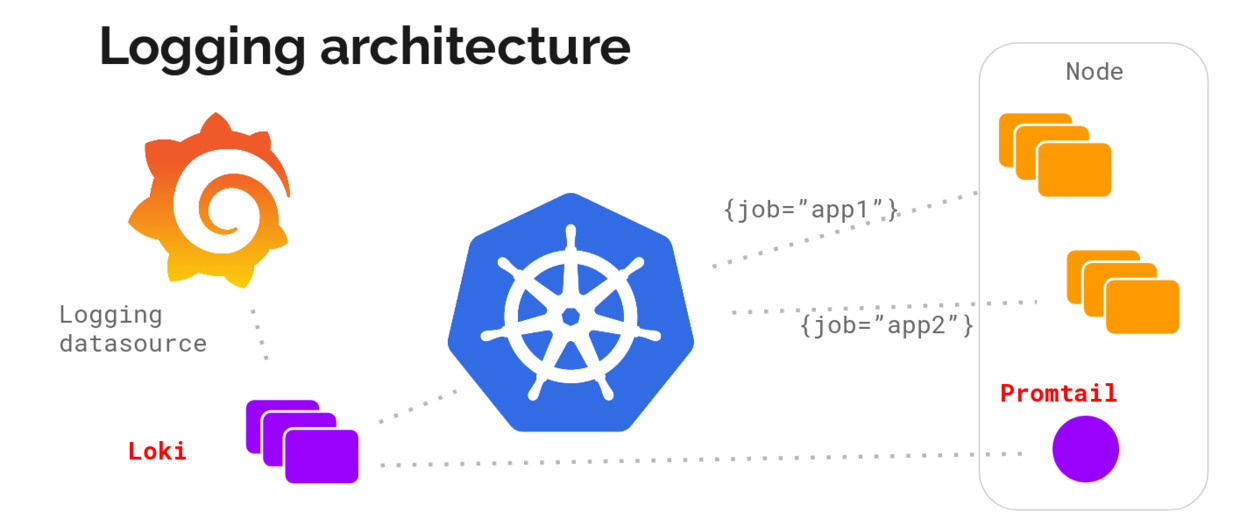
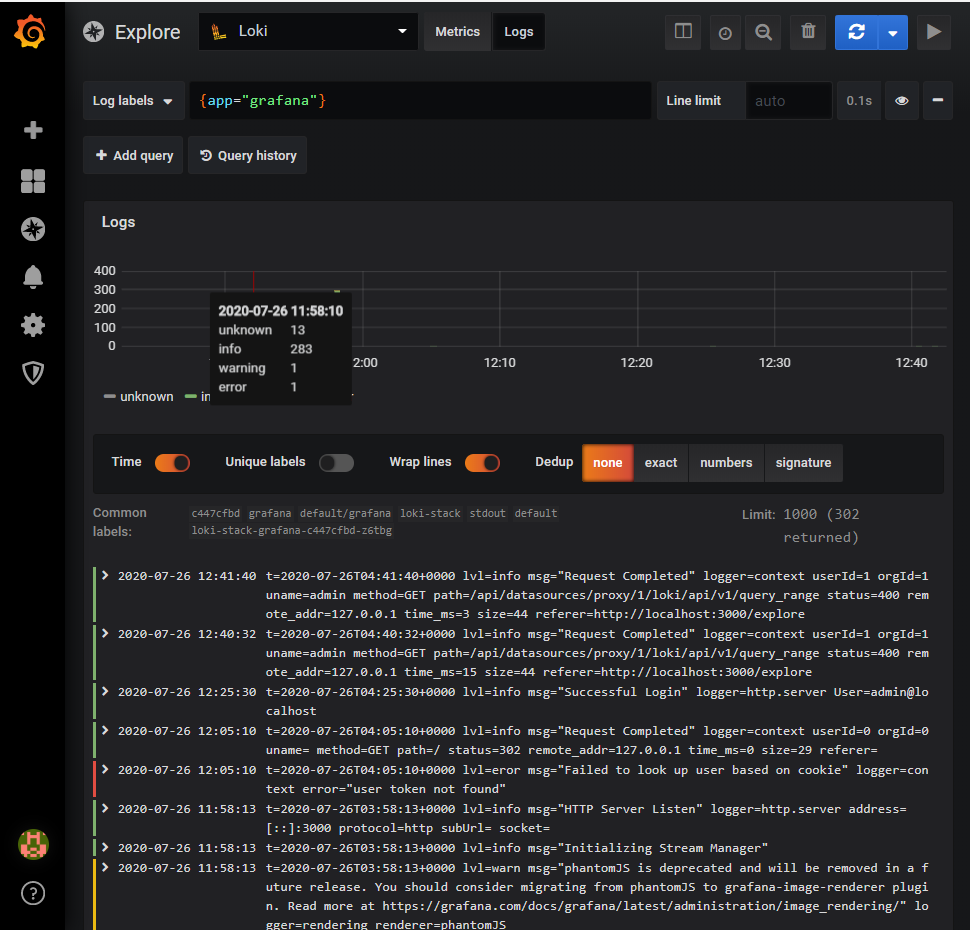
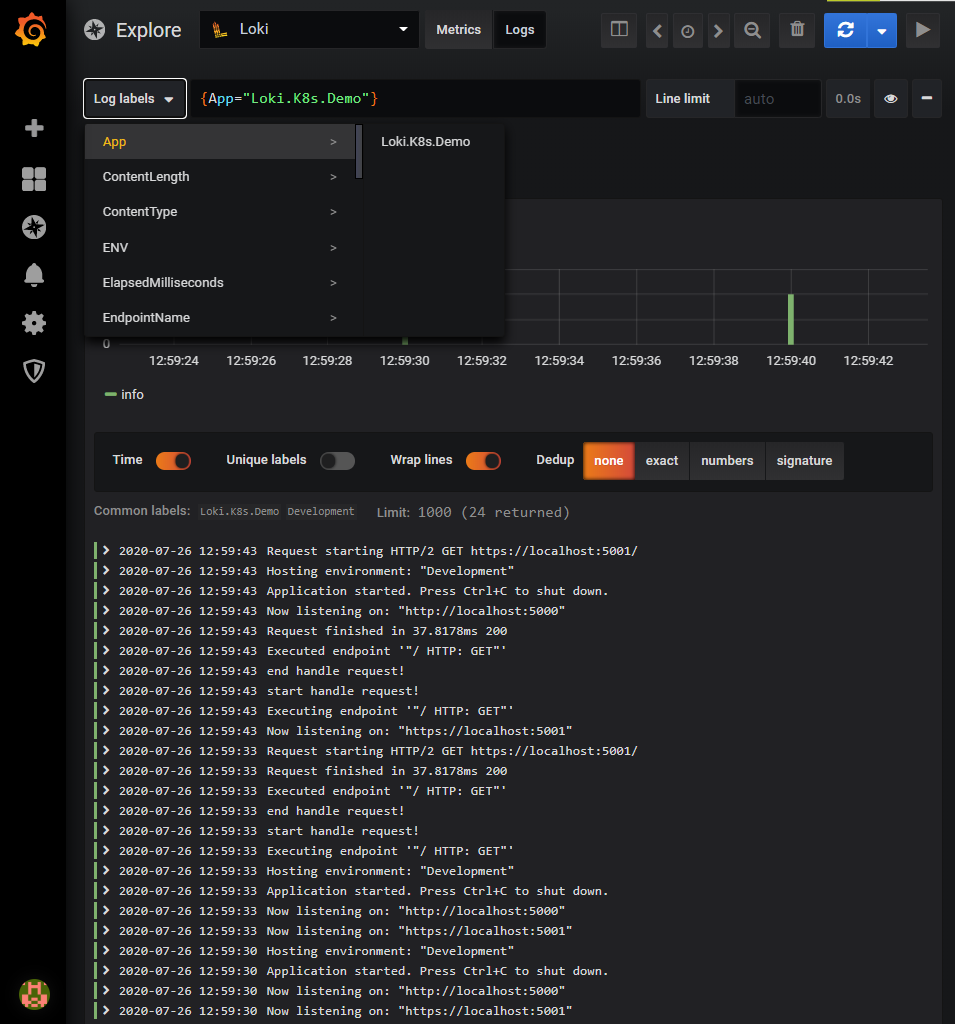
标签:hand rri netcore patch environ 介绍 cep sink 查看 转: 最近在了解日志聚合系统,正好前几天看到一篇文章《用了日志系统新贵Loki,ELK突然不香了!》,所以就决定动手体验一下。本文就带大家快速了解下Loki,并简单介绍.NET Core如何集成Loki。 Grafana Loki like Prometheus, but for logs。其是一个水平可扩展,高可用性,多租户的日志聚合系统,基于Apatch 2.0开源。其有三部分组成: 日志聚合系统的目的是为了方便我们进行日志跟踪和故障排查,尤其在云原生的环境之下。目前主流的日志聚合系统,当数ELK、EFK和Loki。Loki相较于ELK Stack有以下优势: Elasticsearch中的数据作为非结构化JSON对象存储在磁盘上,Loki以二进制的形式存储。 Elasticsearch采用全文索引,倒排索引的切分和共享的成本较高。Loki仅索引元数据,比如标签。 和Prometheus无缝集成。 首先我们先来基于Heml安装Loki到本地K8S集群。 1. 添加Loki Chart 仓库: 2. 安装Loki Stack 从上面的Values中,可以看出,可以自定义启用fluent-bit、grafana、filebeat、prometheus、logstash组件。这里我们仅启用grafana日志界面。 3. 登录Grafana 从上面可知,已经成功启动,其中loki暴露的容器端口为3100,grafana暴露的端口为80。 然后本地浏览器打开http://localhost:3000/就可以访问了。 上面已经说了很清楚了,可以从secret中获取。 然后使用 下一步,我们就来创建一个ASP.NET Core Web 应用,将日志记录到Loki,并通过Grafana进行聚合分析。 从上可知,日志组件选用的是Serilog,因为其支持持久化日志到Loki。 修改 因为不想把应用打包成镜像运行到K8S中,所以我们需要把K8S的Loki服务做一次端口转发暴露到本机,转发后,就可以使用 运行项目后,重新打开Grafana,添加过滤条件,就可以查看应用日志了。 参考资料: 转: .NET Core + K8S + Loki 玩转日志聚合 标签:hand rri netcore patch environ 介绍 cep sink 查看 原文地址:https://www.cnblogs.com/wangtcc/p/14615274.html.NET Core + K8S + Loki 玩转日志聚合

1. Intro
2. What‘s Loki Stack

3. Why Use Loki
4. How Use Loki
PS C:UsersShengjie> helm repo add loki https://grafana.github.io/loki/charts
"loki" has been added to your repositories
PS C:UsersShengjie> helm repo update
Hang tight while we grab the latest from your chart repositories...
...Successfully got an update from the "stable" chart repository
...Successfully got an update from the "loki" chart repository
Update Complete. ? Happy Helming!?
PS C:UsersShengjie> helm search hub loki-stack
URL                                             CHART VERSION   APP VERSION     DESCRIPTION
https://hub.helm.sh/charts/loki/loki-stack      0.38.3          v1.5.0          Loki: like Prometheus, but for logs.
PS C:UsersShengjie> helm show values loki/loki-stack
loki:
  enabled: true

promtail:
  enabled: true

fluent-bit:
  enabled: false

grafana:
  enabled: false
  sidecar:
    datasources:
      enabled: true
  image:
    tag: 6.7.0

prometheus:
  enabled: false

filebeat:
  enabled: false
  filebeatConfig:
    filebeat.yml: |
      # logging.level: debug
      filebeat.inputs:
      - type: container
        paths:
          - /var/log/containers/*.log
        processors:
        - add_kubernetes_metadata:
            host: ${NODE_NAME}
            matchers:
            - logs_path:
                logs_path: "/var/log/containers/"
      output.logstash:
        hosts: ["logstash-loki:5044"]

logstash:
  enabled: false
  image:
    repository: grafana/logstash-output-loki
    tag: 1.0.1
  filters:
    main: |-
      filter {
        if [kubernetes] {
          mutate {
            add_field => {
              "container_name" => "%{[kubernetes][container][name]}"
              "namespace" => "%{[kubernetes][namespace]}"
              "pod" => "%{[kubernetes][pod][name]}"
            }
            replace => { "host" => "%{[kubernetes][node][name]}"}
          }
        }
        mutate {
          remove_field => ["tags"]
        }
      }
  outputs:
    main: |-
      output {
        loki {
          url => "http://loki:3100/loki/api/v1/push"
          #username => "test"
          #password => "test"
        }
        # stdout { codec => rubydebug }
      }
PS C:UsersShengjie> helm install loki-stack loki/loki-stack --set grafana.enabled=true
coalesce.go:165: warning: skipped value for filters: Not a table.
coalesce.go:165: warning: skipped value for filters: Not a table.
NAME: loki-stack
LAST DEPLOYED: Sun Jul 26 11:58:11 2020
NAMESPACE: default
STATUS: deployed
REVISION: 1
NOTES:
The Loki stack has been deployed to your cluster. Loki can now be added as a datasource in Grafana.

See http://docs.grafana.org/features/datasources/loki/ for more detail.
首先确认Loki是否成功部署:PS C:UsersShengjie> helm list
NAME NAMESPACE REVISION UPDATED STATUS CHART APP VERSION
loki-stack default 1 2020-07-26 11:58:11.022896 +0800 CST deployed loki-stack-0.38.3 v1.5.0
PS C:UsersShengjie> kubectl get pod -w
NAME READY STATUS RESTARTS AGE
loki-stack-0 1/1 Running 0 2m33s
loki-stack-grafana-c447cfbd-z6tbg 1/1 Running 0 2m33s
loki-stack-promtail-j47hl 1/1 Running 0 2m33s
PS C:UsersShengjie> kubectl get svc -w
NAME TYPE CLUSTER-IP EXTERNAL-IP PORT(S) AGE
kubernetes ClusterIP 10.96.0.1
因此我们下一步需要进行端口转发,才能访问grafana。PS C:UsersShengjie> kubectl port-forward svc/loki-stack-grafana 3000:80
Forwarding from 127.0.0.1:3000 -> 3000
Forwarding from [::1]:3000 -> 3000
其默认用户是admin,默认密码在哪里呢,别慌,我们去看下loki-stack chart 的readme:PS C:UsersShengjie> helm show readme loki/loki-stack
# Loki-Stack Helm Chart
## Prerequisites
Make sure you have Helm [installed](https://helm.sh/docs/using_helm/#installing-helm) and
[deployed](https://helm.sh/docs/using_helm/#installing-tiller) to your cluster. Then add
Loki‘s chart repository to Helm:
$ helm repo add loki https://grafana.github.io/loki/charts
You can update the chart repository by running:
$ helm repo update
## Deploy Loki and Promtail to your cluster
### Deploy with default config
$ helm upgrade --install loki loki/loki-stack
### Deploy in a custom namespace
$ helm upgrade --install loki --namespace=loki-stack loki/loki-stack
### Deploy with custom config
$ helm upgrade --install loki loki/loki-stack --set "key1=val1,key2=val2,..."
## Deploy Loki and Fluent Bit to your cluster
$ helm upgrade --install loki loki/loki-stack
--set fluent-bit.enabled=true,promtail.enabled=false
## Deploy Grafana to your cluster
The chart loki-stack contains a pre-configured Grafana, simply use `--set grafana.enabled=true`
To get the admin password for the Grafana pod, run the following command:
$ kubectl get secret --namespace 如果在windows powersheel中执行,需要分两步:
1. 先获取base64加密的密码
PS C:UsersShengjie> $pwd= kubectl get secret --namespace default loki-stack-grafana -o jsonpath="{.data.admin-password}"
2. decode base64
PS C:UsersShengjie> [Text.Encoding]::Utf8.GetString([Convert]::FromBase64String($pwd))
CjnbkkQmwQynZ96gCsynSf0elYQLOp4dyuDnp9jJ
------------------------
Linux命令行执行:
shengjie@Thinkpad:/mnt/c/Users/Shengjie$ kubectl get secret --namespace default loki-stack-grafana -o jsonpath="{.data.admin-password}" | base64 --decode ; echo
CjnbkkQmwQynZ96gCsynSf0elYQLOp4dyuDnp9jJ
admin/CjnbkkQmwQynZ96gCsynSf0elYQLOp4dyuDnp9jJ即可成功登录http://localhost:3000/。
5. Use Loki With .NET Core
PS C:UsersShengjie> dotnet new web -n Loki.K8s.Demo
The template "ASP.NET Core Empty" was created successfully.

Processing post-creation actions...
Running ‘dotnet restore‘ on Loki.K8s.DemoLoki.K8s.Demo.csproj...
  Determining projects to restore...
  Restored C:UsersShengjieLoki.K8s.DemoLoki.K8s.Demo.csproj (in 150 ms).

Restore succeeded.
PS C:UsersShengjie> cd .Loki.K8s.Demo
# 添加Serilog.AspNetCore和Serilog.Sinks.Loki Nuget包。
PS C:UsersShengjieLoki.K8s.Demo> dotnet add package Serilog.AspNetCore
PS C:UsersShengjieLoki.K8s.Demo> dotnet add package Serilog.Sinks.Loki
修改Program.cs如下:public static IHostBuilder CreateHostBuilder(string[] args) =>
Host.CreateDefaultBuilder(args)
.ConfigureWebHostDefaults(webBuilder =>
{
webBuilder.UseStartupStartup.cs的Configure方法如下:public void Configure(IApplicationBuilder app, IWebHostEnvironment env,ILoggerhttp://localhost:3100作为Loki的Url进行日志写入啦。PS C:UsersShengjieLoki.K8s.Demo> kubectl port-forward svc/loki-stack 3100:3100
Forwarding from 127.0.0.1:3100 -> 3100
Forwarding from [::1]:3100 -> 3100

.NET Core + K8S + Loki 玩转日志聚合
下一篇:JSON学习
文章标题:.NET Core + K8S + Loki 玩转日志聚合
文章链接:http://soscw.com/index.php/essay/89847.html