Api网关Kong集成Consul做服务发现及在Asp.Net Core中的使用
2021-06-02 22:02
标签:example war return discover timeout 证书 tar cti code ??Api网关我们之前是用 .netcore写的 Ocelot的,使用后并没有完全达到我们的预期,花了些时间了解后觉得kong可能是个更合适的选择。 简单说下kong对比ocelot打动我的: 1、kong可以直接代替Nginx/OpenRestry做前端服务器。 2、kong的功能强大,性能不俗,生态不错,操作面板,插件丰富,社区活跃; 1、对kong和consul做个基本介绍; 2、kong集成consul 做服务发现; 3、Asp.net core WebApi 服务自动注册到Consul; 4、Asp.net core WebApi 自动注册路由规则到kong,实现程序启动即部署; 172.16.1.30 CentOS Linux release 7.6.1810 (Core) (虚拟机单核2g) Docker version 18.09.3, build 774a1f4 kong apigateway(enterprise) 2.3.x (docker安装) 我们熟悉Nginx; 有个一个加强版的Nginx叫做OpenRestry,OpenRestry ≈ lua脚本+Nginx; 那么Kong 网关就是满血版的 OpenRestry,它有许许多多的的插件和各种丰富的功能,且提供对应的Rest Api,让你轻松打造你所能想象到的 网关+ web前端服务器的功能; 特点(翻译) 云原生:平台无关,kong支持任意平台,裸机容器或云平台; k8s原生:原生支持k8s,有kong-ingress,支持l4+l7协议; 动态负载均衡:负载均衡到多个upstream; Hash-based的负载均衡:根据cookie、session,ip等hash负载均衡; 断路器:自动剔除不健康的服务; 心跳检测:主动和被动心跳检测; 服务发现:通过第三方dns解析做服务发现,如consul; Serverless:调用和保护 AWS Lambda or OpenWhisk functions directly ; WebSockets:支持ws、wss协议; gRPC:支持gRPC协议,并通过日志和插件监控流量; OAuth2.0:轻松添加OAuth2.0支持; 日志:轻松记录请求和响应,通过HTTP, TCP, UDP, 或 直接到硬盘; 安全性:访问控制,爬虫检测、ip黑白名单等等; Syslog:记录到系统日志; SSL: 安装不同的SSL证书到服务; 监控:实时监控,提供关机负责负载均衡和性能指标; 整箱代理:kong可以作为正向代理服务器; 身份认证:HMAC, JWT, Basic, 各种奇奇怪怪的规则都支持. 限制器:流量限制功能; 传输转换:新增、删掉、或者修改你的请求或者响应; 缓存:请求缓存; CLI:命令行控制支持; Rest Api:Rest Api控制支持; Geo-Replicated:夸时区请求支持; 故障检测与恢复:数据库(Cassandra /postgres)节点挂掉不影响kong的服务; 集群:所有kong节点都自动加入集群保持配置同步; 拓展性:分布式拓展原生支持,水平伸缩加减节点就行; 高性能:使用Nginx作为核心负载均衡组件,高性能可伸缩; 插件:高拓展性,插件式添加功能; 详细请看 github: https://github.com/Kong/kong 官方文档: https://docs.konghq.com 拉取镜像 给镜像改个名 创建一个网络 运行一个postgresSql 9.6,用来存取kong的配置 启动kong 这里说明一下,kong的配置是用postgres(或者Cassandra )来存配置,但每一次请求都不需要去读取数据库的。修改的配置会直接 reload 到内存中,不影响性能; 另外说说kong的集群; 因为kong 网关其实最终 表现为一个超级前端服务器+网关,所以每个连接到同个数据库的kong实例配置一样,连接同个数据库的kong作为一个集群; 一般在kong的前面是直接做dns解析就行,如果dns不支持多ip的话做keepalive + vip就行; 验证 管理后台 ??Consul是HashiCorp公司推出的开源工具,用于实现分布式系统的服务发现与配置。与其他分布式服务注册与发现的方案,比如 Airbnb的SmartStack等相比,Consul的方案更“一站式”,内置了服务注册与发现框 架、分布一致性协议实现、健康检查、Key/Value存储、多数据中心方案,不再需要依赖其他工具(比如ZooKeeper等),使用起来也较 为简单。 其实就是做服务治理的。 github: https://github.com/hashicorp/consul 官方文档: https://www.consul.io/ 直接docker安装 *这是作为开发节点安装 安装成功 运行一个WebApi服务 先在服务运行一个Asp.net Core WebApi (就是是新建的一个包含),我的版本是3.1的,我给服务命名:DemoApi31,监听端口5002 将服务注册到Consul 注册成功: Dns解析验证 ok,我们这里已经把服务注册到consul,且能通过dns常解析到了,我们做跟kong的集成吧。 consul提供内置Dns解析和Rest Api 两种方式集成做服务发现,我们这里跟kong的集成选用的Dns方式。 因为consul的角色是dns服务器,所以非常简单,我们已注册好的 1、创建一个名为 DemoApi31.service.consul 是consu要求的格式 2、创建一个名为 验证 访问我们配置的kong路由:http://172.16.1.30:8000/consul/api/values ok 到目前为止我们只完成了本文目的1、2 3,和4三请往下看; ??以之前的 安装nuget包 **加入配置 大家主要各服务器要改成自己的 StartUp.cs ConfigureServices方法 StartUp.cs Configure方法 启动程序 ConsulBuilder.cs 参考晓晨大佬 逻辑简单,确定自己需要用的是注册服务功能,调Consul Api 注册,然后程序退出的时候注销consul的服务就行; 安装nuget包 **加入配置 guid顺便去https://www.guidgen.com/ 生成一个 StartUp.cs ConfigureServices方法 启动程序 验证 查看kong管理后台: 访问 http://172.16.1.30:8000/auto/api/values 大功告成。 StartUp.cs ConfigureServices方法 配置变为 ??逻辑也简单,也是调用kong配置把本该手工配置的路由,分别调用upstream、service、route Api修改配置。有区别的是程序退出时不会去删对应的路由; ??我在各技术博客都没有看到总结的比较好的kong+consul+asp.net core的集成文章,特此总结。期待您的点赞留意; https://docs.konghq.com/ https://www.cnblogs.com/stulzq/p/11942691.html https://github.com/lianggx/Kong.Net https://www.consul.io/docs Api网关Kong集成Consul做服务发现及在Asp.Net Core中的使用 标签:example war return discover timeout 证书 tar cti code 原文地址:https://www.cnblogs.com/xiaxiaolu/p/14826794.html
写在前面
本文目的
运行环境
kong
kong的简介

kong的安装
docker pull kong/kong-gateway:2.3.3.2-alpine
docker tag docker network create kong-ee-net
docker run -d --name kong-ee-database --network=kong-ee-net -p 5432:5432 -e "POSTGRES_USER=kong" -e "POSTGRES_DB=kong" -e "POSTGRES_PASSWORD=kong" postgres:9.6
  docker run -d --name kong-ee2
  --network=kong-ee-net   -e "KONG_DATABASE=postgres"   -e "KONG_PG_HOST=172.16.1.30"   -e "KONG_PG_PASSWORD=kong"   -e "KONG_PROXY_ACCESS_LOG=/dev/stdout"   -e "KONG_ADMIN_ACCESS_LOG=/dev/stdout"   -e "KONG_PROXY_ERROR_LOG=/dev/stderr"   -e "KONG_ADMIN_ERROR_LOG=/dev/stderr"   -e "KONG_ADMIN_LISTEN=0.0.0.0:8001"   -e "KONG_ADMIN_GUI_URL=http://172.16.1.30:8002" \
  -e "KONG_DNS_RESOLVER=172.16.1.30:8600" \  #注意按需使用,consul的才配
  -p 8000:8000   -p 8443:8443   -p 8001:8001   -p 8444:8444   -p 8002:8002   -p 8445:8445   -p 8003:8003   -p 8004:8004   kong-ee


  //-e "KONG_DNS_RESOLVER=172.16.1.30:8600" 注意这个配置,这是我需要用的consul的dns配置,如果不想用consul做服务发现,删掉这行
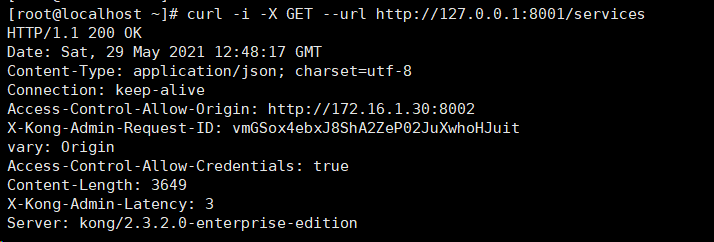
#admin api 获取所有服务
curl -i -X GET --url http://127.0.0.1:8001/services

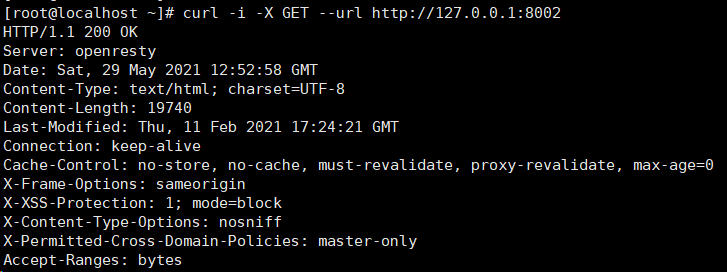
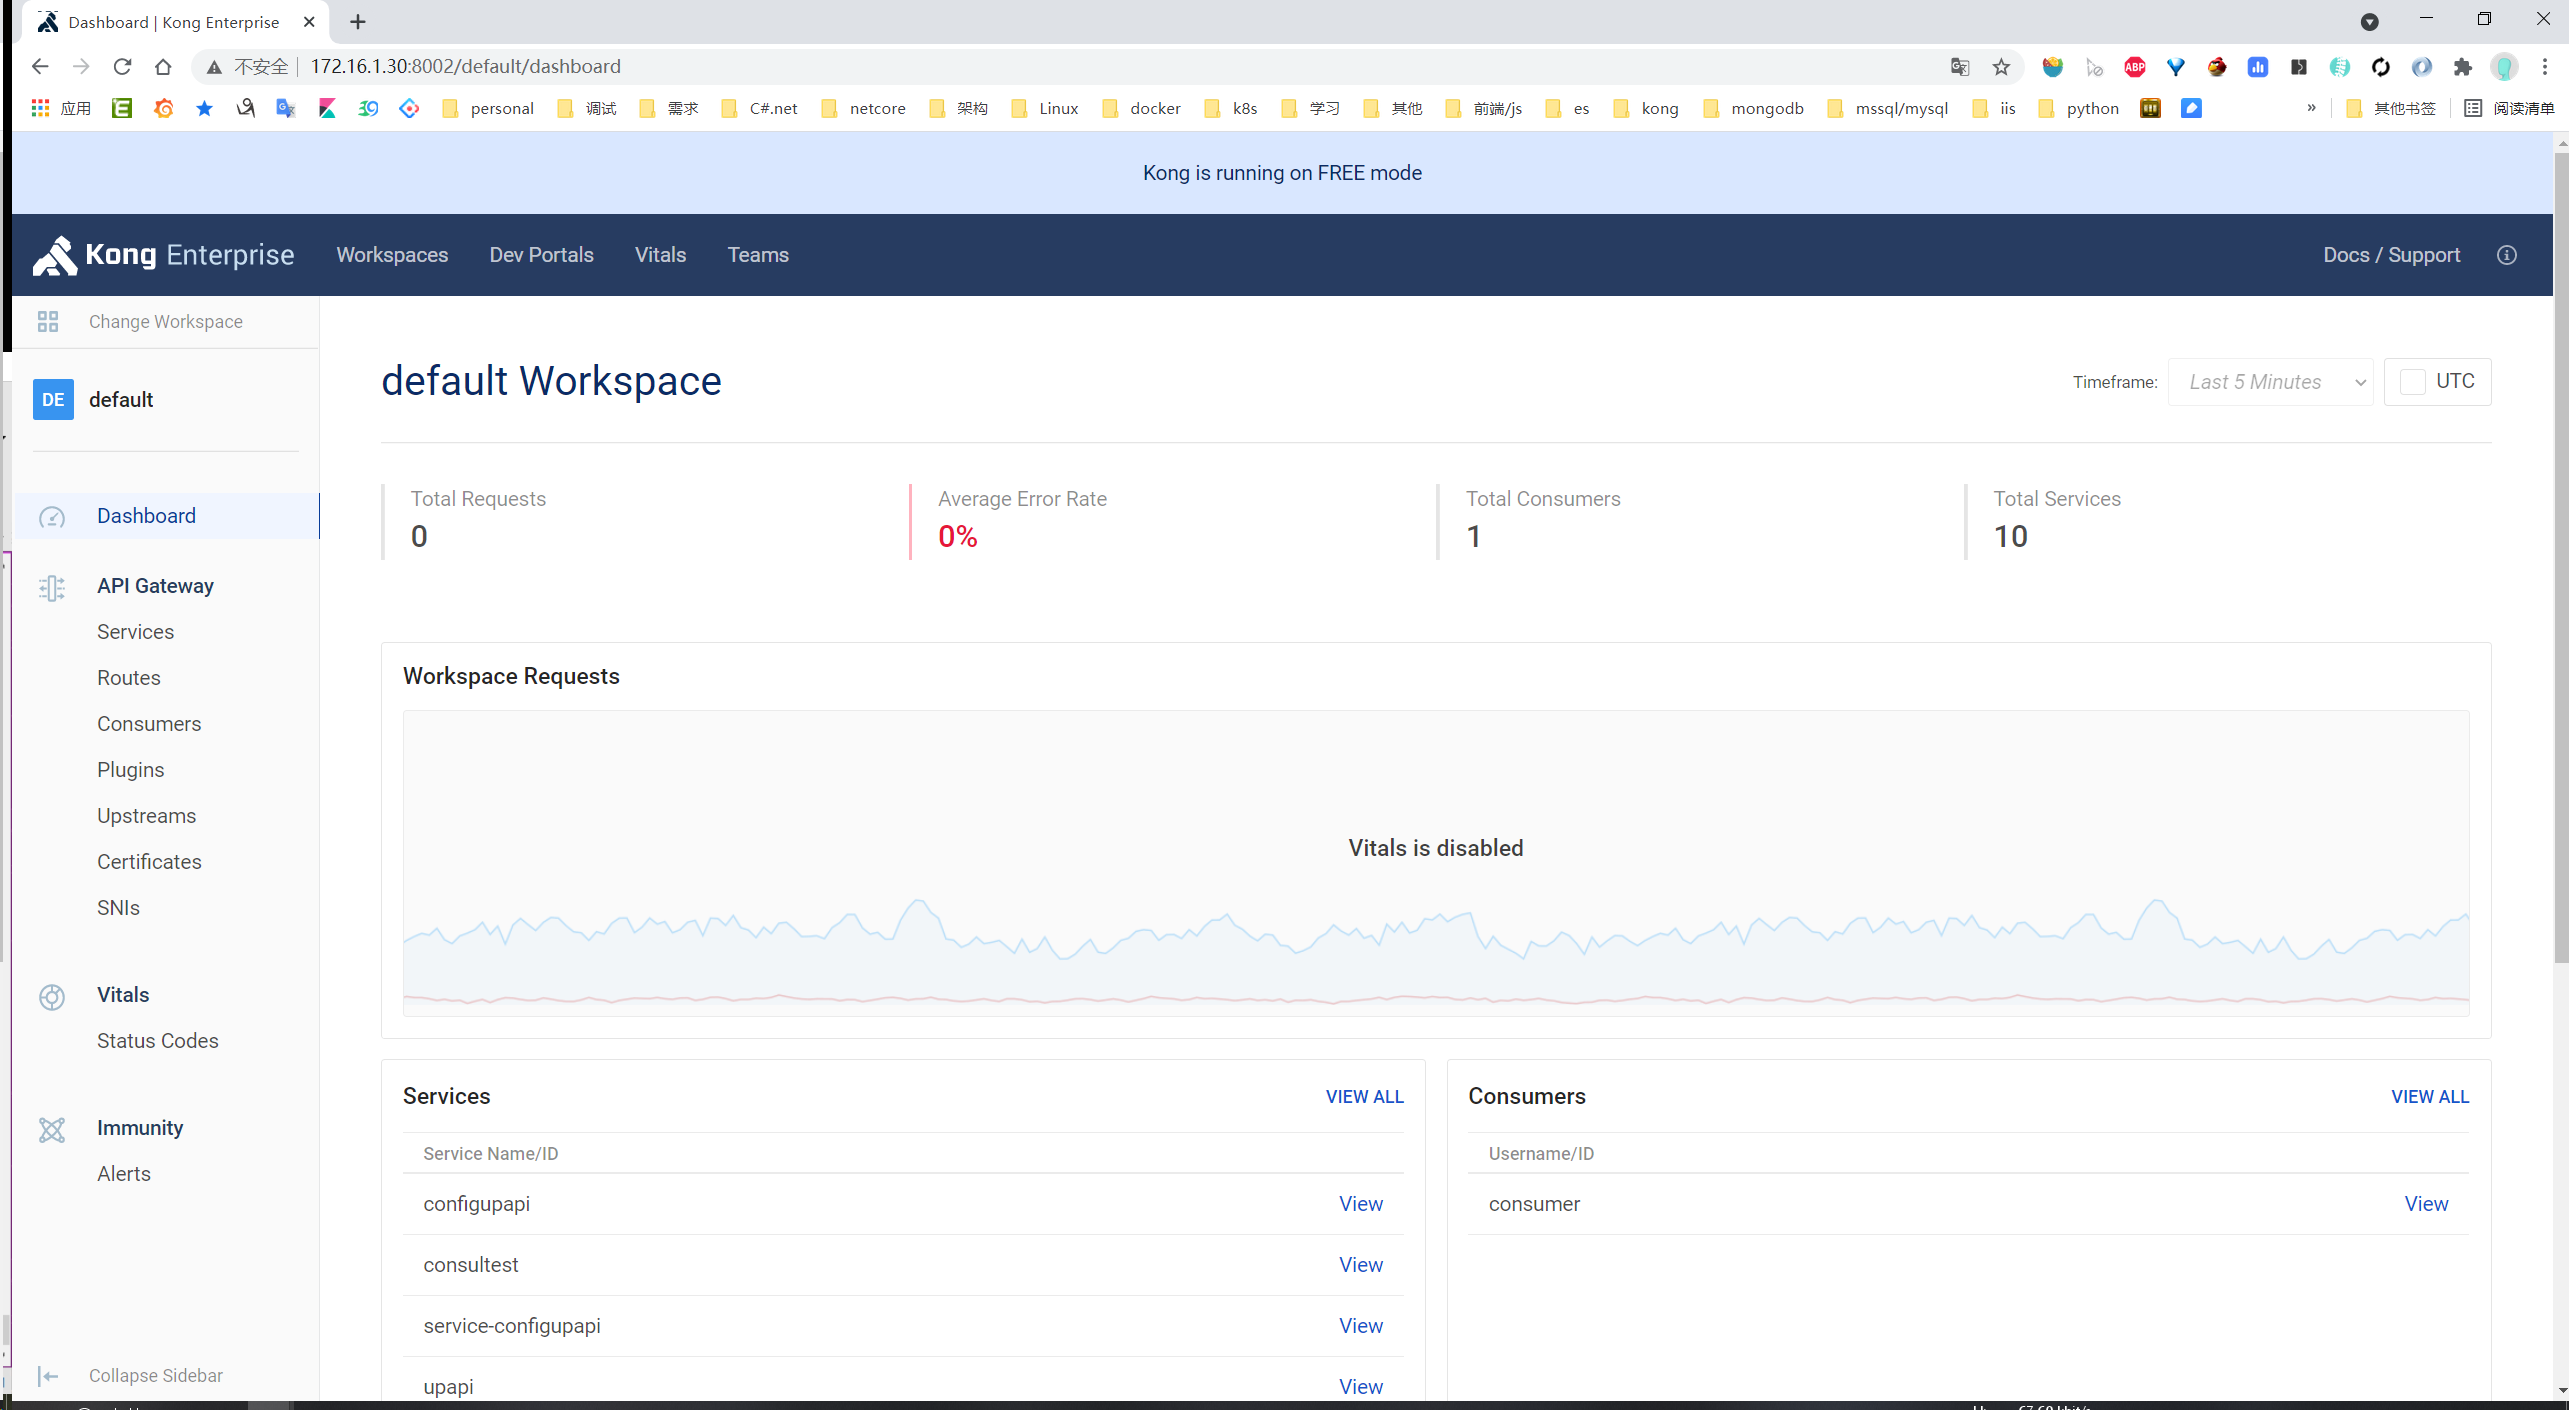
#admin 管理后台
curl -i -X GET --url http://127.0.0.1:8002
consul
consul简介
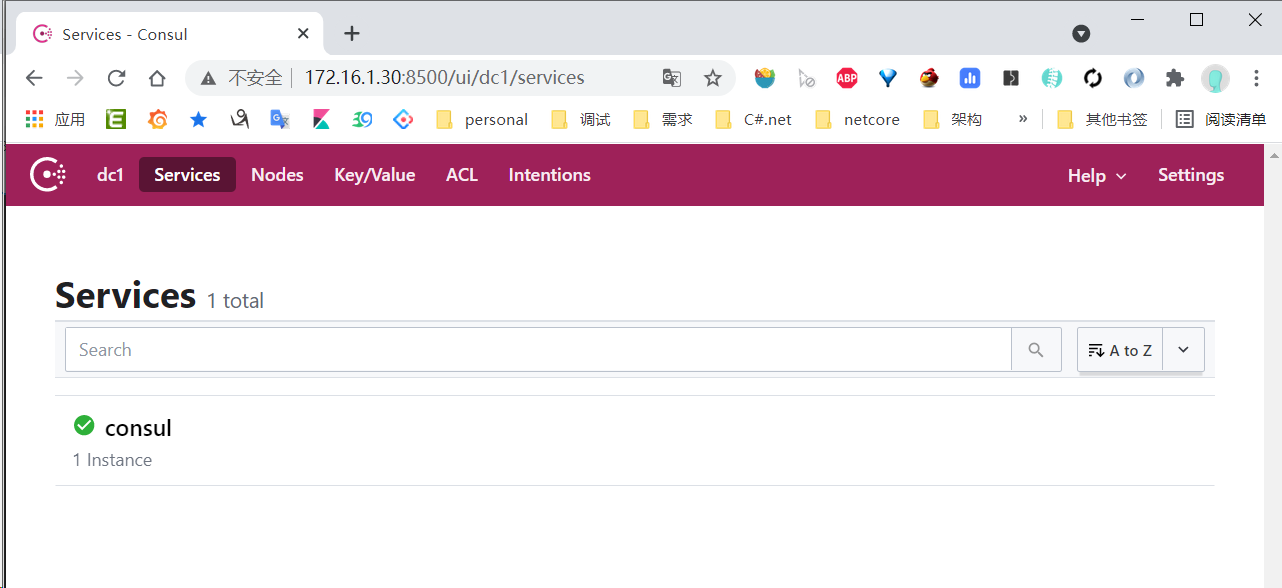
consul的安装
docker run -d --name=dev-consul1 --network=host -e CONSUL_BIND_INTERFACE=eth0 consul:1.8
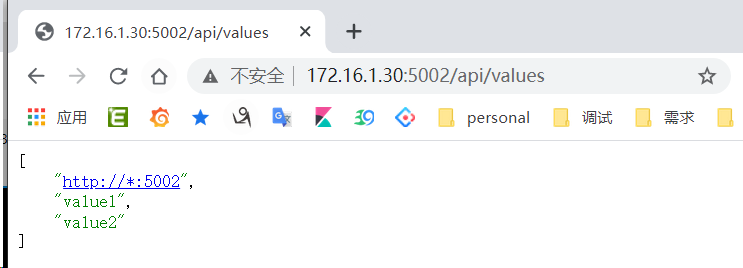
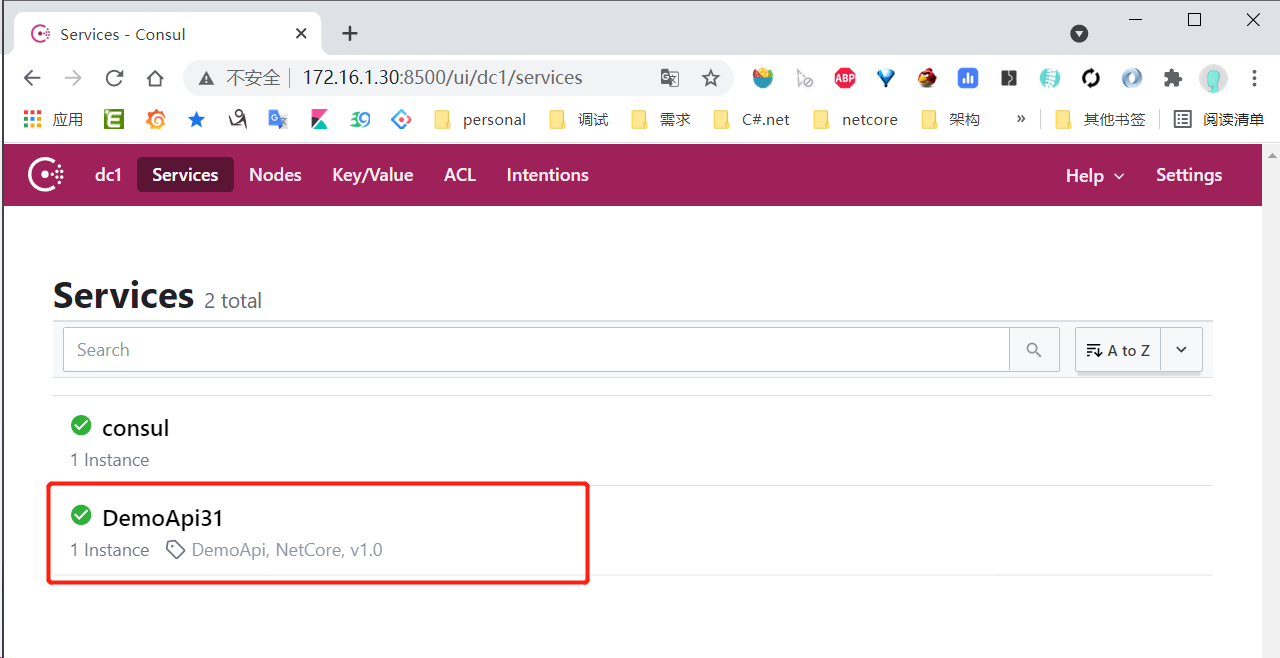
curl --location --request PUT ‘http://172.16.1.30:8500/v1/agent/service/register‘ --header ‘Content-Type: application/json‘ --data-raw ‘{
  "ID": "DemoApi31_172.16.1.30:5002",
  "Name": "DemoApi31",
  "Address": "172.18.1.30",
  "Port": 5002,
  "EnableTagOverride": false,
  "Weights": {
    "Passing": 10,
    "Warning": 1
  }
}‘
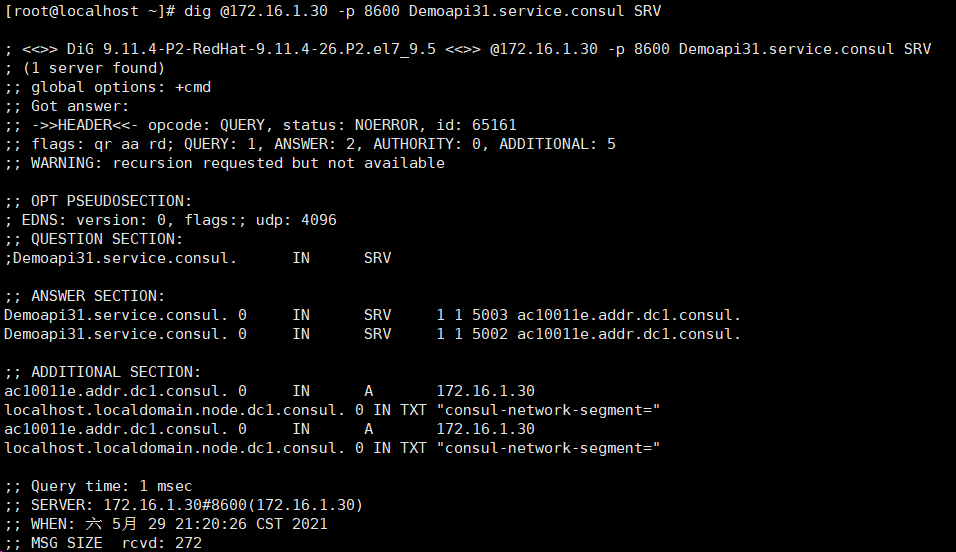
# 如果没安装dig 安装:yum install bind-utils
dig @172.16.1.30 -p 8600 Demoapi31.service.consul SRV
kong集成consul做服务发现
DemoApi31为例:consul的服务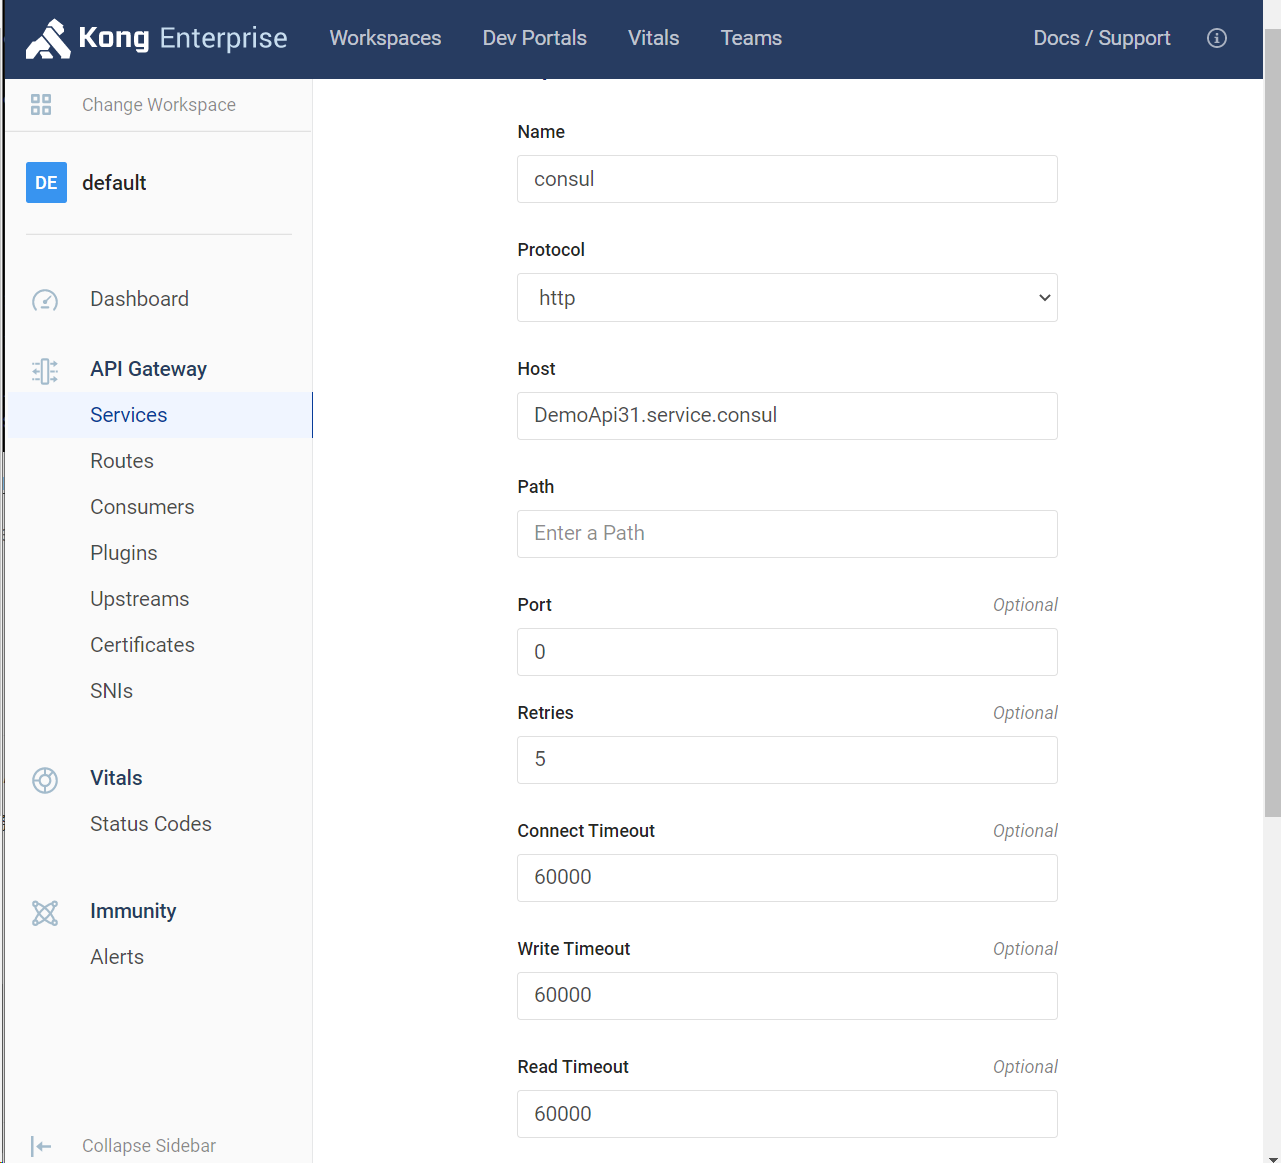
consul的路由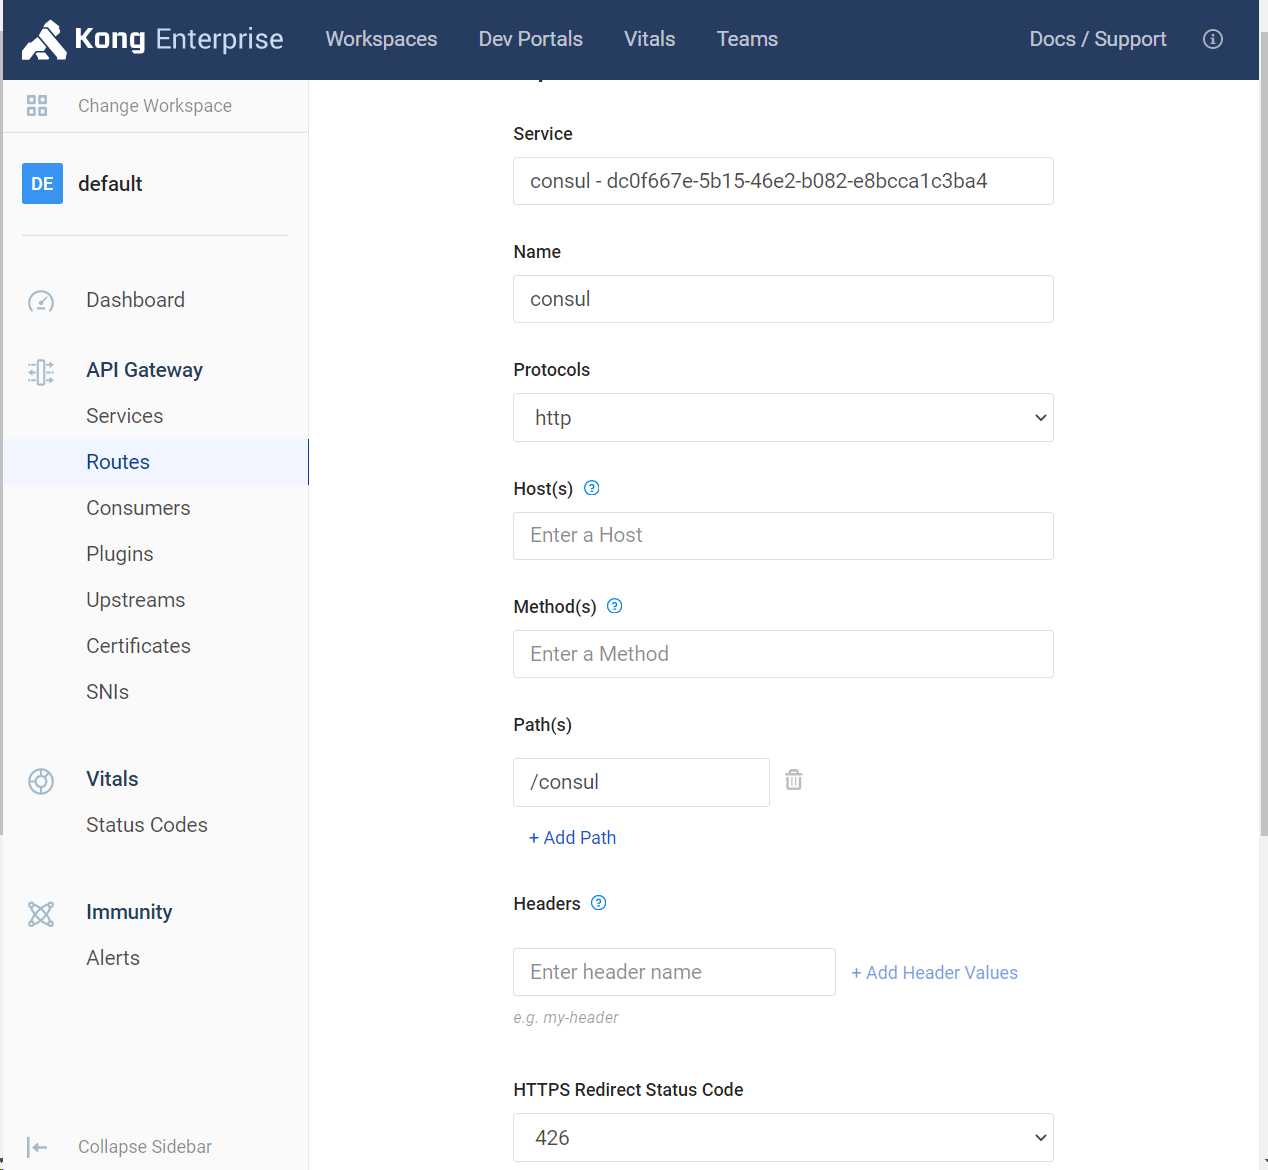
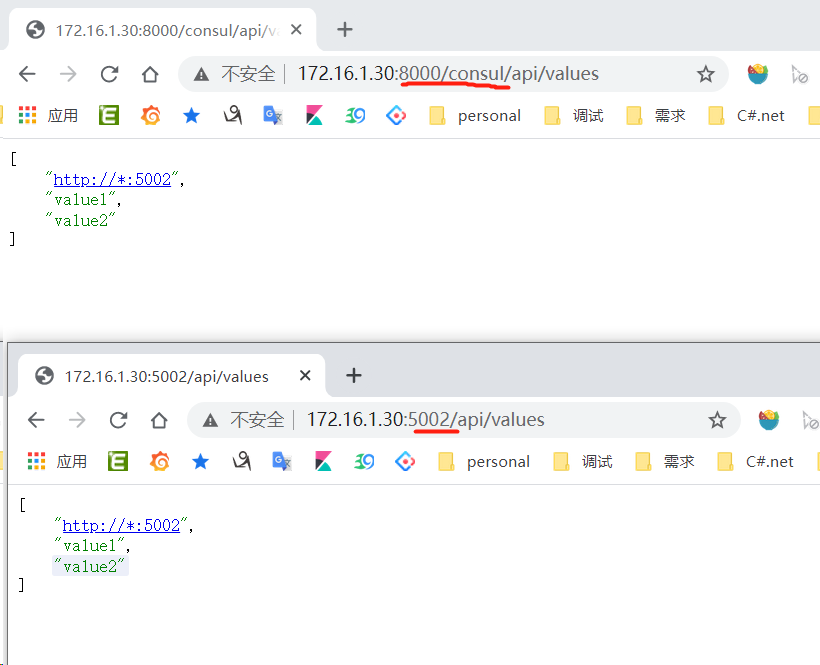
在Asp.net Core中的使用
DemoApi31为例,换成5003端口,我需要达到的效果是,程序启动的时候就把服务注册到Consul 做好心跳检测,并同时部署到网关Kong,直接对外服务。Asp.net Core 服务自动注册到Consul
Install-Package Passport.Infrastructure -Version 0.1.4.7-preview-1
appsettings.json** "ServiceDiscovery": {
"ServiceName": "DemoApi31",
"Consul": {
"HttpEndpoint": "http://172.16.1.30:8500",
"HttpHeathCheck": {
"Path": "/healthcheck",
"TimeOunt": 10,
"Interval": 10
},
"Tags": [
"NetCore",
"DemoApi",
"v1.0"
]
}
}
public void ConfigureServices(IServiceCollection services)
{
    //第一行
    PassportConfig.InitPassportConfig(Configuration, Environment);

    ......

    services.AddHealthChecks();
    services.AddConsul();
}
app.UseHealthChecks("/healthcheck");
dotnet DemoApi.Core3.1.dll --healthhost 172.16.1.30 --urls http://*:5003

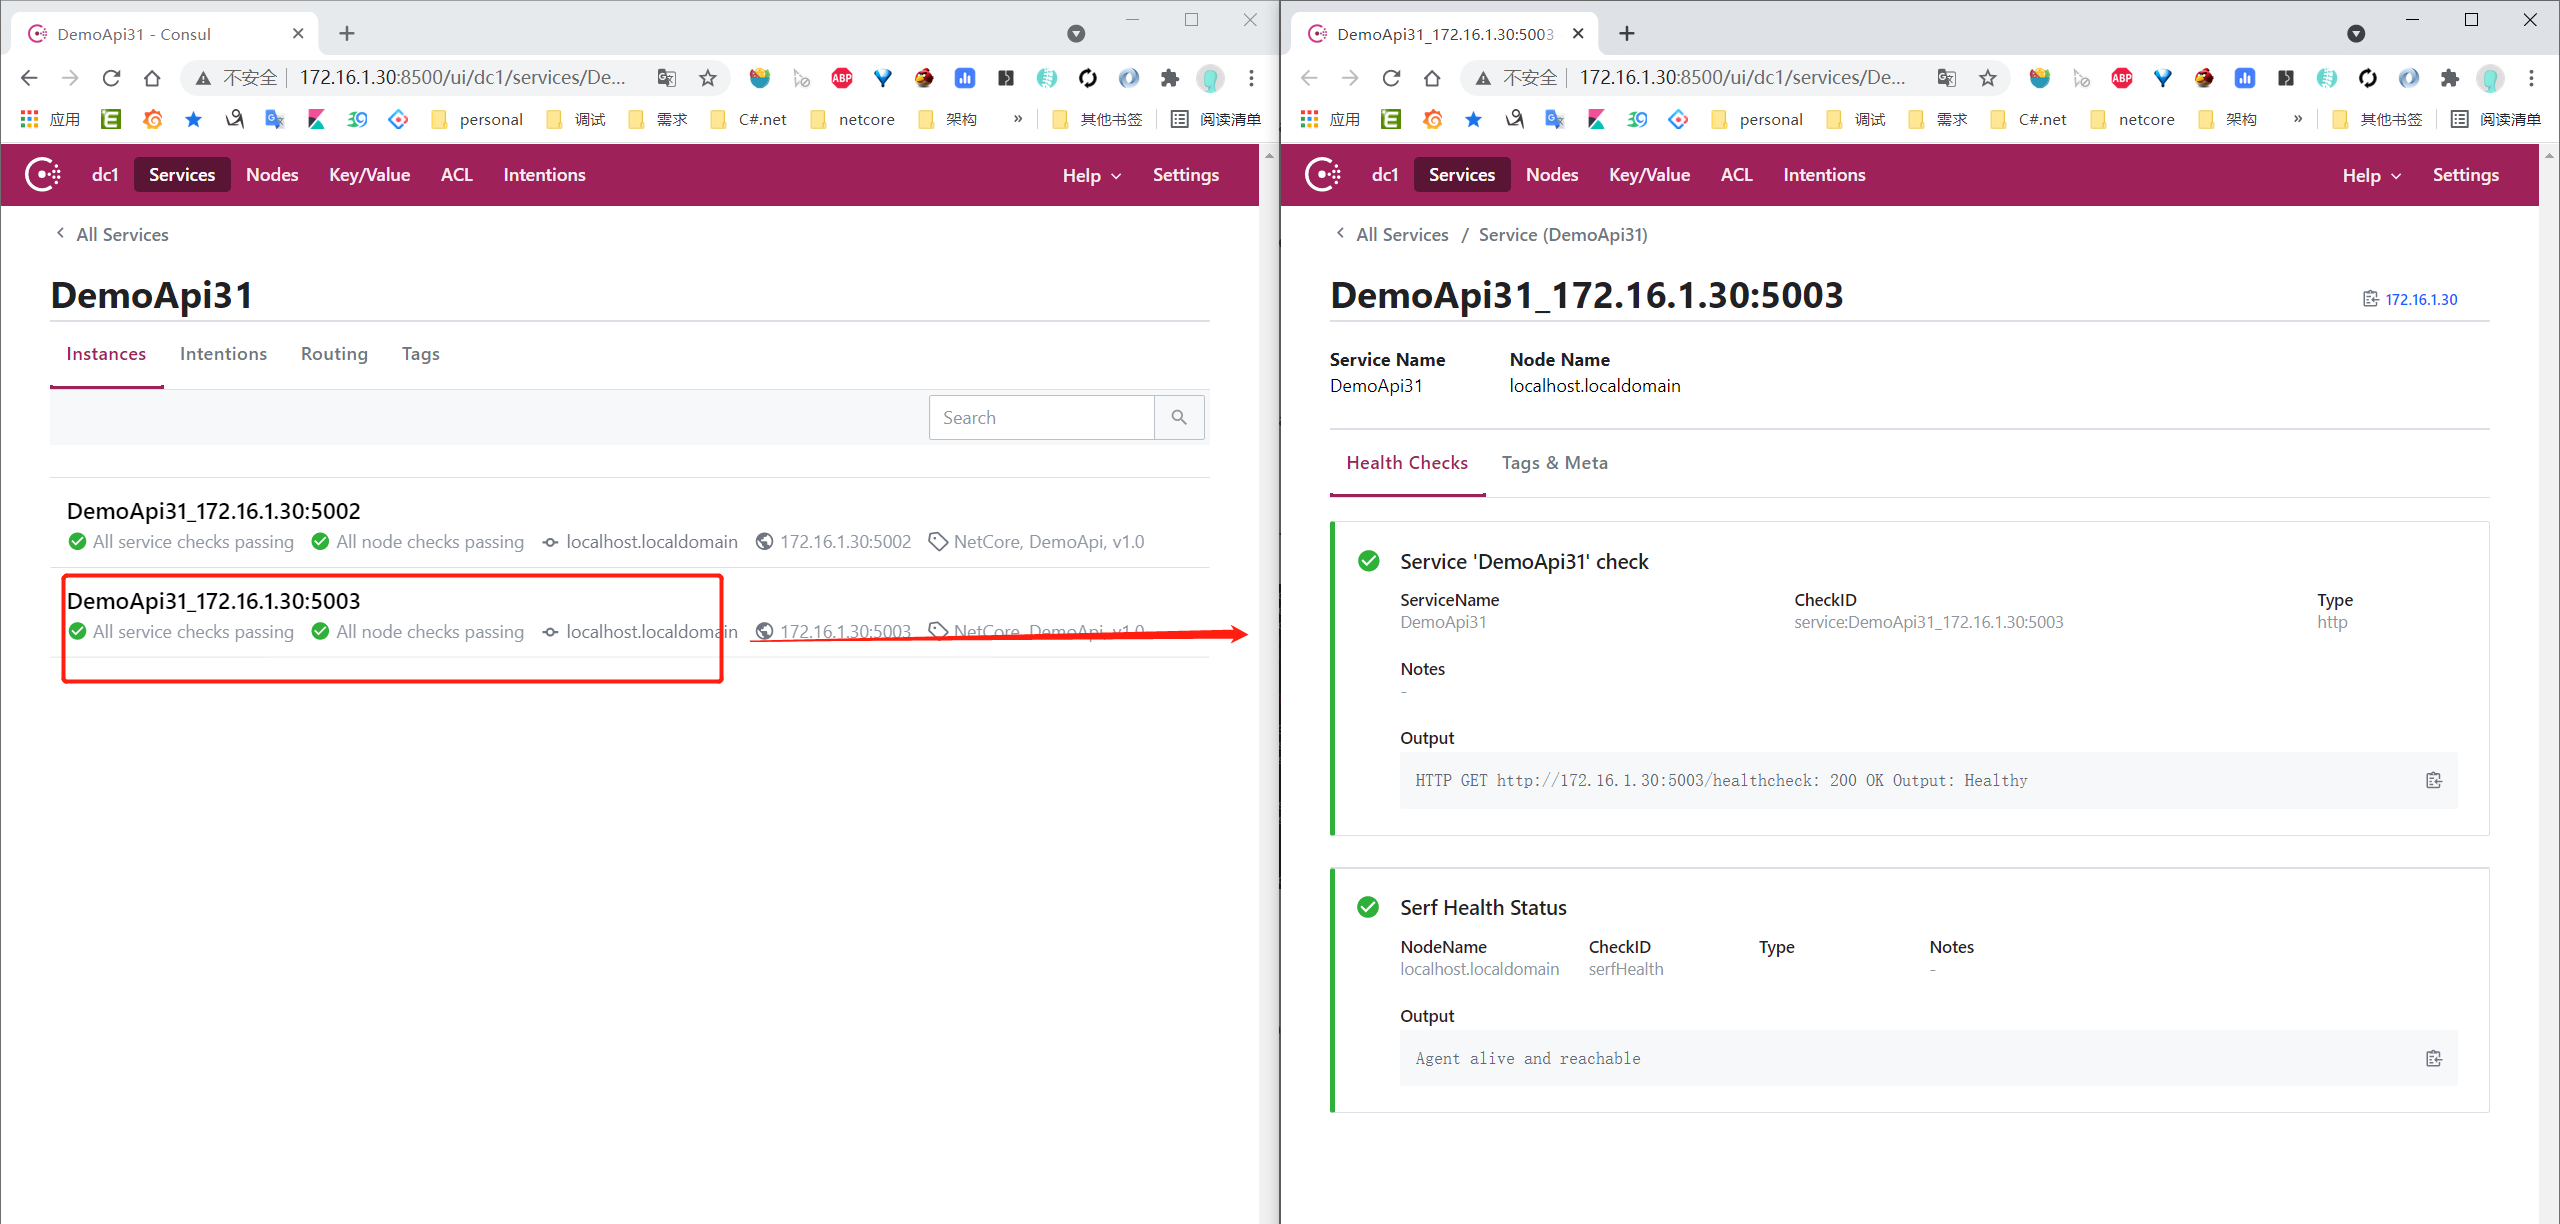
源码解析
/// public class ConsulBuilder
{
private readonly ConsulClient _client;
private readonly List _checks = new List();
public ConsulBuilder(ConsulClient client)
{
_client = client;
}
public ConsulBuilder AddHealthCheck(AgentServiceCheck check)
{
_checks.Add(check);
return this;
}
/// Asp.net core WebApi 自动注册路由规则到kong
通过Consul
#已安装跳过
Install-Package Passport.Infrastructure -Version 0.1.4.7-preview-1
appsettings.json**"Kong": {
//"Disable": false, //true=禁用
"Host": "http://172.16.1.30:8001",
"Services": [
{
"Id": "72e21af8-283f-44c4-a766-53de8bb35c21", //guid
"Name": "service-autoapi",
"Retries": 5,
"Protocol": "http",
"Host": "DemoApi31.service.consul",
"Port": 0,
"Path": null,
"Connect_timeout": 60000, //毫秒
"Write_timeout": 60000,
"Read_timeout": 60000,
"Tags": null
}
],
"Routes": [
{
"Id": "5370e1b7-6c43-442d-9a44-23c249f958f7",
"Name": "route-autoapi",
"Protocols": [ "http" ],
"Methods": null,
"Hosts": null,
"Paths": [ "/autoapi" ],
"Https_redirect_status_code": 307,
"Regex_priority": 0,
"Strip_path": true,
"Preserve_host": false,
"Tags": null,
"Service": {
"Id": "72e21af8-283f-44c4-a766-53de8bb35c21" //这个id跟关联的Services的id一致
}
}
]
}
public void ConfigureServices(IServiceCollection services)
{
   ......


    services.AddConsul();
    services.RouteRegistToKong();
}
dotnet DemoApi.Core3.1.dll --healthhost 172.16.1.30 --urls http://*:5003
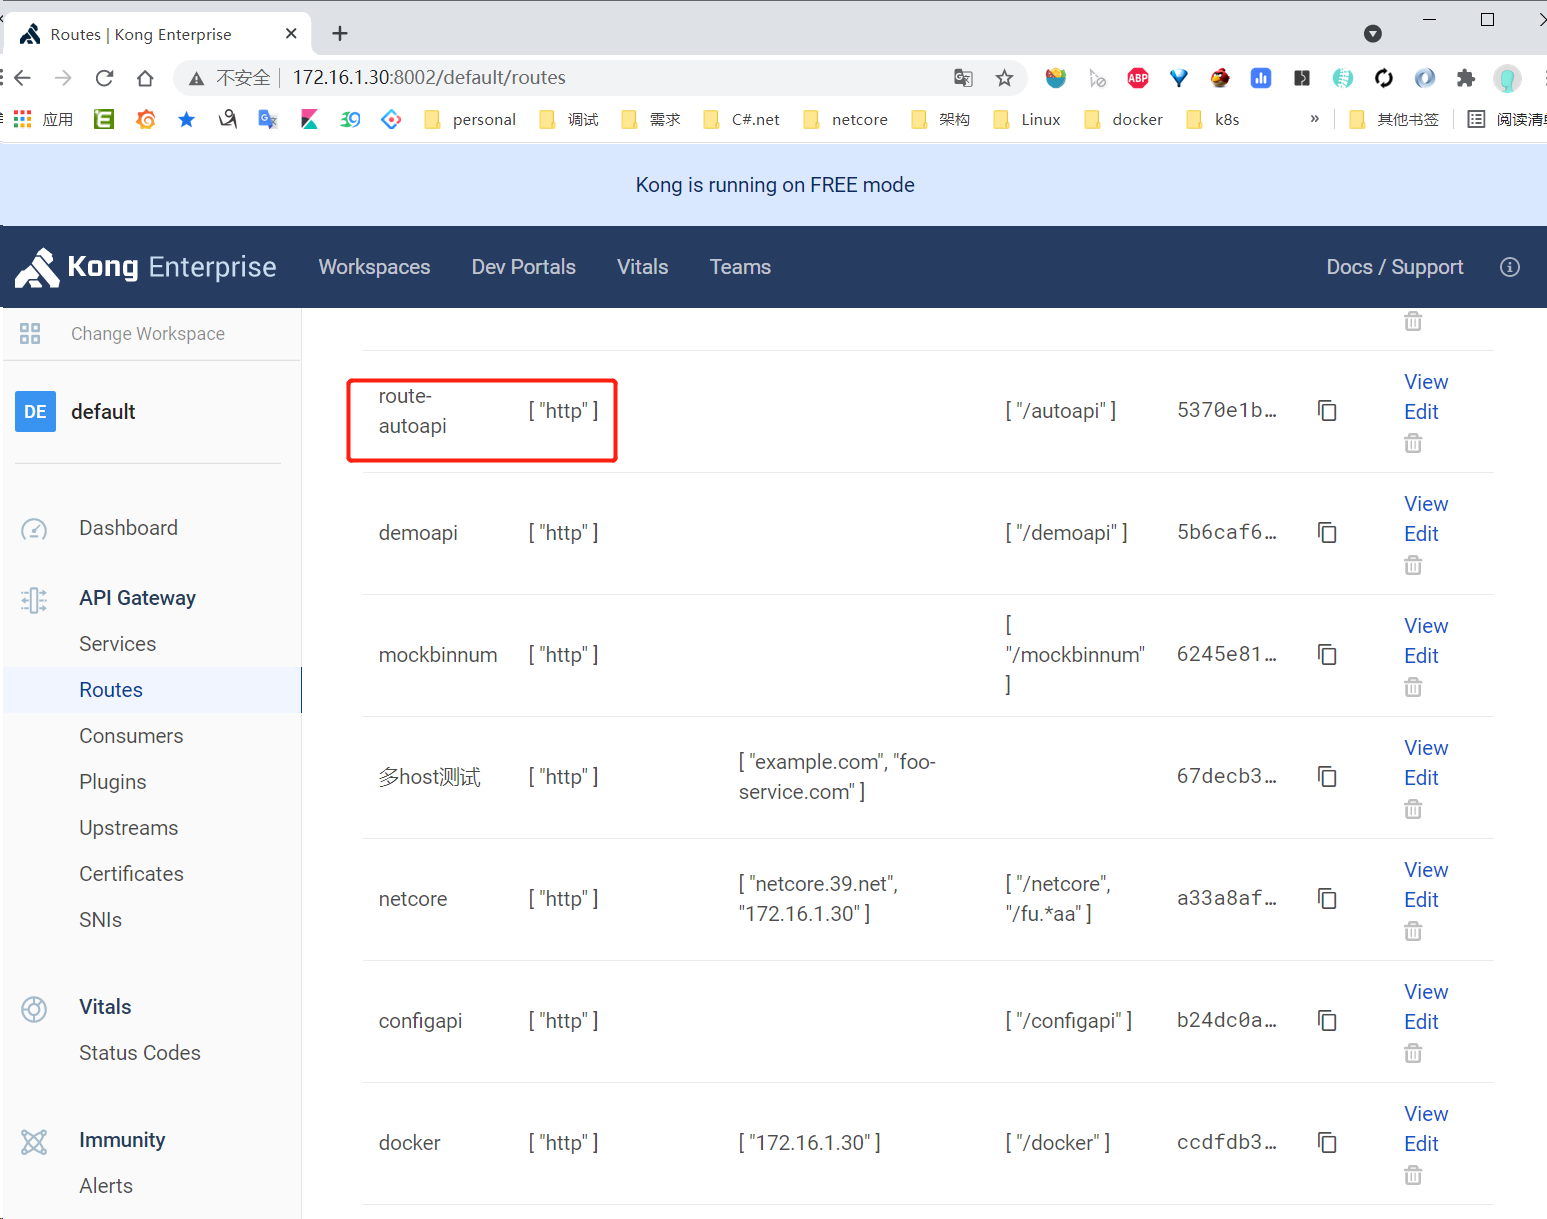
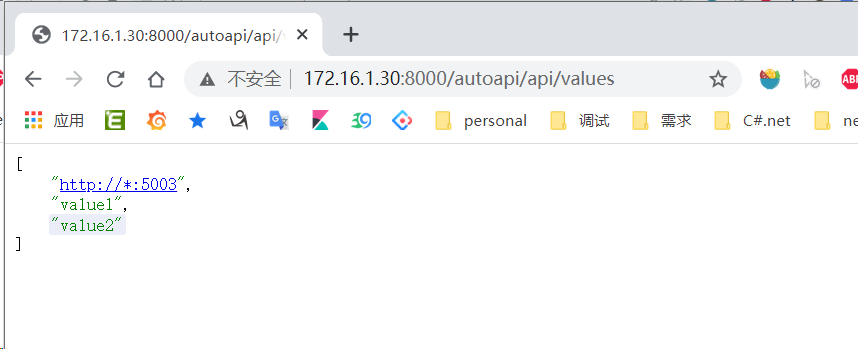
不通过Consul,直接配置路由到kong
public void ConfigureServices(IServiceCollection services)
{
   ......


    //删掉这行services.AddConsul();
    services.RouteRegistToKong();
}
"Kong": {
    //"Disable": false, //true=禁用
    "Host": "http://172.16.1.30:8001",
    "Services": [
      {
        "Id": "0f86015b-b170-4ada-b045-740ae7d77ed6", //guid
        "Name": "configupapi",
        "Retries": 5,
        "Protocol": "http",
        "Host": "configupapi",
        "Port": 0,
        "Path": null,
        "Connect_timeout": 60000, //毫秒
        "Write_timeout": 60000,
        "Read_timeout": 60000,
        "Tags": null
      }
    ],
    "Routes": [
      {
        "Id": "1be79a57-af87-43b0-a0a0-b7a6cc0c5ade",
        "Name": "configupapi",
        "Protocols": [ "http" ],
        "Methods": null,
        "Hosts": null,
        "Paths": [ "/configupapi" ],
        "Https_redirect_status_code": 307,
        "Regex_priority": 0,
        "Strip_path": true,
        "Preserve_host": false,
        "Tags": null,
        "Service": {
          "Id": "0f86015b-b170-4ada-b045-740ae7d77ed6" //这个id跟Services的id一致
        }
      }
    ],

    "Upstream": {
      "Id": "8efd15af-df78-422f-97a0-9072fa7e7431",
      "Tags": [ "exampleapi", "v1.0" ],
      "Name": "configupapi",
      "Hash_on": "none",
      "Healthchecks": {
        "Active": {
          "Unhealthy": {
            "Http_statuses": [ 429, 500, 501, 502, 503, 504, 505 ],
            "Tcp_failures": 1,
            "Timeouts": 2,
            "Http_failures": 1,
            "Interval": 5
          },
          "Type": "http",
          "Http_path": "/healthcheck",
          "Timeout": 1,
          "Healthy": {
            "Successes": 1,
            "Interval": 20,
            "Http_statuses": [ 200, 302 ]
          },
          "Https_verify_certificate": true,
          "Concurrency": 1
        },
        "Passive": {
          "Unhealthy": {
            "Http_statuses": [ 429, 500, 501, 502, 503, 504, 505 ]
          },
          "Healthy": {
            "Http_statuses": [ 200, 201, 302 ]
          },
          "Type": "http"
        }
      },
      "Hash_on_cookie_path": "/",
      "Hash_fallback": "none",
      "Slots": 10000
    },
    "Target": {
      "Tags": [ "exampleapi", "v1.0" ],
      "Weight": 100
    }
  }
源码解析
/// 总结
[参考]
上一篇:.NET CLI简单使用
下一篇:百度地图api的介绍和使用
文章标题:Api网关Kong集成Consul做服务发现及在Asp.Net Core中的使用
文章链接:http://soscw.com/index.php/essay/89934.html