Windows环境下搭建MosQuitto服务器
2021-06-18 22:07
阅读:830
MosQuitto服务器的搭建
官网地址
Windows环境下搭建服务器
参考文章: [移动] Mosquitto简要教程(安装/使用/测试)
下载、安装MosQuitto服务器
首先在DownLoad界面,下载服务器源码,一种是根据源码下载,然后在本地通过Cygwin编译Source,另一种是直接下载官网提供的编译好的Binary Installation。
笔者在采用第一种源码安装的时候,遇到了一个问题,安装openssl后暂时仍未解决。 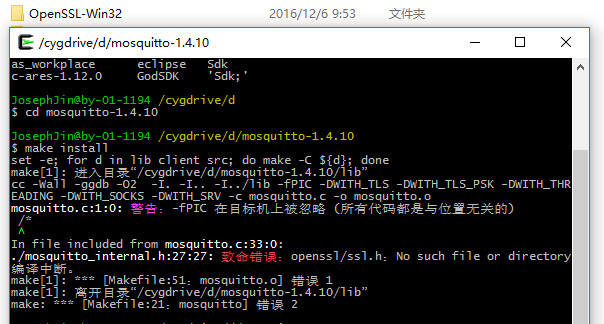
于是本文采用的是第二种方式,根据readme的提示,如果缺少libeay32.dll,ssleay32.dll,pthreadVC2.dll的话,可以根据提示安装对应的环境也可以直接下载相应的dll文件,笔者直接下载的单独的dll文件测试成功。
-
-
Dependencies - win32
-
--------------------
-
-
* OpenSSL
-
Link: http://slproweb.com/products/Win32OpenSSL.html
-
Install "Win32 OpenSSL
" -
Required DLLs: libeay32.dll ssleay32.dll
-
* pthreads
-
Link: ftp://sourceware.org/pub/pthreads-win32
-
Install "pthreads-w32-
-release.zip -
Required DLLs: pthreadVC2.dll
-
-
Please ensure that the required DLLs are on the system path, or are in the same directory as
-
the mosquitto executable.
-
-
-
Dependencies - Cygwin
-
---------------------
-
-
* OpenSSL
-
Link: http://slproweb.com/products/Win32OpenSSL.html
-
Install "Win32 OpenSSL
" -
* pthreads
-
Link: ftp://sourceware.org/pub/pthreads-win32
-
Install "pthreads-w32-
-release.zip -
* Cygwin
-
Link: https://www.cygwin.com/setup-x86.exe
-
Required packages: libgcc1, openssl, zlib0
- 1
- 2
- 3
- 4
- 5
- 6
- 7
- 8
- 9
- 10
- 11
- 12
- 13
- 14
- 15
- 16
- 17
- 18
- 19
- 20
- 21
- 22
- 23
- 24
- 25
- 26
- 27
- 28
- 29
- 30
- 1
- 2
- 3
- 4
- 5
- 6
- 7
- 8
- 9
- 10
- 11
- 12
- 13
- 14
- 15
- 16
- 17
- 18
- 19
- 20
- 21
- 22
- 23
- 24
- 25
- 26
- 27
- 28
- 29
- 30
安装完成后如下图所示: 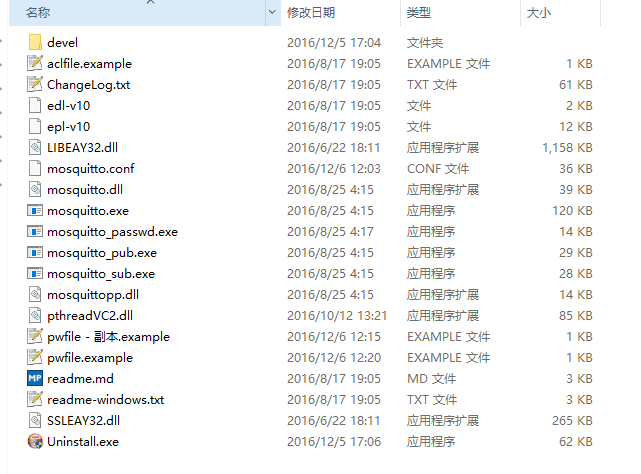
其中几个主要的作用如下:
| 模块 | 功能 |
|---|---|
| mosquitto.conf | mosquitto服务器的配置文件 |
| mosquitto | 用来开启broker |
| mosquitto_passwd | 用来设置用户的账号与密码 |
| mosquitto_pub | 用来发布消息 |
| mosquitto_sub | 用来订阅消息 |
| pwfile.example | 通过mosquitto_passwd来存储用户的账号密码的文件 |
测试服务器
创建Broker、订阅、发布消息可以通过命令行来进行,我们首先测试一下服务器是否可以正常运行:
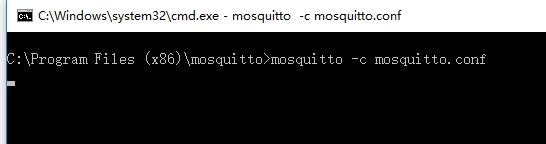
- 开启服务器
mosquitto -c mosquitto.conf,通过命令行运行,如果没有出现其他提示表示成功,此时我们可以自己发布、订阅消息来进行下面的测试了。
- 订阅与发布
- 通过
mosquitto_sub -v -t {topic}来订阅Topic,其中{topic}就是订阅的主题。 - 通过
mosquitto_pub -t {topic} -m {message}来发布消息,其中{topic}即发布的主题,{message}即要发布的信息。 - 演示Gif:可以看到我们测试中,接收
topic的主题,当发布之后成功的接收到了订阅的主题。
- 通过
补充功能
-
设置用户的账号与密码:
mosquitto_passwd [ -c | -D ] passwordfile username-
-c表示创建一个新的用户并写入到一个文件中。
-
创建成功之后,我们打开该文件,可以看到里面保存了我们刚刚创建的用户的账号,而密码则帮我们进行了加密。

-
创建之后,不要忘记修改
mosquitto.conf中的password_file pwfile.example, 将其修改成我们刚刚创建的passwordfile使其生效。
-
总结与预告
本次成功的在Windows环境下部署了Mosquitto服务器,下篇文章将演示如果在手机客户端上接受到推送的信息。
文章来自:搜素材网的编程语言模块,转载请注明文章出处。
文章标题:Windows环境下搭建MosQuitto服务器
文章链接:http://soscw.com/index.php/essay/95676.html
文章标题:Windows环境下搭建MosQuitto服务器
文章链接:http://soscw.com/index.php/essay/95676.html
评论
亲,登录后才可以留言!