php集成动态口令认证
2018-09-21 16:39
大多数系统目前均使用的静态密码进行身份认证登录,但由于静态密码容易被窃取,其安全性无法满足安全要求。
动态口令采用一次一密、用过密码作废的方式防止了密码被窃取带来的安全问题。
动态口令分为HOTP(基于事件计数的动态口令,RFC4226)、TOTP(基于时间计数的动态口令,RFC6238)、OCRA(挑战应答式动态口令,RFC6287)等方式。
本文介绍了集成TOTP方式的动态口令认证的方案,PHP框架采用Thinkphp3.2.3,动态口令生成器使用的是google authtication。
1、为Thinkphp框架添加oath算法类
oath算法封装类oath.php代码如下:
<?PHP /** * This program is free software: you can redistribute it and/or modify * it under the terms of the GNU General Public License as published by * the Free Software Foundation, either version 3 of the License, or * (at your option) any later version. * * This program is distributed in the hope that it will be useful, * but WITHOUT ANY WARRANTY; without even the implied warranty of * MERCHANTABILITY or FITNESS FOR A PARTICULAR PURPOSE. See the * GNU General Public License for more details. * * You should have received a copy of the GNU General Public License * along with this program. If not, see <
由于google的动态口令算法中种子密钥使用了base32编码,因此需要base32算法,base32.php内容如下:
<?php //namespace Base32; /** * Base32 encoder and decoder * * Last update: 2012-06-20 * * RFC 4648 compliant * @link
将这两个文件放到Thinkphp框架的ThinkPHP\Library\Vendor\oath目录下,oath目录是自己创建的。
2、添加数据库字段
用户表添加如下字段:
auth_type(0-静态密码,1-动态口令)
seed(种子密钥)
temp_seed(临时种子密钥)
last_logintime(上次登录成功时间)
last_otp(上次使用密码)
其中auth_type是为了标明用户使用的哪种认证方式,seed为用户的种子密钥,temp_seed为用户未开通前临时保存的一个种子密钥,如果用户开通动态口令认证成功,该字段内容会填到seed字段。last_logintime和last_otp为上次认证成功的时间和动态口令,用于避免用户同一个口令重复使用。
3、代码集成
1)、开通动态口令
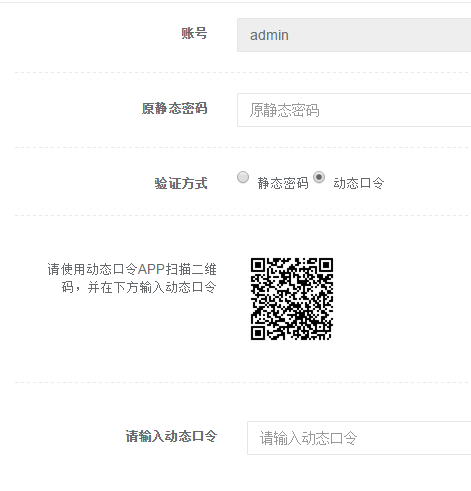
在原有系统的修改密码页面,加上认证方式的选择,例如:

如果用户选择动态口令方式,则会生成一张二维码显示在页面,用于用户开通动态口令。为了兼容google authtication,其二维码格式与谷歌一样。生成二维码的方法见我的另一篇《Thinkphp3.2.3整合phpqrcode生成带logo的二维码》 。
生成密钥二维码代码如下:
public function qrcode() { Vendor(oath.base32); $base32 = new \Base32(); $rand = random(16);//生成随机种子 $rand = $base32->encode($rand); $rand=str_replace(=,,$rand);//去除填充的‘= $errorCorrectionLevel =intval(3) ;//容错级别 $matrixPointSize = intval(8);//生成图片大小 //生成二维码图片 Vendor(phpqrcode.phpqrcode); $object = new \QRcode(); $text = sprintf(otpauth://totp/%s?secret=%s, $user, $rand); $object->png($text, false, $errorCorrectionLevel, $matrixPointSize, 2); 生成的种子$rand保存到数据库的temp_seed字段 }
random是生成随机字符串函数。$rand=str_replace(=,,$rand)这句代码是因为谷歌手机令牌中base32解码算法并没有填充的‘=号。
验证用户动态口令的代码如下:
从数据库读取temp_seed Vendor(oath.oath); $object = new \Google2FA(); if($object->verify_key($temp_seed, $otp)){ 验证成功,将数据库更新seed为temp_seed,auth_type为1,last_otp为otp }
2)、动态口令登录
用户动态口令登录验证的代码:
从数据库读取auth_type,seed,last_otp字段。
if($auth_type==1){//动态口令 //防止重复认证 if($lat_otp == $otp) { 动态口令重复使用返回 } Vendor(oath.oath); $object = new \Google2FA(); if(!$object->verify_key($seed, $otp)) { 动态口令不正确 } else { 登录成功,将数据库更新last_otp为$otp,last_logintime为time() } }
4、测试验证
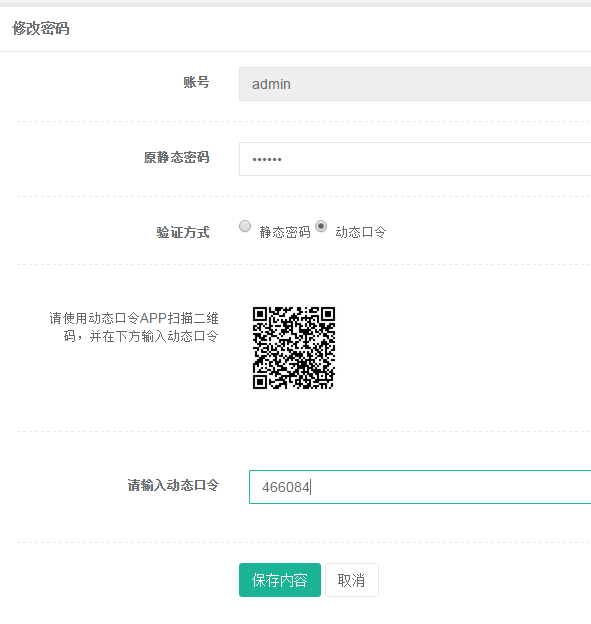
下载google authtication,使用静态密码登录系统,进入修改密码页面。
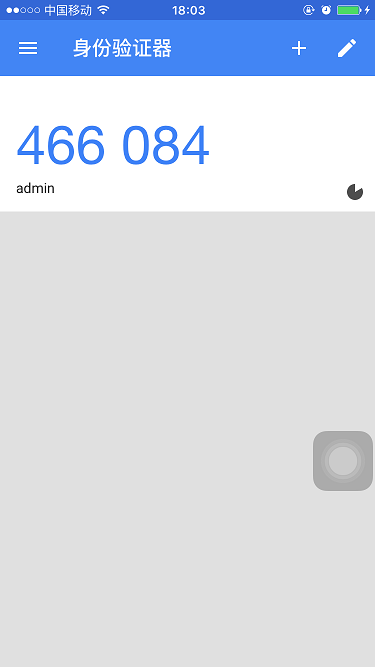
打开google authtication,扫描二维码,会显示动态口令。


保存内容,开通动态口令成功!
然后你就可以用高大上的动态口令登录系统了!
以上就是本文的全部内容,希望对大家的学习有所帮助,也希望大家多多支持脚本之家。