Windows下Apache与PHP的安装与配置
2020-12-13 05:52
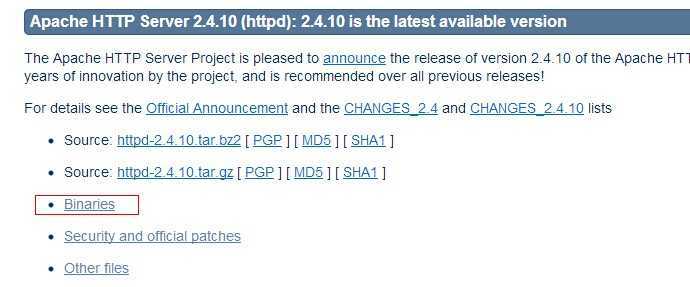
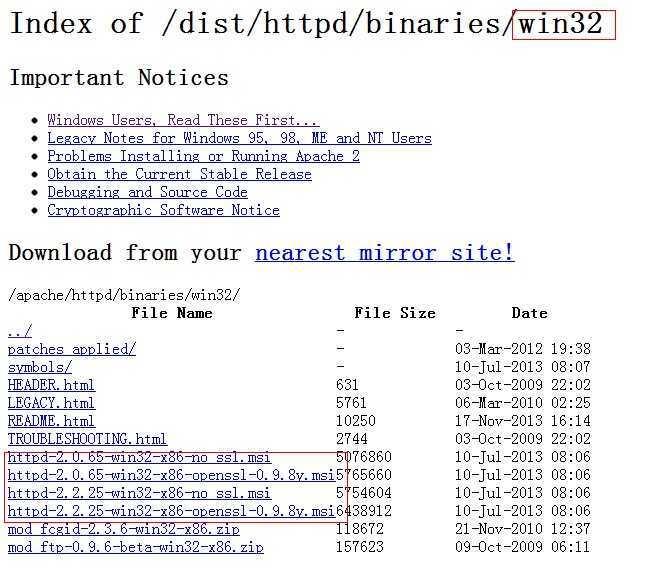
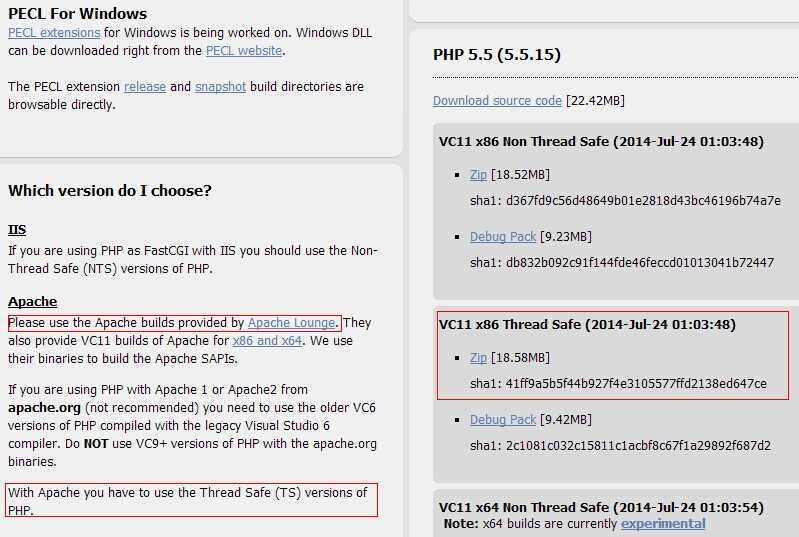
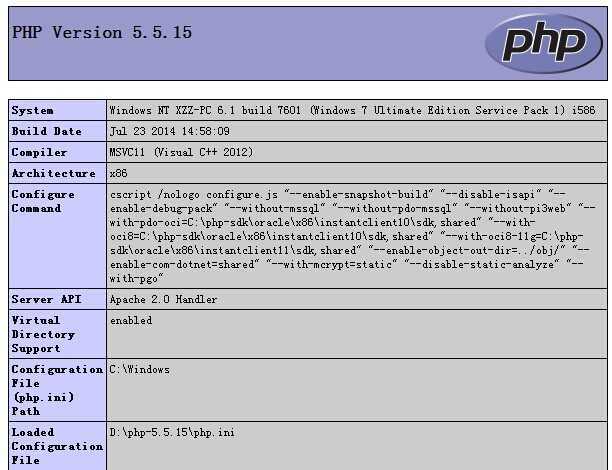
标签:blog http 使用 os strong io 文件 for Windows下Apache+PHP开发环境的搭建主要包括三种方式,第一种是直接采用集成化的安装包,如XAMPP,第二种是Apache采用官方提供的msi安装包,PHP手动安装,第三种是Apache和PHP均手动安装。显然,第一种方式是最简单的,但相应的限制也比较大,第三种方式最麻烦,但可以灵活的选择自己所需的版本进行安装。本文主要记录了第三种方式的安装过程。 本文不同于其它同类文章的一个特点是:我不希望只是单纯提供几个下载链接,而是希望告诉初学者如何从官方网站找到相关资源,这样即使情况发生了变化(比如有新版本发布或者原有链接失效),也能按图索骥找到新的资源。 XAMPP除了集成了Apache和PHP,还包括MySQL和Perl,可非常方便的实现PHP开发环境的快速安装与配置。 XAMPP的官方网站为: https://www.apachefriends.org/index.html https://www.apachefriends.org/zh_cn/index.html (中文) 安装过程略。 Apache的官方网站为:http://httpd.apache.org 打开下载页面(http://httpd.apache.org/download.cgi),找到最新版本,点击下面的Binaries。 进入win32下载页面,可以看到不同版本的msi文件,下载自己需要的版本安装即可。 从上图中我们没有找到最新版本2.4.10的msi,只能安装2.2.25版本。而如果PHP选用当前最新的PHP-5.5.15,则无法正常启动,原因是PHP与Apache的版本不匹配。所以这种安装方式一定要注意选择与Apache相匹配的PHP版本。 PHP的官方网站为:http://php.net,官网提供了windows版本的下载链接,如下图: 在PHP windows版本下载页面的左边有关于版本选择的说明文字,一定要仔细阅读。这段文字明确建议我们Apache应选择Lounge版本,同时PHP应使用线程安全(TS)版本。 进入Apache Lounge的下载页面(http://www.apachelounge.com/download),下载所需的版本: 具体安装和配置步骤如下 1. 下载windows版本的Apache和PHP,这里我选择的都是采用VC11编译的32位版本。 Apache-2.4.10:http://www.apachelounge.com/download/VC11/binaries/httpd-2.4.10-win32-VC11.zip PHP-5.5.15:http://windows.php.net/downloads/releases/php-5.5.15-Win32-VC11-x86.zip 2. 将Apache压缩包解压,阅读ReadMe.txt,里面告诉了我们应该如何做。 把解压后的Apache24拷贝到要安装的目标位置。建议拷贝到C盘根目录下,因为这是其默认设置。 我选择的是拷贝到D盘根目录,这样就需要对Apache配置文件d:\Apache24\conf\httpd.conf进行修改,打开该文件,将c:/Apache24全部替换成d:/Apache24 3. 运行cmd,进入Apache24下的bin目录,为了检查httpd.conf有无问题,我们输入httpd.exe -t,如果正常的话只会显示一行Syntax OK,如果有错的话则会告诉我们是哪儿错了。 我这里得到的错误信息是说ServerName有问题。在httpd.conf中找到ServerName,原来是该设置默认是注释掉的,去掉前面的#号,保存文件。重新执行httpd.exe -t,测试通过。 提示:httpd.exe的更多命令可通过httpd.exe -h查看。 4. 在控制台中运行httpd.exe -k install将Apache安装成windows服务,这样Apache以后将自动运行。 5. 运行httpd.exe -k start启动服务,如果没有错误提示,在浏览器中输入http://127.0.0.1或者http://localhost将显示如下页面: 至此,Apache安装成功。如果希望使用ApacheMonitor,可以为Apache24\bin\ApacheMonitor.exe建立快捷方式,或者添加到windows启动程序组中。 6. 将PHP解压后拷贝到安装位置,我这里选择的是d:/php-5.5.15。然后将php.ini-development复制并重命名为php.ini,如果是部署,则复制php.ini-production。 7. 编辑Apache的httpd.conf 查找LoadModule,在其后面增加下面配置,如果你的PHP在C盘的话,请将D:换成C:,另外注意路径使用/。 查找AddType,加入如下配置: 查找DirectoryIndex,加入index.php,如果希望index.php优先于index.html,则将其放在前面。 保存配置,在命令行中运行httpd.exe -t检查配置,如果没有问题,则运行httpd.exe -k restart重启Apache服务。 8. 在Apache24\htdocs目录下新建一个phpinfo.php文件,输入如下PHP代码: 然后在浏览器中访问http://127.0.0.1/phpinfo.php,如果显示下面的页面则表面PHP工作正常: 至此,Apache+PHP的基本开发环境搭建完毕。 Windows下Apache与PHP的安装与配置,搜素材,soscw.com Windows下Apache与PHP的安装与配置 标签:blog http 使用 os strong io 文件 for 原文地址:http://www.cnblogs.com/freefalcon/p/3888459.html方式一、采用集成化开发环境XAMPP
方式二、Apache采用官方msi


方式三、手动安装Apache和PHP


D:\Apache24\bin>httpd.exe -t
AH00558: httpd.exe: Could not reliably determine the server‘s fully qualified do main name, using fe80::29b5:91f1:1dba:81be. Set the ‘ServerName‘ directive globally to suppress this message
Syntax OK
D:\Apache24\bin>httpd.exe -k install
Installing the Apache2.4 service
The Apache2.4 service is successfully installed.
Testing httpd.conf....
Errors reported here must be corrected before the service can be started.

LoadModule php5_module D:/php-5.5.15/php5apache2_4.dll
PHPIniDir D:/php-5.5.15
AddType application/x-httpd-php .php
php
    phpinfo();
?>
