C#利用QrCode.Net生成二维码(Qr码)
2020-12-13 13:44
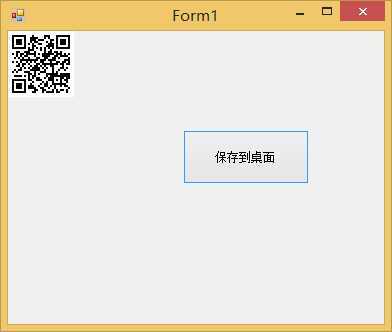
标签:des winform style blog http io color os ar 在网上很多应用都是用二维码来分享网址或者其它的信息。尤其在移动领域,二维码更是有很大的应用场景。因为项目的需要,需要在网站中增加一个生成二维码分析网址的功能,在谷歌大幅度抽筋的情况下无奈使用百度。百度N多,找到一些项目,但是可用性不强。(有一个项目是用VS2005开发的,在2010中调试不开。)终于在codeplex上找到一个“神器”,这个“神器”可以很方便的生成二维码,速度那是相当的快,并且可支持中文,遵从MIT协议。 QrCode.Net是一个使用C#编写的用于生成二维码图片的类库,使用它可以非常方便的为WinForm、WebForm、WPF、Silverlight和Windows Phone 7应用程序提供二维码编码输出功能。可以将二维码文件导出为eps格式。 项目地址为:http://qrcodenet.codeplex.com QrCode.Net不再采用http://code.google.com/p/zxing/ ZXing的端口,新的版本将有更好的性能。 测试结果如下(微秒): 输入字符串长度:74个 EC performance 1000 Tests~ QrCode.Net: 3929 ZXing: 5221 同时,QrCode.Net可以对字符串进行分析,决定是否使用UTF-8编码。(比如使用中文的时候。) 1.Graphics 显示结果: 2.生成到图片 显示结果: C#利用QrCode.Net生成二维码(Qr码) 标签:des winform style blog http io color os ar 原文地址:http://www.cnblogs.com/tianmahygj/p/4054270.html //const string str = "Hello World!";
const string str = "http://www.weilanwu.com";
protected override void OnPaint(PaintEventArgs e)
{
base.OnPaint(e);
ShowCode(e.Graphics);
}
//在Graphics上绘制二维码
private void ShowCode(Graphics g)
{
QrEncoder qrEncoder = new QrEncoder(ErrorCorrectionLevel.H);
QrCode qrCode = qrEncoder.Encode(str);
FixedModuleSize moduleSize = new FixedModuleSize(2, QuietZoneModules.Two);
GraphicsRenderer render = new GraphicsRenderer(moduleSize, Brushes.Black, Brushes.White);
render.Draw(g, qrCode.Matrix);
}

        /*
         * FixedModuleSize---5-----165*165
         * FixedModuleSize---4-----132*132
         * FixedModuleSize---3-----99*99
         * FixedModuleSize---2-----66*66
         * FixedModuleSize---1-----33*33
         */
        //直接把二维码 保存到文件
        private void SaveCodeFile()
        {
            QrEncoder qrEncoder = new QrEncoder(ErrorCorrectionLevel.H);
            QrCode code = new QrCode();
            qrEncoder.TryEncode(str, out code);
            const int modelSizeInPixels = 4;

            GraphicsRenderer render = new GraphicsRenderer(new FixedModuleSize(modelSizeInPixels, QuietZoneModules.Two)
                , Brushes.Black, Brushes.White);

            string filename = LocalPathHelper.DesktopPath + "/one.png";
            using (FileStream stream = new FileStream(filename, FileMode.Create))
            {
                render.WriteToStream(code.Matrix, ImageFormat.Png, stream);
            }
        }
