C#软件开发实例.私人订制自己的屏幕截图工具(七)加入放大镜的功能
2020-12-13 14:41
阅读:335
上一篇:C#软件开发实例.私人订制自己的屏幕截图工具(六)加入配置管理功能
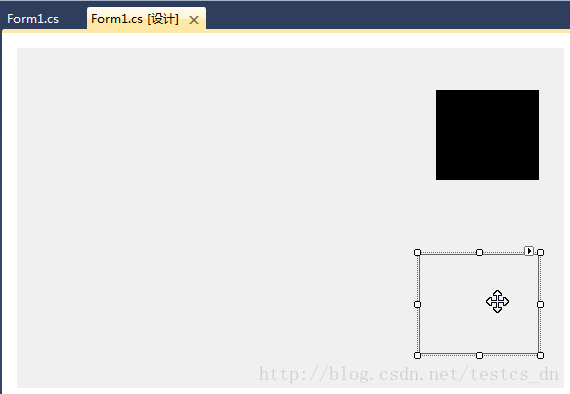
因为截图时可能须要精确截取某一部分,所以须要放大镜的功能,这样截取的时候才更easy定位截图的位置。
加入PictureBox,name属性设置为“pictureBox_zoom”;
在“Form1_Load”事件处理函数中加入下面代码:
//设置放大镜的大小
            this.pictureBox_zoom.Width = this.ZoomBoxWidth;
            this.pictureBox_zoom.Height = this.ZoomBoxHeight;
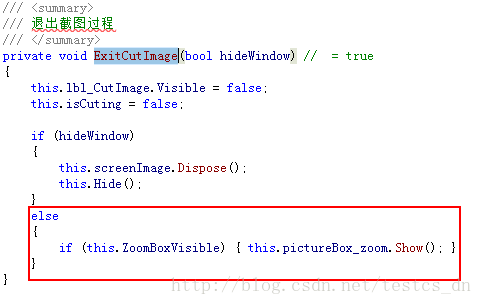
在“ExitCutImage”方法中加入代码:
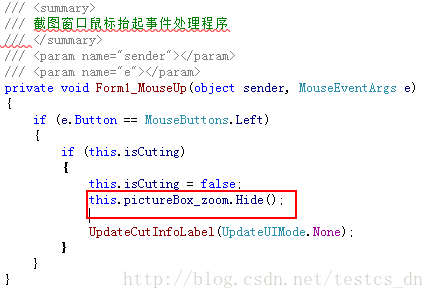
在“Form1_MouseUp”事件处理函数中加入代码:
在“ShowForm”方法的else条件最后加入代码:
if (this.ZoomBoxVisible)
                {
                    UpdateCutInfoLabel(UpdateUIMode.ShowZoomBox);
                    this.pictureBox_zoom.Show();
                }
在“UpdateCutInfoLabel”函数最后加入下面代码:
if (this.pictureBox_zoom.Visible || (updateUIMode & UpdateUIMode.ShowZoomBox) != UpdateUIMode.None)
            {
                Point zoomLocation = new Point(MousePosition.X + 15, MousePosition.Y + 22);
                if (zoomLocation.Y + this.pictureBox_zoom.Height > this.Height)
                {
                    if (zoomLocation.X + this.pictureBox_zoom.Width > this.Width)
                    {
                        zoomLocation = new Point(MousePosition.X - this.pictureBox_zoom.Width - 10, MousePosition.Y - this.pictureBox_zoom.Height - 10);
                    }
                    else
                    {
                        zoomLocation = new Point(MousePosition.X + 15, MousePosition.Y - this.pictureBox_zoom.Height - 15);
                    }
                }
                else
                {
                    if (zoomLocation.X + this.pictureBox_zoom.Width > this.Width)
                    {
                        zoomLocation = new Point(MousePosition.X - this.pictureBox_zoom.Width - 15, MousePosition.Y);
                    }
                }
                this.pictureBox_zoom.Location = zoomLocation;
                if (!this.pictureBox_zoom.Visible)
                {
                    this.pictureBox_zoom.Show();
                }
            }
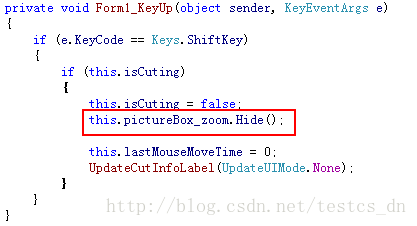
在“Form1_KeyUp”事件处理函数中加入下面代码:
为“pictureBox_zoom”加入“Paint”事件处理程序,代码例如以下:
////// 放大镜组件重绘事件处理程序 /// 实时显示鼠标指针位置放大后的图像 /// /// /// private void pictureBox_zoom_Paint(object sender, PaintEventArgs e) { Bitmap bmp_lbl = new Bitmap(e.ClipRectangle.Width, e.ClipRectangle.Height); int srcWidth = (int)(this.ZoomBoxWidth / 10); int srcHeight = (int)(this.ZoomBoxHeight / 10); Bitmap bmp = new Bitmap(srcWidth, srcHeight); Rectangle srcRect = new Rectangle(MousePosition.X - 5, MousePosition.Y - 4, srcWidth, srcHeight); if (!isCuting) { srcRect = new Rectangle(MousePosition.X - 6, MousePosition.Y - 5, srcWidth, srcHeight); } Graphics g = Graphics.FromImage(bmp); g.DrawImage(screenImage, 0, 0, srcRect, GraphicsUnit.Pixel); g.Dispose(); //Zoom int x, y; for (int row = 0; row编译,执行,截图看看效果吧!
下一篇:C#软件开发实例.私人订制自己的屏幕截图工具(八)加入键盘操作截图的功能
文章来自:搜素材网的编程语言模块,转载请注明文章出处。
文章标题:C#软件开发实例.私人订制自己的屏幕截图工具(七)加入放大镜的功能
文章链接:http://soscw.com/essay/34377.html
文章标题:C#软件开发实例.私人订制自己的屏幕截图工具(七)加入放大镜的功能
文章链接:http://soscw.com/essay/34377.html
评论
亲,登录后才可以留言!