Spring Boot 01
2020-12-13 16:49
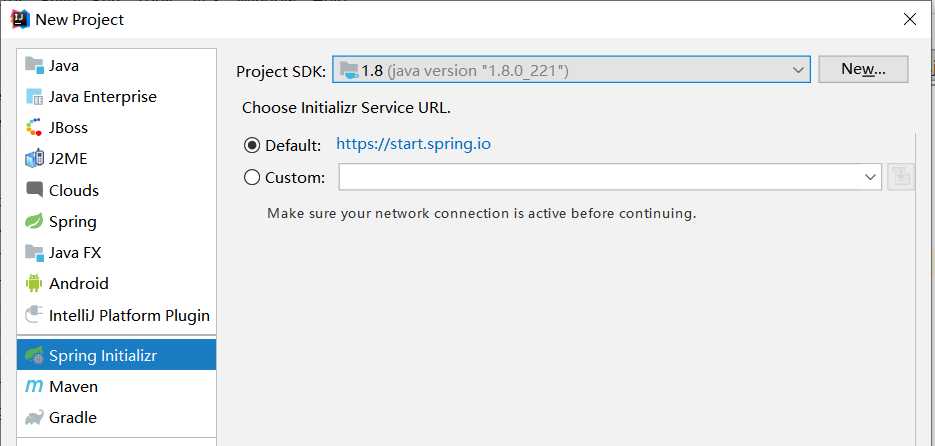
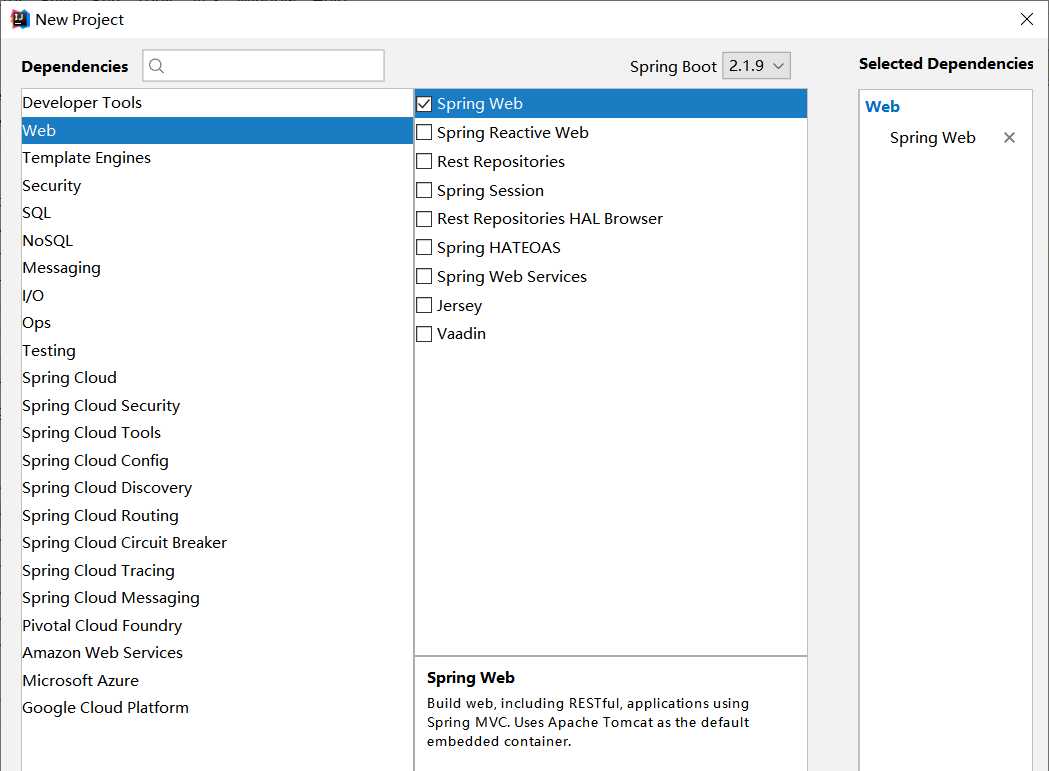
标签:str for 编写 tap localhost 技术 安装tomcat 启动器 官网文档 Spring Boot Hello World: 1 不用模板创建一个maven项目 2 springboot相关依赖: 在spring boot 官网文档 https://docs.spring.io/spring-boot/docs/2.1.9.RELEASE/reference/html/ 找到:https://docs.spring.io/spring-boot/docs/2.1.9.RELEASE/reference/html/getting-started-installing-spring-boot.html#getting-started-maven-installation 里边有maven相关依赖的内容 注: 3 编写一个主程序类: 4 编写Controller 这部分和SpringMVC一样: 5 测试:直接运行主程序: 输入 http://localhost:8080/hello Spring Boot 应用简化了部署,不用直接打War包,可以添加Maven的插件,直接生产一个可执行的jar文件,所以在 服务器可以安装tomcat服务器。 Spring Boot Hello World 2.0:自动快速创建一个Spring Boot项目 1 选择spring Initializr,点击next 2 填写信息后,下一步选择需要的模块, 我只选择了web模块 3 next next Spring Boot 01 标签:str for 编写 tap localhost 技术 安装tomcat 启动器 官网文档 原文地址:https://www.cnblogs.com/Lemonades/p/11619492.html
第一个依赖spring-boot-starter-parent 他有一个父依赖spring-boot-dependencies ,他会真正管理依赖的版本,所以受到他管理的依赖是不用写版本号的,不受到他的管理自然要写版本号。
第二个依赖:spring-boot-starter-web :spring场景启动器。帮我们导入web模块正常运行需要的组件。

spring boot将所以的功能场景抽取出来,做成一个个的 starter(启动器),只需要在项目中导入这些 starter 相关场景的依赖就会导入进来,
而且自动对版本进行管理。
各种启动器介绍:https://docs.spring.io/spring-boot/docs/2.1.9.RELEASE/reference/html/using-boot-build-systems.html#using-boot-starter/**
* @SpringBootApplication :用于标注一个主程序类,说明这是一个spring boot应用
*/
@SpringBootApplication
public class MainApplication {
public static void main(String[] args) {
SpringApplication.run(MainApplication.class,args);
}
}
@Controller
public class HelloController {

    @RequestMapping("/hello")
    @ResponseBody
    public String hello(){
        return "hello ,spring boot !";
    }
}

