.NetCore使用Docker安装ElasticSearch、Kibana 记录日志
2021-07-05 03:04
标签:sem red bst 个人 tle 容器 elastic 构建 mes centos docker 注意事项: 注意事项: 1.新建一个.net core web程序(.net core3.1) 2.将以下 Serilog 包添加到项目中 3.删除 appsettings.json 中的 Logging 部分并将其替换为以下配置,如果是dev环境,则修改appsettings.Development.json文件 4.在 Program.cs 中配置登录 5.在action里记录日志,并运行程序 6.在Kibana添加ElasticSearch索引 7.搜索日志 8.管理索引 .NetCore使用Docker安装ElasticSearch、Kibana 记录日志 标签:sem red bst 个人 tle 容器 elastic 构建 mes 原文地址:https://www.cnblogs.com/wl-blog/p/14962154.html前言
部署环境
依赖环境
docker-compose
.net core 3.1使用部署
1.创建 docker-compose.yml 文件
version: ‘3.1‘
services:
  elasticsearch:
   container_name: elasticsearch
   hostname: elasticsearch
   image: docker.elastic.co/elasticsearch/elasticsearch:7.9.2
   restart: always
   ports:
    - 9200:9200
    - 9300:9300
   volumes:
    - elasticsearch-data:/usr/share/elasticsearch/data
   environment:
    - xpack.monitoring.enabled=true
    - xpack.watcher.enabled=false
    - "ES_JAVA_OPTS=-Xms512m -Xmx512m"
    - discovery.type=single-node
  kibana:
   container_name: kibana
   hostname: kibana
   image: docker.elastic.co/kibana/kibana:7.9.2
   restart: always
   ports:
    - 5601:5601
   depends_on:
    - elasticsearch
   environment:
    - ELASTICSEARCH_URL=http://localhost:9200
  apm_server:
    image: docker.elastic.co/apm/apm-server:7.9.2
    restart: always
    container_name: apm_server
    hostname: apm_server
    command: --strict.perms=false -e
    environment:
      - output.elasticsearch.hosts=["localhost:9200"]
      - output.i18n.locale="zh-CN"
    ports:
      - 8200:8200
    depends_on:
      - kibana
      - elasticsearch
volumes:
  elasticsearch-data:
2.运行 docker-compose.yml 文件
docker-compose up -d    //构建启动容器  -d 后台运行
docker-compose down     //停止up 命令所启动的容器,并移除网络
docker-compose stop     //停止容器
docker-compose start    //启动容器
docker-compose restart  //重启容器

3.启动kibana web界面,浏览器输入:http://[ip]:5601/app/home#/ [ip]为服务器ip地址或域名
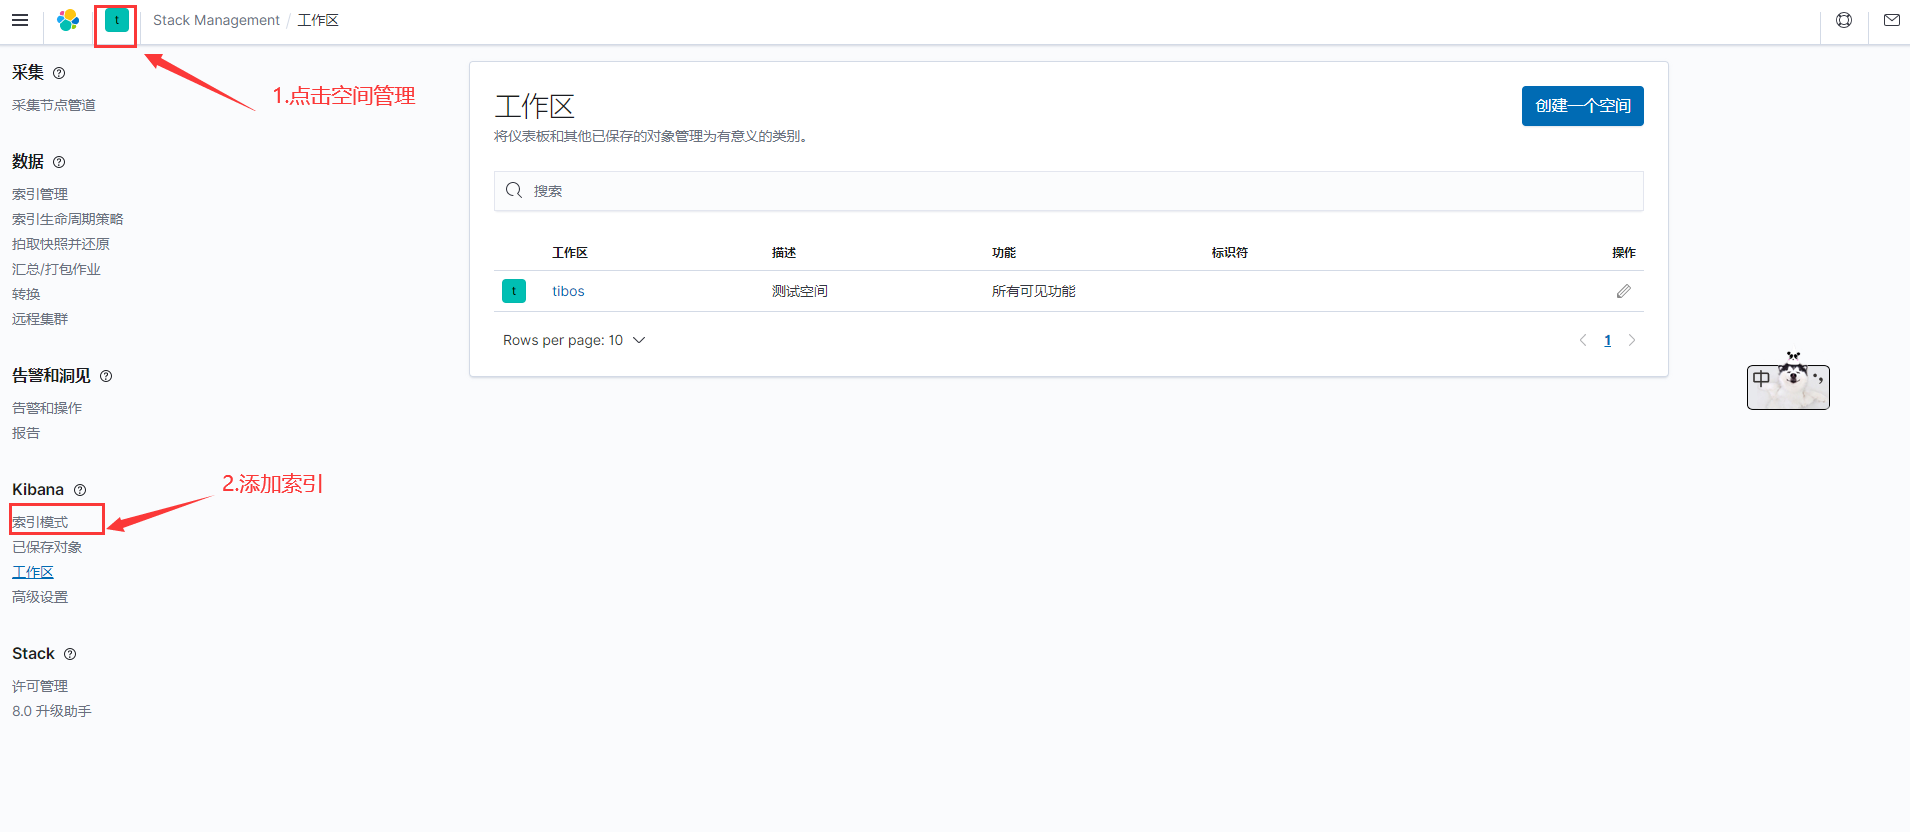
4.使用 ASP.NET Core 和 Serilog 记录到 Elasticsearch
{
  "Serilog": {
    "MinimumLevel": {
      "Default": "Information",
      "Override": {
        "Microsoft": "Information",
        "System": "Warning"
      }
    }
  },
  "ElasticConfiguration": {
    "Uri": "http://localhost:9200" //这里填写es地址
  },
  "AllowedHosts": "*"
}
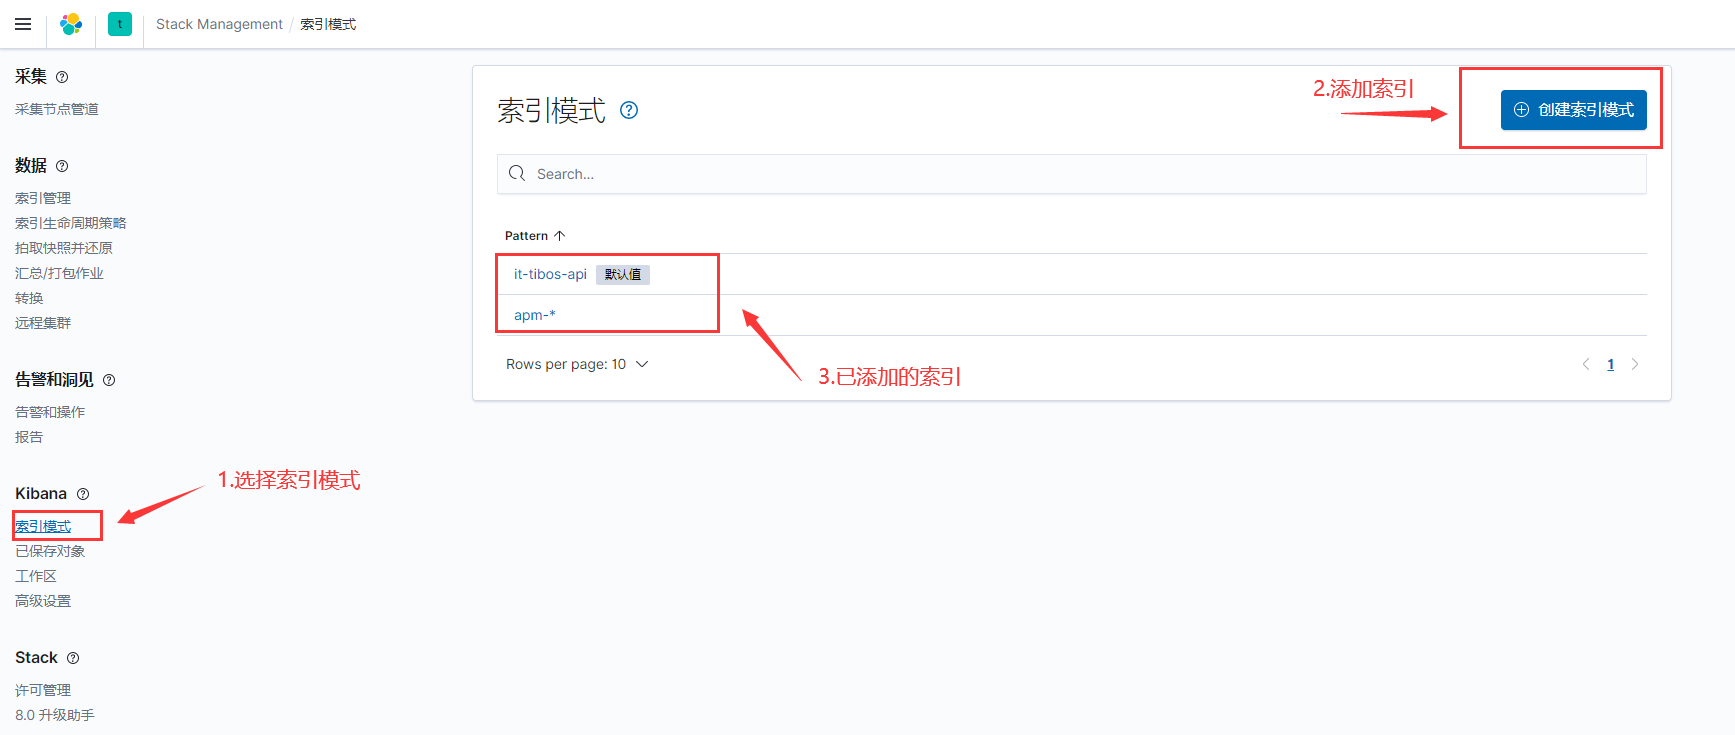
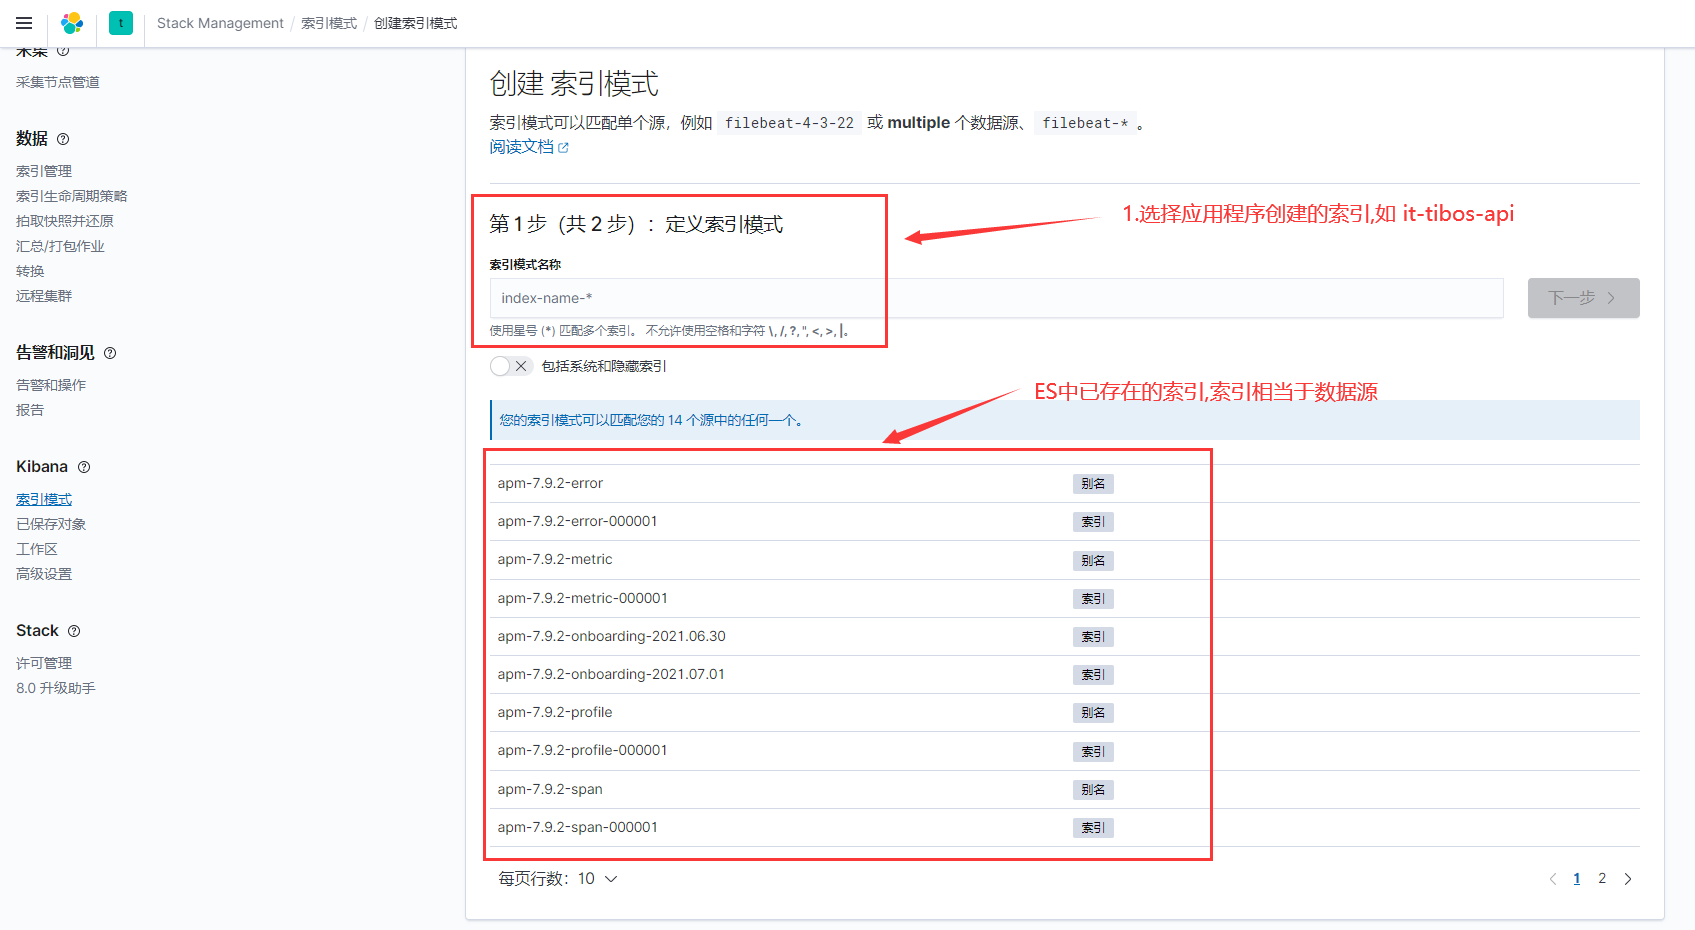
注意在es中创建的索引,这里的索引是it-tibos-api,可以根据业务进行修改 public class Program
{
public static void Main(string[] args)
{
//configure logging first
ConfigureLogging();
//then create the host, so that if the host fails we can log errors
CreateHost(args);
}
private static void ConfigureLogging()
{
var environment = Environment.GetEnvironmentVariable("ASPNETCORE_ENVIRONMENT");
var configuration = new ConfigurationBuilder()
.AddJsonFile("appsettings.json", optional: false, reloadOnChange: true)
.AddJsonFile(
$"appsettings.{Environment.GetEnvironmentVariable("ASPNETCORE_ENVIRONMENT")}.json",
optional: true)
.Build();
Log.Logger = new LoggerConfiguration()
.Enrich.FromLogContext()
.Enrich.WithExceptionDetails()
.Enrich.WithMachineName()
//.WriteTo.Debug()
.WriteTo.Console()
.WriteTo.Elasticsearch(ConfigureElasticSink(configuration, environment))
.Enrich.WithProperty("Environment", environment)
.ReadFrom.Configuration(configuration)
.CreateLogger();
}
private static ElasticsearchSinkOptions ConfigureElasticSink(IConfigurationRoot configuration, string environment)
{
return new ElasticsearchSinkOptions(new Uri(configuration["ElasticConfiguration:Uri"]))
{
AutoRegisterTemplate = true,
IndexFormat = $"it-tibos-api" //索引
};
}
private static void CreateHost(string[] args)
{
try
{
CreateHostBuilder(args).Build().Run();
}
catch (System.Exception ex)
{
Log.Fatal($"Failed to start {Assembly.GetExecutingAssembly().GetName().Name}", ex);
throw;
}
}
public static IHostBuilder CreateHostBuilder(string[] args) =>
Host.CreateDefaultBuilder(args)
.ConfigureWebHostDefaults(webBuilder =>
{
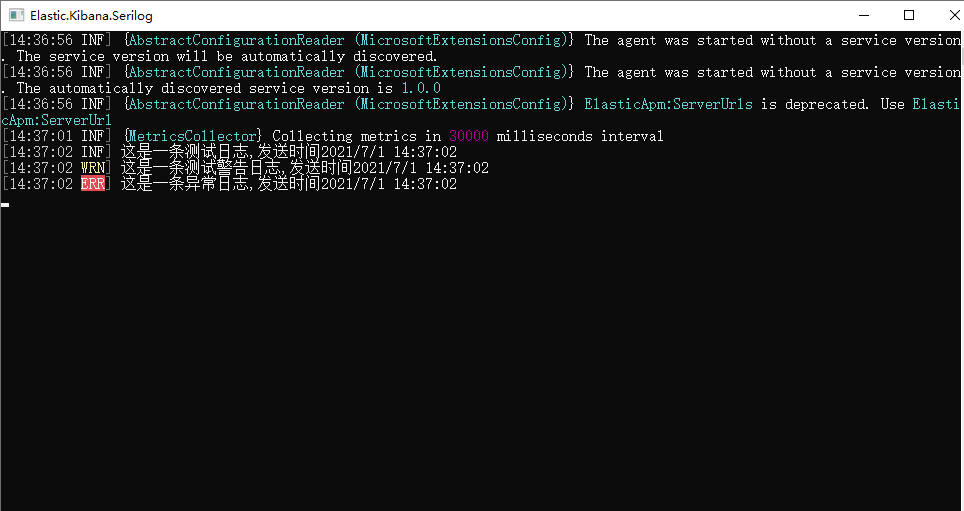
webBuilder.UseStartup _logger.LogInformation($"这是一条测试日志,发送时间{DateTime.Now}");
_logger.LogWarning($"这是一条测试警告日志,发送时间{DateTime.Now}");
try
{
throw new Exception("Some bad code was executed");
}
catch (Exception ex)
{
_logger.LogError($"这是一条异常日志,发送时间{DateTime.Now}");
}

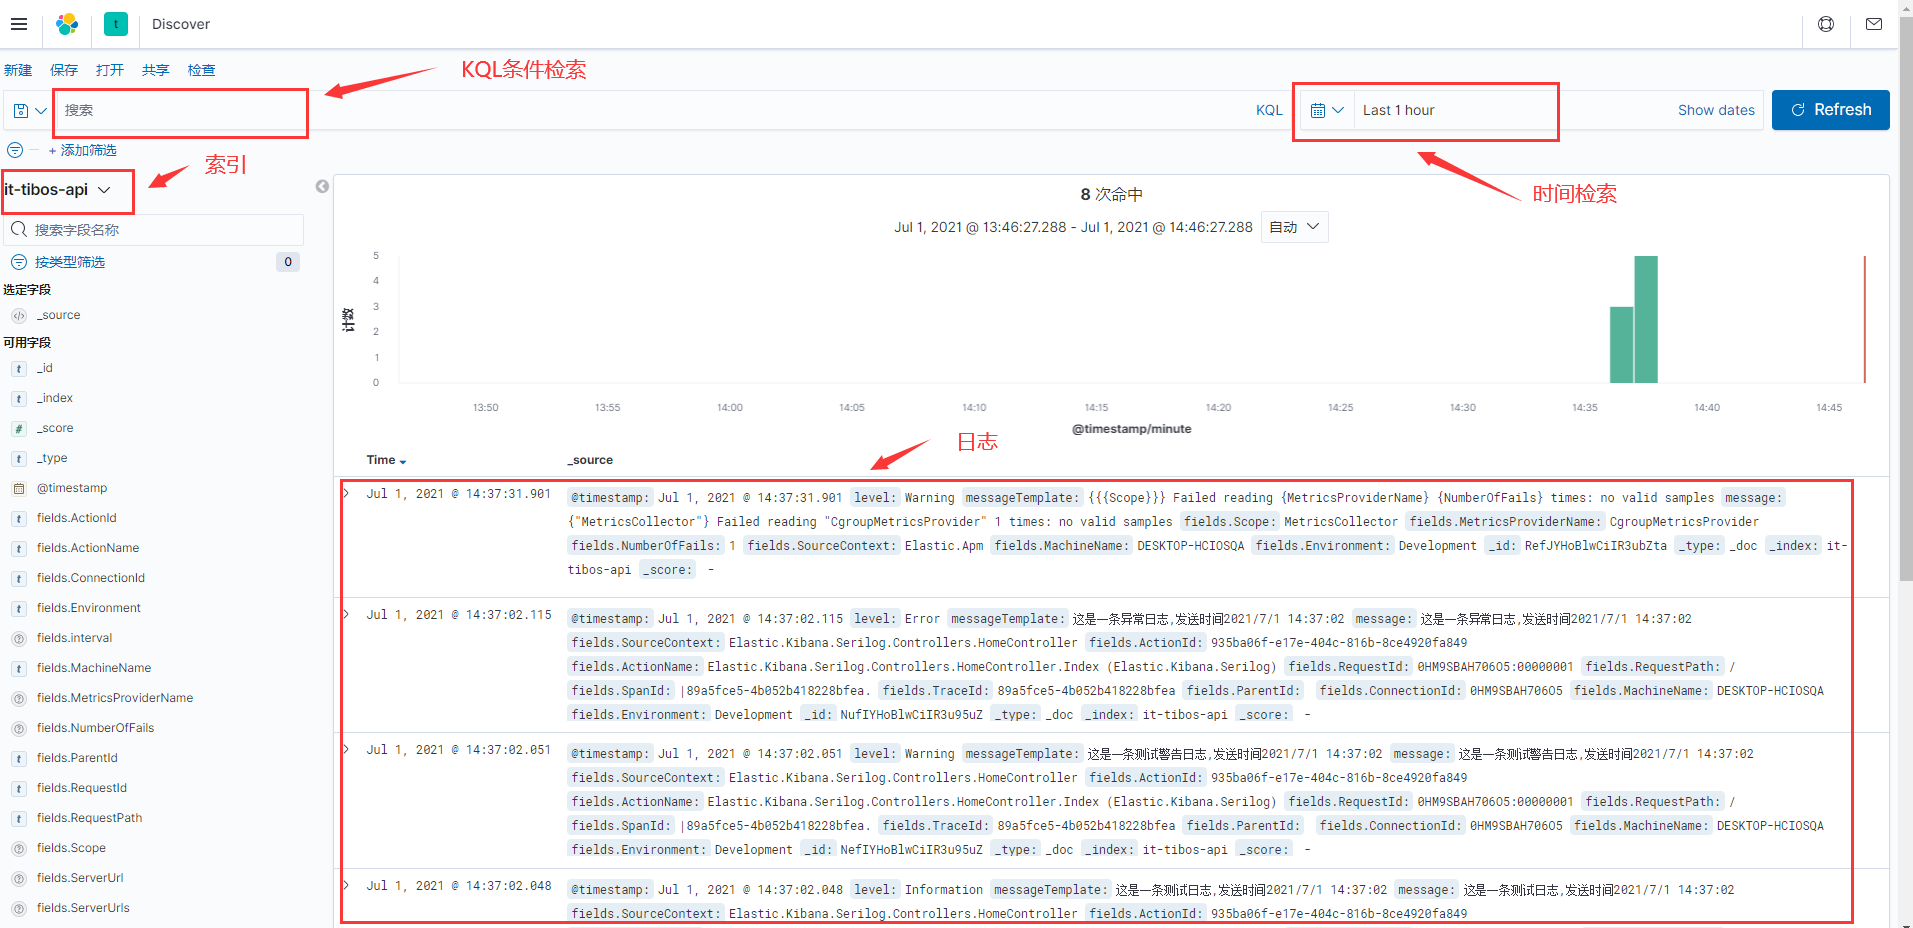
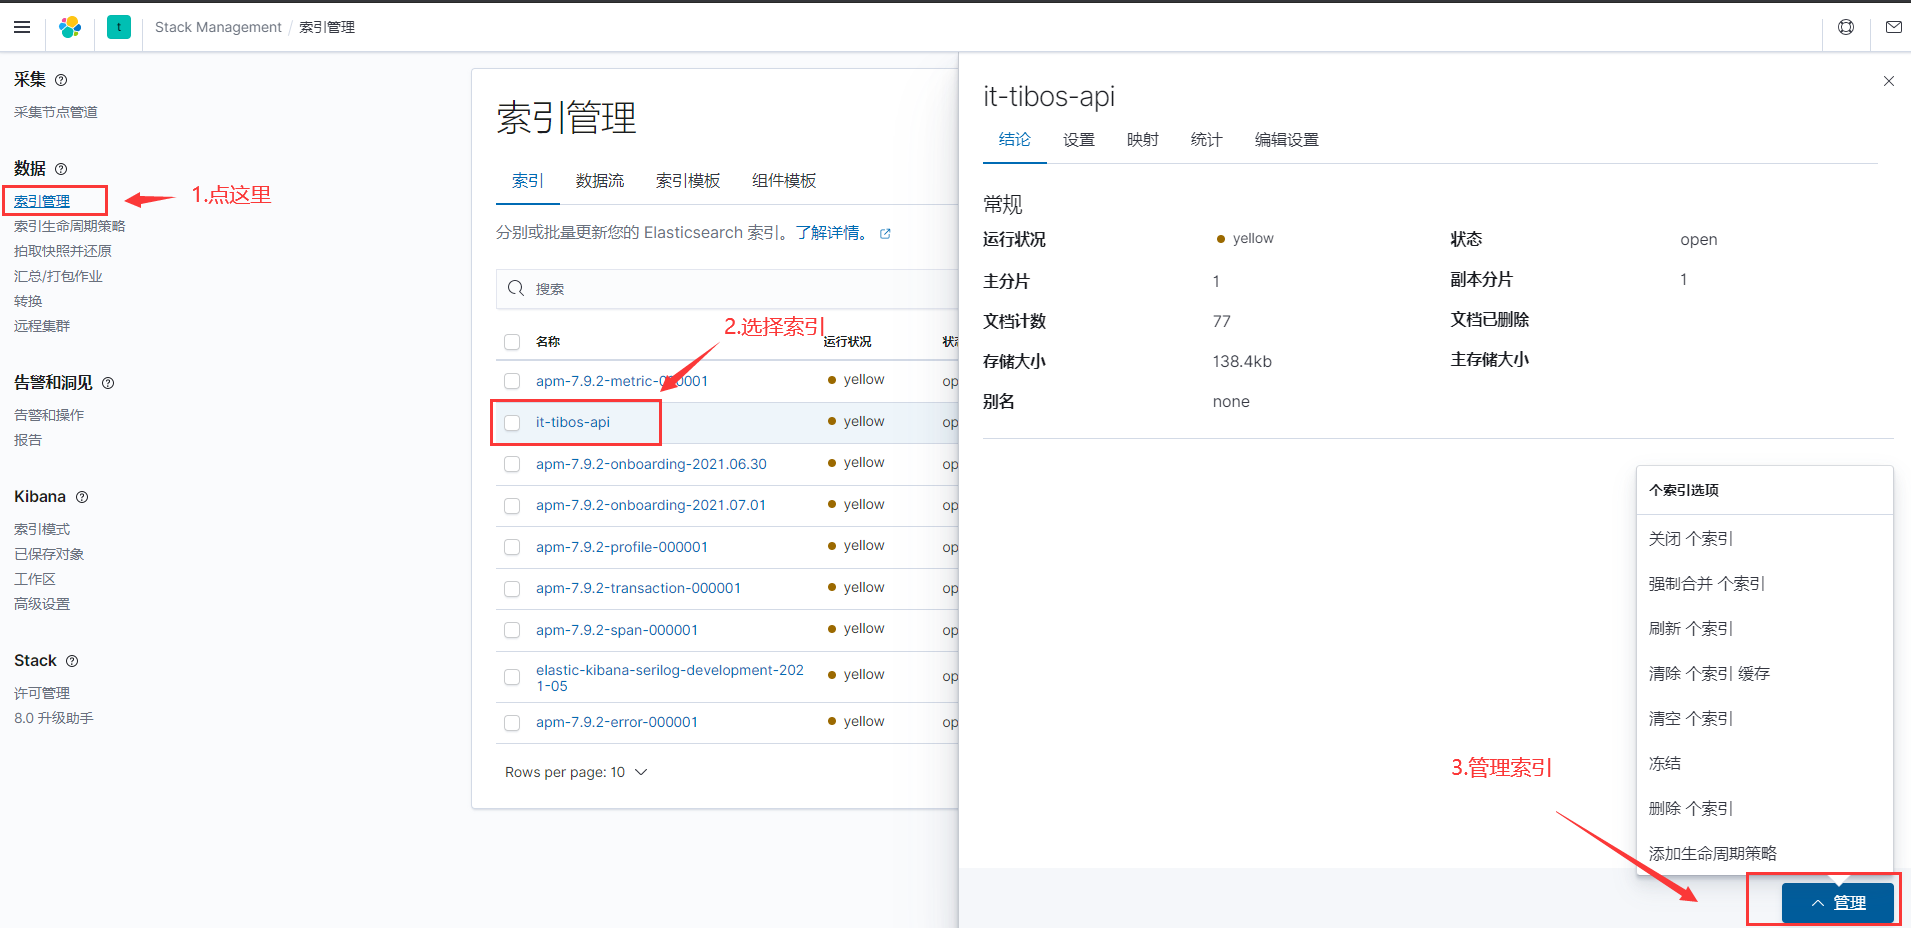
参考:
文章标题:.NetCore使用Docker安装ElasticSearch、Kibana 记录日志
文章链接:http://soscw.com/index.php/essay/101958.html